Usage
In this guide, you will explore the main features of @parse/react-native lib using a ToDO React Native app example. You will use the useParseQuery hook to query tasks in real-time and store results locally on this App. Using various Parse Queries, you will discover how to use the new Parse Lib on your project.
Parse React Native is currently on the Alpha version. The lib is under testing, so we recommend to proceed with caution. Your feedback is very appreciated, so feel free to use the lib and send us your questions and first impressions by dropping an email to community@back4app.com
Explore the main use cases for the Parse React Native lib by creating a ToDo App.
To complete this tutorial, you will need:
- An app created on Back4App.
Before getting started, you will need to get the bootstrap React Native project that we have setup as a starting point for this tutorial. It is a simple react-native init project with all dependencies and styles pre-defined for you to focus on exploring @parse/react-native features. You may download de Zip or clone the project.
Next, install the project dependencies:
For iOS, install pods:
In the previous guide, Getting started, you learned how to use initializeParse to enable connection with Back4app servers. Set up your App Id and JavaScriptKey in the entry point component located at src/index.js:
Go ahead and run the project:
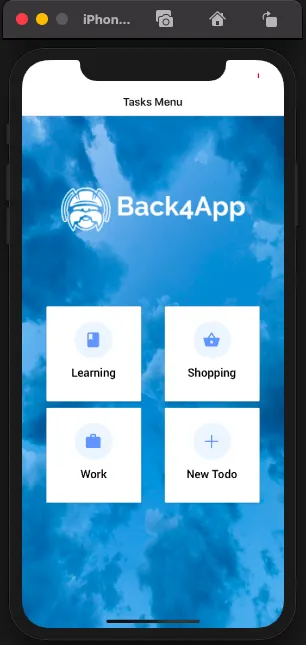
After that you will have successfully setup the starter project and the App will look like the following:

The project’s directory structure:
The initial project have main 4 pages:
- Learning Page: shows tasks that belongs to the learning category
- Shopping Page: shows tasks that belongs to the shopping category
- Work Page: shows tasks that belongs to the work category
- AddTodo Page: basic form to create a new task
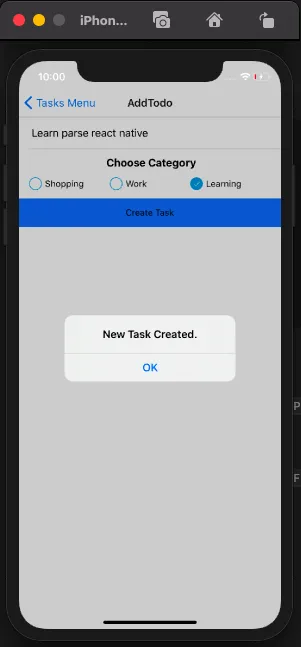
A commom feature in a ToDo app is allowing users to create new tasks. For that, the create task function will use the Parse Javascript SDK to create a new Parse Object and save it on Back4app. On the AddTodo page from the starter project, you will have a basic form with an input to insert the task description, some check boxes to select the task category and a submit button. In this tutorial, you will create Parse.Object for the tasks which will have the following attributes:
Look at the Parse Javascript SDK Save Data guide for more info on creating Parse objects.
Now implement the method to create a task when the user clicks on submit. At thepages/AddTodo/index.jscomponent, let’s implement thehandleSubmitmethod:
After that, you will now be able to create some tasks. Feel free to create as many tasks as you want. In the next steps you will be querying them.

Now that you have created some tasks, it is time to use Parse React Native Lib. You will write some queries and pass them to useParseQuery hook. The queries will list all the non-completed tasks in the learning category. This is the first use case of the hook, you will build a one-time fetch query, by setting enableLiveQuery:false, that runs when the learning page component renders. The enableLiveQuery is true by default, and changing to false will disable the real-time changes subscription.
On the pages/Learning/index.js component, let’s write our Parse.query:
Pass the query as argument to theuseParseQueryhook:
The above code shows a basic use for the Parse hook. The useParseQuery hook is a new resource that you can use with any Parse.Query. Use all Parse.Query capabitilies to retrieve your data objects and the hook will make this experience even better. After getting the results, pass them down to the TaskList component to display tasks on the App:
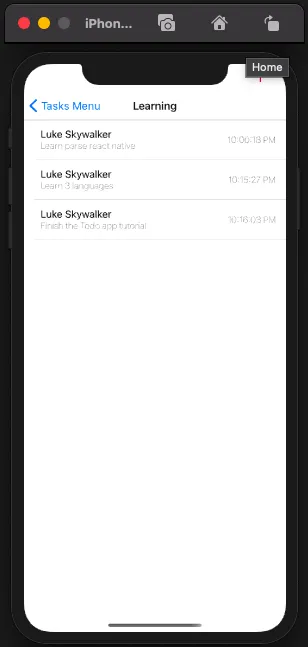
Your App should successfuly show the list of tasks like this:

The second usage you are going to explore is real-time updates. The useParseQuery hook encapsulates the Parse Live Query and provides out of the box support for real-time changes. When passing a query to the hook, it creates a WebSocket connection to communicate with the Back4app LiveQuery server, which synchronizes automatically. You will add this feature to the tasks in the shopping category.
It is important to note that Live Query and Back4App subdomain must be enabled on your Back4app Dashboard App. Once you do that, add your subdomain url to initializeParse and the results from the Parse React Native hook will always have updated data. If you do not configure the subdomain, useParseQuery hook will not be able to retrieve data in real-time.
On thepages/Shopping/index.jscomponent, let’s write ourParse.query:
Then, pass the query as argument to theuseParseQueryhook:
Note that there is no need for extra parameters since the real-time changes is enabled by default. After getting the results, pass them down to theTaskListcomponent to display tasks on the App:
The third use case for @parse/react-native is using offline caching of query results. This is useful in case your React Native App needs to work when users have network latency or Internet connectivity issues. Offline support improves your React Native Apps responsiveness and user expirience. The great news is that no extra steps are required! The offline-first approach and real-time subscriptions are enabled by default.
In short, simply using useParseQuery hook assures that your app will be caching query results for offline support combined with Live Query subscriptions for when your user goes back online.
Suppose that the task list from the work category is too much for a person to handle and you want to show only a subset of them for the day. Also, order by date of creation.
On the pages/Shopping/index.js component, let’s write our Parse.query:
Then, pass the query as argument to the useParseQuery hook and pass them down to the TaskList component to display tasks on the App:
You used @parse/react-native to retrive data from Back4app with features such Live Query in the previous steps. Therefore, an explanation of the interface exported is required. The useParseQuery hook accepts a Parse.Query and an UseParseQueryOptions object as its arguments. The default optional configuration object is the following:
- enableLiveQuery: Realtime Live Query feature is enabled by default
- enableLocalDatastore: Enables local caching of data results, default is true but you can turn off by setting to false
- initialLoad: If you already have some data loaded in memory then you can set them to show a preview of the data to users.
At this point, you’ve learned how to use the @parse/react-native lib by creating a React Native todo App on Back4App.