Basic Operations
Storing data on Parse is built around the Parse.Object class. Each Parse.Object contains key-value pairs of JSON-compatible data. This data is schemaless, which means that you don’t need to specify ahead of time what keys exist on each Parse.Object. You can simply set whatever key-value pairs you want, and our backend will store it.
You can also specify the datatypes according to your application needs and persist types such as number, boolean, string, DateTime, list, GeoPointers, and Object, encoding them to JSON before saving. Parse also supports store and query relational data by using the types Pointers and Relations.
In this guide, you will learn how to perform basic data operations through a CRUD example app, which will show you how to create, read, update and delete data from your Parse server database in React. You will first create your component functions for each CRUD operation, using them later in a complete screen layout, resulting in a to-do list app.
To complete this tutorial, you will need:
- If you want to test/use the screen layout provided by this guide, you should set up the Ant Design library.
To build a basic CRUD application in React using Parse.
The first step to manage your data in your Parse database is to have some on it. Let’s now make a createTodo function that will create a new instance of Parse.Object with the “Todo” subclass. The to-do will have a title (string) describing the task and a done(boolean) field indicating whether the task is completed.
Notice that if your database does not have a Todo table (or subclass) in it yet, Parse will create it automatically and also add any columns set inside the Parse.Object instance using the Parse.Object.set() method, which takes two arguments: the field name and the value to be set.
After creating some data in your database, your application can now be able to read it from the server and show it to your user. Go ahead and create a readTodos function, which will perform a Parse.Query, storing the result inside a state variable.
Many constraints and orderings can be applied to your queries using the Parse.Query class, but for now, we will stick to this simple query, which will retrieve every saved Todo object.
Updating a Parse.Object instance is very similar to creating a new one, except that in this case, you need to assign the previously created objectId to it and then save, after setting your new values.
Since this example app represents a to-do list, your update function takes an additional argument, the done value, which will represent if the specific task is completed or not.
To delete a data object, you need to call the .destroy() method in the Parse.Object instance representing it. Please be careful because this operation is not reversible.
Let’s now use these four functions in a complete component, so you can test it and make sure that every CRUD operation is working properly.
Here is the complete component code, including styled user interface elements (using Ant Design), state variables, and calls to your CRUD functions. You should create a separate component in a file called TodoList.js/TodoList.tsx in your src directory containing the following code or add it directly to your main application file (App.js/App.tsx).
Also, add these CSS styles at the end of your App.css file:
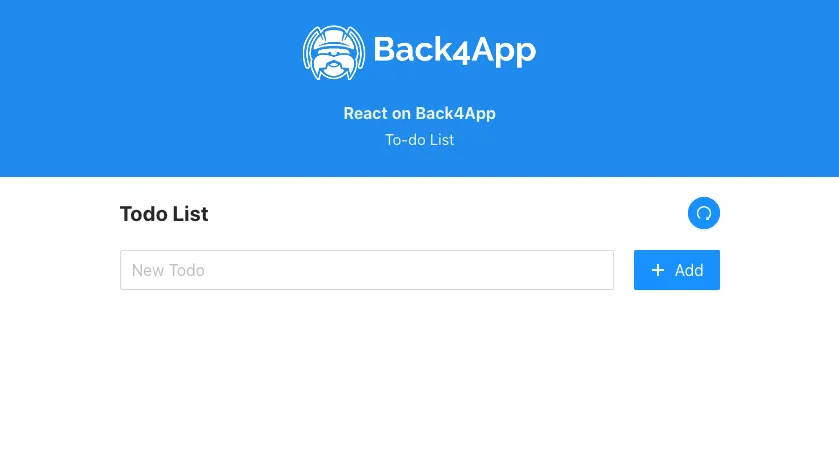
If your component is properly set up, you should see something like this after running the app:

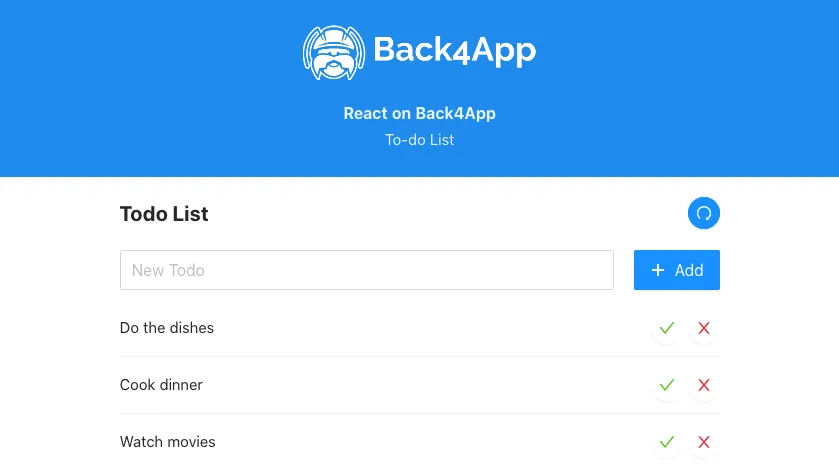
Go ahead and add some to-dos by typing its titles in the input box one at a time and pressing on the Add button. Note that after every successful creation, the createTodo function triggers the readTodos one, refreshing your task list automatically. You should now have a sizeable to-do list like this:

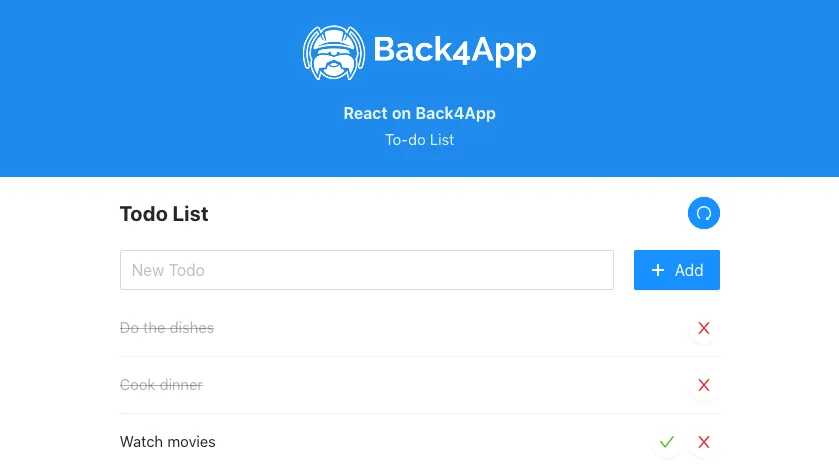
You can now mark your tasks as done by clicking in the checkmark beside it, causing their done value to be updated to true and changing its icon status on the left.

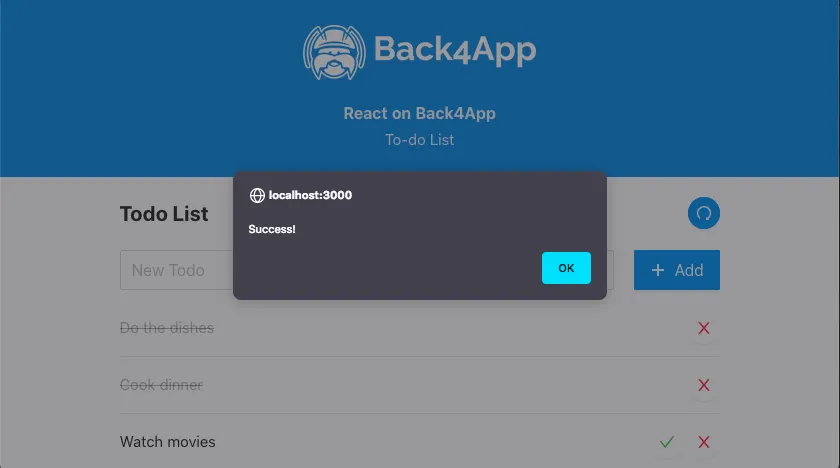
The only remaining data operation is now the delete one, which can be done by pressing on the trash can icon at the far right of your to-do list object. After successfully deleting an object, you should get an alert message like this:

At the end of this guide, you learned how to perform basic data operations (CRUD) in Parse on React. In the next guide, we will show you which data types are supported in Parse and how to use them.