How to Build a Backend for Deno?
In this tutorial, you will learn how to build a backend for Deno using Back4App.
We will walk through every step to integrate Back4App’s key features—database, rest APIs, user authentication, file storage, and live queries—into a Deno environment.
You will see how to communicate with Back4App through REST endpoints and create a complete infrastructure without managing servers on your own.
When you use Back4App, you can skip configuring servers with Deno manually, saving time and effort.
You will focus on writing simpler code, thanks to Deno’s standard library and modern approach.
By the end of this how to build a backend for deno guide, you will have a clear path to integrate advanced security, cloud code, and scheduled tasks into your Deno application.
Once you complete this tutorial, you will be able to run the server, handle REST APIs, integrate user authentication, store files, and schedule tasks easily.
You will also understand how to manage your data with Deno’s fetch approach using the Back4App REST API.
- A Back4app account and a new Back4app project Getting Started with Back4app. If you do not have an account, you can create one for free. Use the link above to get your project ready.
- Install Deno You can get Deno at https://deno.land. Install Deno on your operating system and confirm it with deno --version.
- Familiarity with basic Deno concepts Such as modules, file systems, deno run --allow-net, or how to import application modules from the standard library.
- Basic knowledge of REST APIs We will use fetch calls and headers content type for data handling, so ensure you know the fundamentals of REST and JSON.
Make sure you have these prerequisites before beginning. Having your Back4App project configured and your local Deno environment running will let you follow this tutorial smoothly.
The foundation for your Deno backend is a Back4App project. If you have not created one yet:
- Log in to your Back4App account.
- Click the “New App” button in your Back4App dashboard.
- Give your app a name (e.g., “Deno-Backend-Tutorial”).
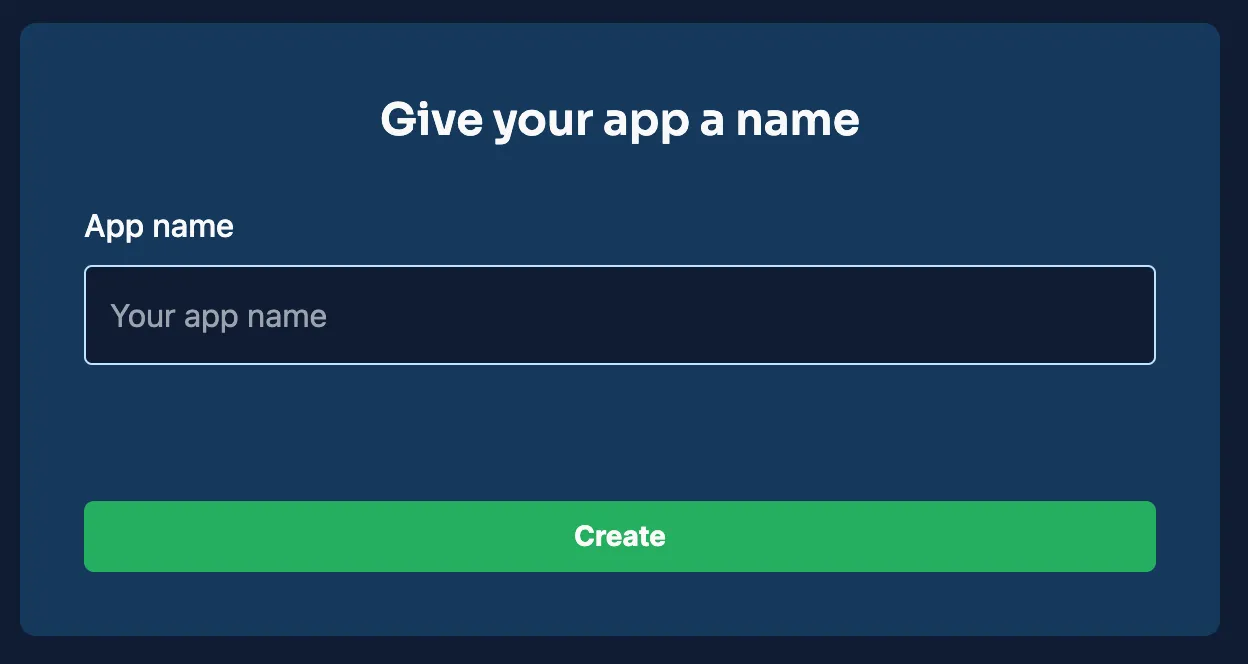
Once your project is ready, it will appear in your Back4App dashboard. This project is where you will set up databases, security, and APIs.
Since we do not have a Parse SDK for Deno, we will use Back4App’s REST API endpoints. You can find the Application ID, REST API Key, and Server URL in your app’s App Settings or Security & Keys section.
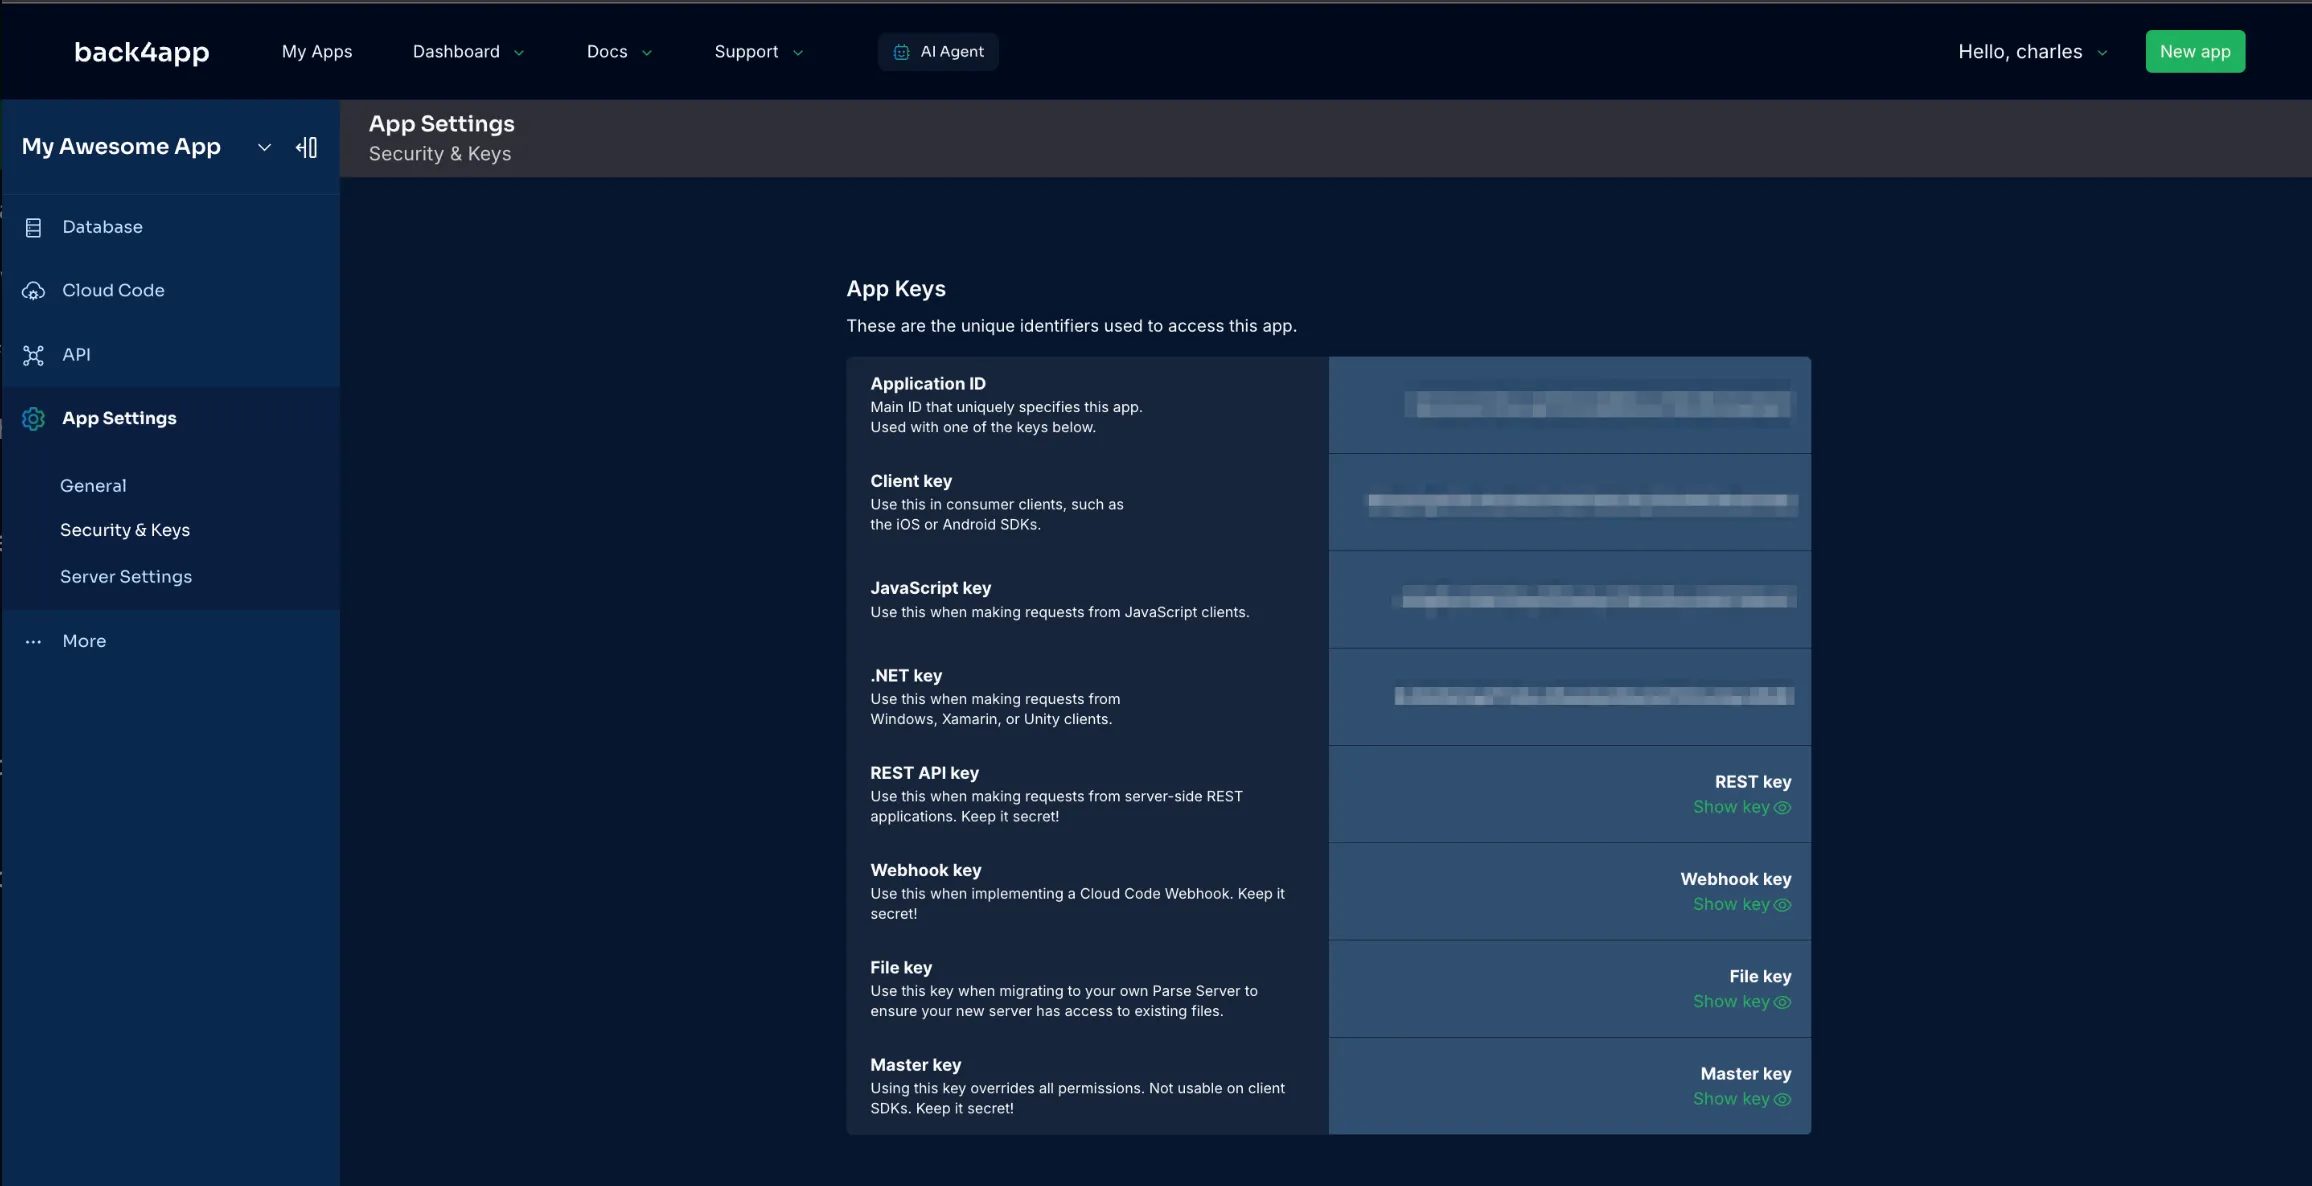
Throughout this tutorial, we will use fetch to send requests from Deno to Back4App. Be sure to include your API key and headers content type in each call.
In this step, you will create a data model on Back4App and interact with it using REST APIs from Deno.
- Go to the “Database” section in your Back4App dashboard.
- Click “Create a New Class” and name it, for example, “Todo.”
- Add relevant columns (e.g., title (String), isCompleted (Boolean)).
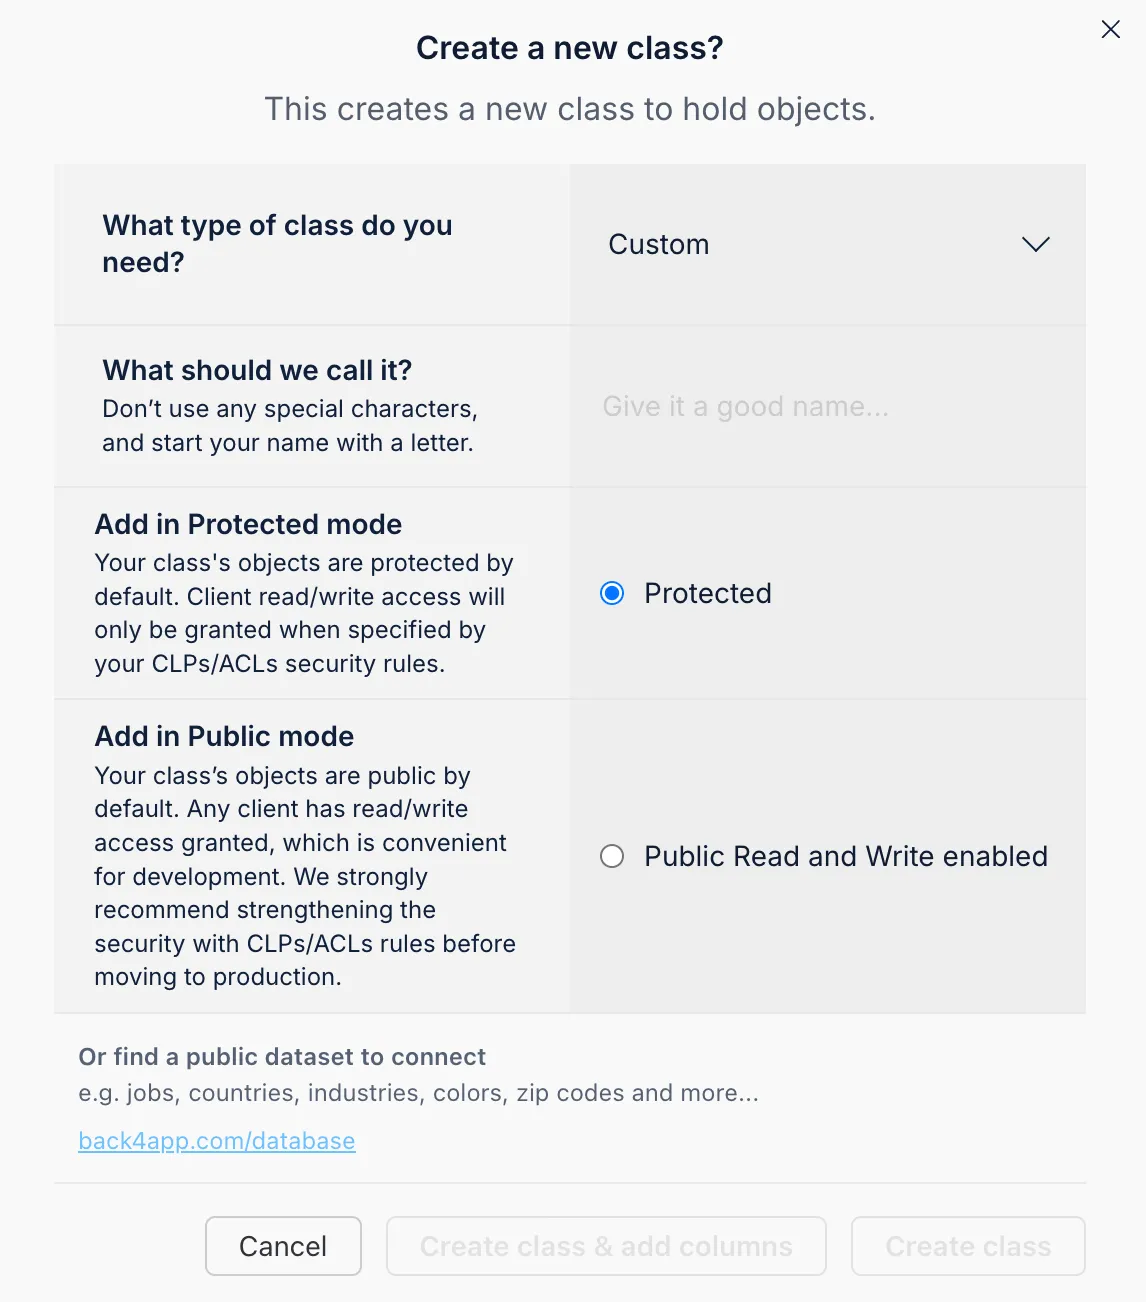
You can also allow Parse to create these columns automatically when data is saved.
Back4App’s AI Agent can design your schema for you:
- Open the AI Agent in your Back4App dashboard.
- Describe your data model (e.g., “Create a Todo class with a title, description, and isCompleted field.”).
- Allow the agent to generate the schema automatically.
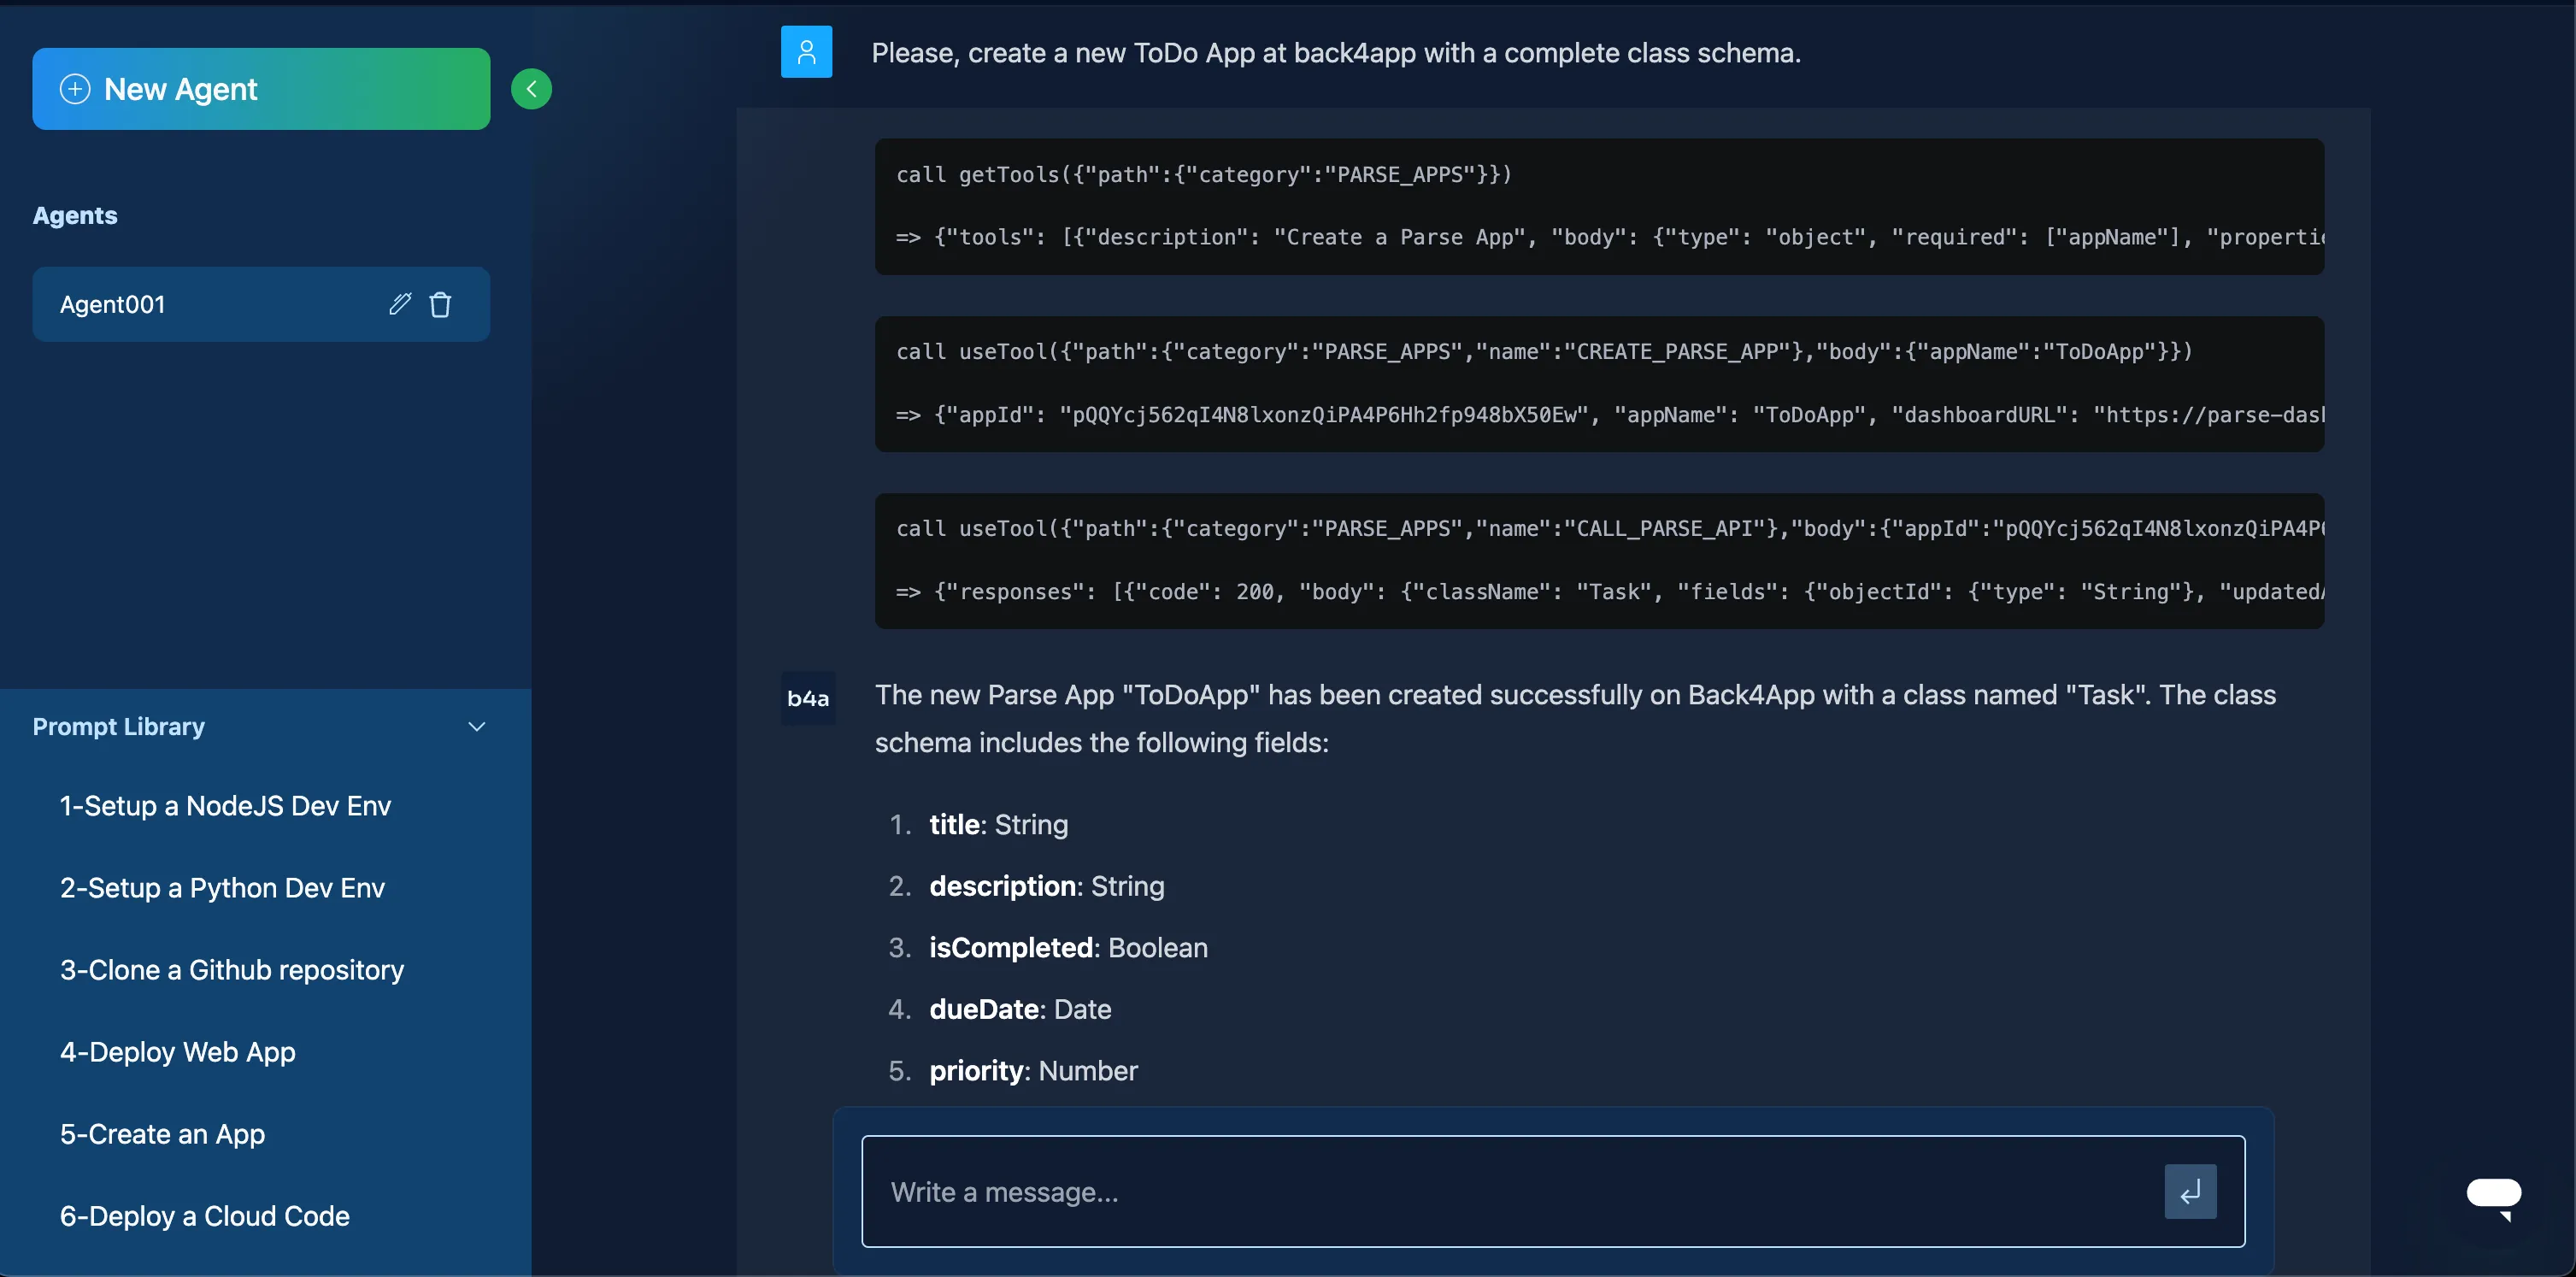
This helps you manage more complex schemas quickly.
From Deno, you can run the server by calling REST endpoints with fetch. For example, to create a Todo:
To fetch Todos:
You can run these with:
Back4App also provides a GraphQL endpoint: https://parseapi.back4app.com/graphql
Live Queries update you in real time, but Deno does not have a native Parse LiveQuery library. You can still set up the Live Query feature in your Back4App dashboard for other clients or use a WebSocket in Deno to subscribe manually. For more details, see the official Live Query docs.
Back4App’s ACLs (Access Control Lists) and CLPs (Class-Level Permissions) protect your data. Use CLPs to set default rules for an entire class. Then use ACLs for object-level restrictions.
- Open the Database section in your Back4App dashboard.
- Select a Class (for example, “Todo”).
- Go to the Class-Level Permissions tab.
- Enable or disable read/write access for the public or for authenticated users as needed.
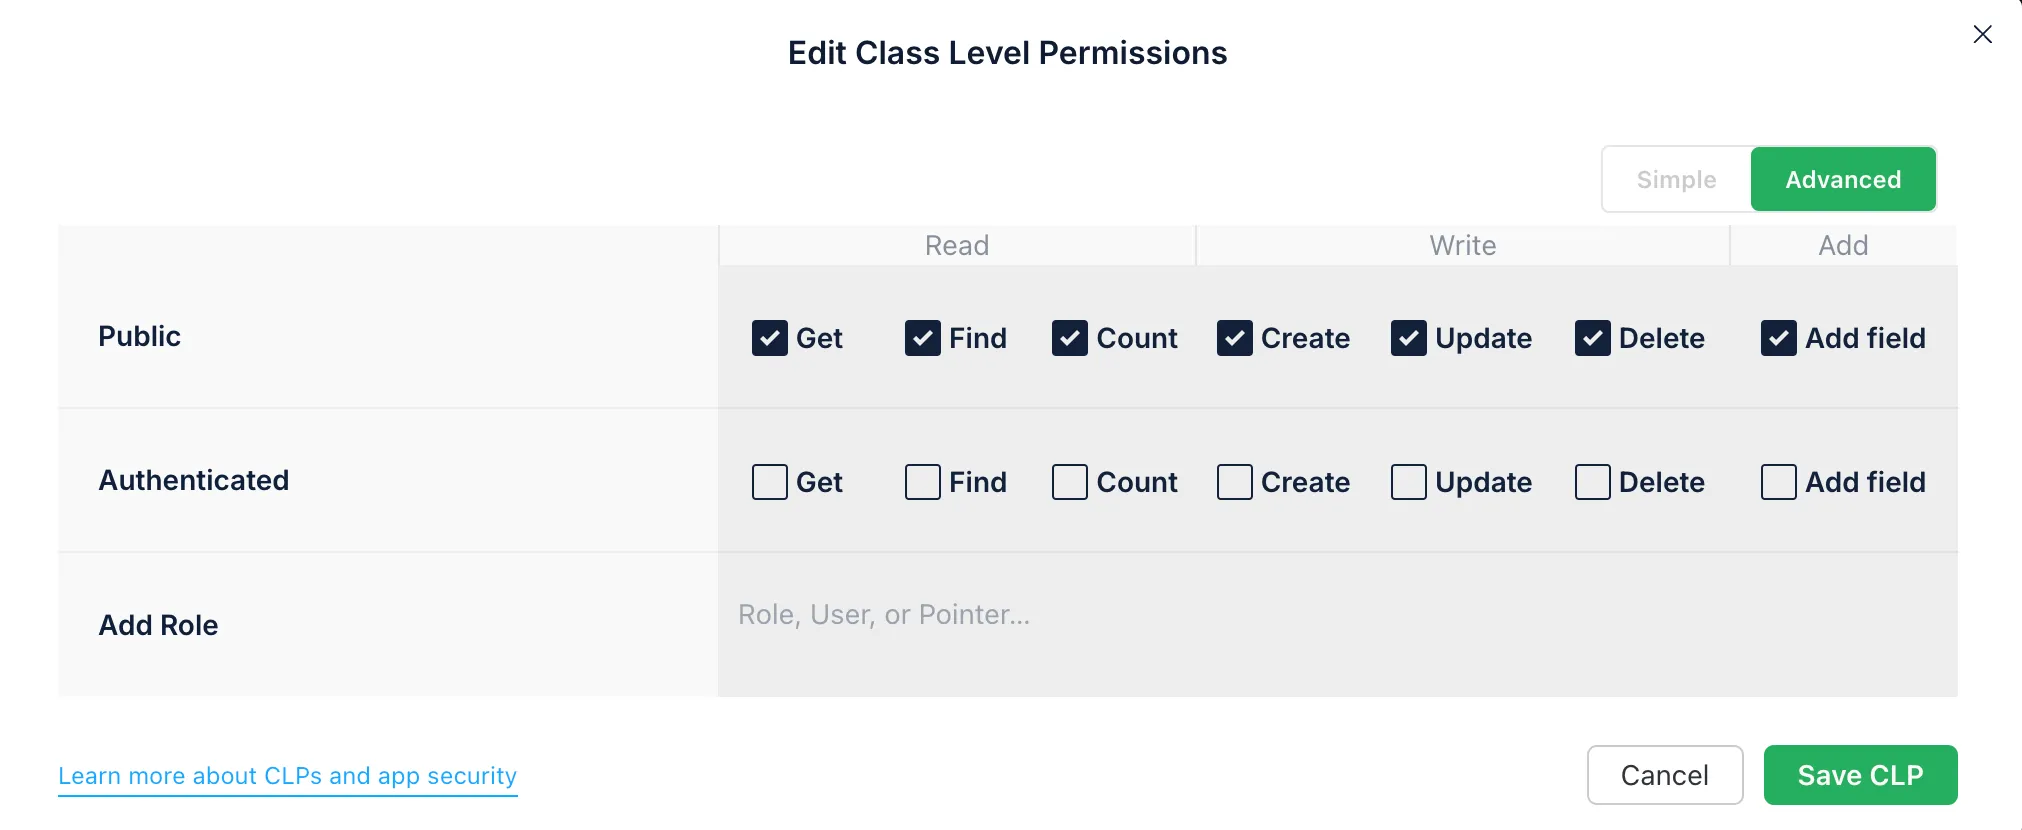
When creating or updating an object via REST, you can include an ACL attribute in the request body. For instance:
This example only allows the “Admins” role to read or write. Public access is off.
Cloud Code is where you store secure server-side logic. You do not manage servers yourself. You can add validations or triggers for specific classes.
You can define a Cloud Function (in JavaScript) and deploy it to your app. For instance, a function to check text length might be:
You can deploy code through the Back4App CLI or the Cloud Code panel in your Back4App dashboard.
You may import external libraries with require(). Once deployed, the server environment will run them. This is helpful for advanced tasks, but do remember that running them from Deno is separate from your Cloud Code environment on Back4App.
Back4App uses the Parse User class for authentication. While you are working with Deno, you can call REST endpoints to manage users.
You can set up Google, Facebook, Apple, and other providers on Back4App. Then, you will call the dedicated endpoints with OAuth tokens. See Back4App’s Social Login docs for details.
To upload files from Deno, use a POST request to https://parseapi.back4app.com/files/<FILENAME>. For example:
You can then store the resulting file URL in your class objects. This method is perfect for storing images or documents while you run the server in Deno.
Verifying emails ensures legitimate access. Password reset helps users regain access securely.
- Enable Email Verification in your Back4App dashboard under Email Settings.
- Customize your verification templates.
- Enable Password Reset and set your preferred email layout.
When a user signs up, they receive a verification link if you turned on email verification. For password reset, call the REST endpoint POST /requestPasswordReset.
Cloud Jobs run periodically without human intervention. For instance, you can delete old records daily or send routine email reminders.
After deploying this job, you can schedule it in App Settings > Server Settings > Background Jobs on your Back4App dashboard.
A Webhook is an HTTP callback triggered when events happen, such as object creation or updates. You can integrate with Slack, Stripe, or any external service.
- Open “More” > “WebHooks” in the Back4App dashboard.
- Click “Add Webhook” and provide the endpoint of your third-party service.
- Set which triggers or classes you want to send requests.
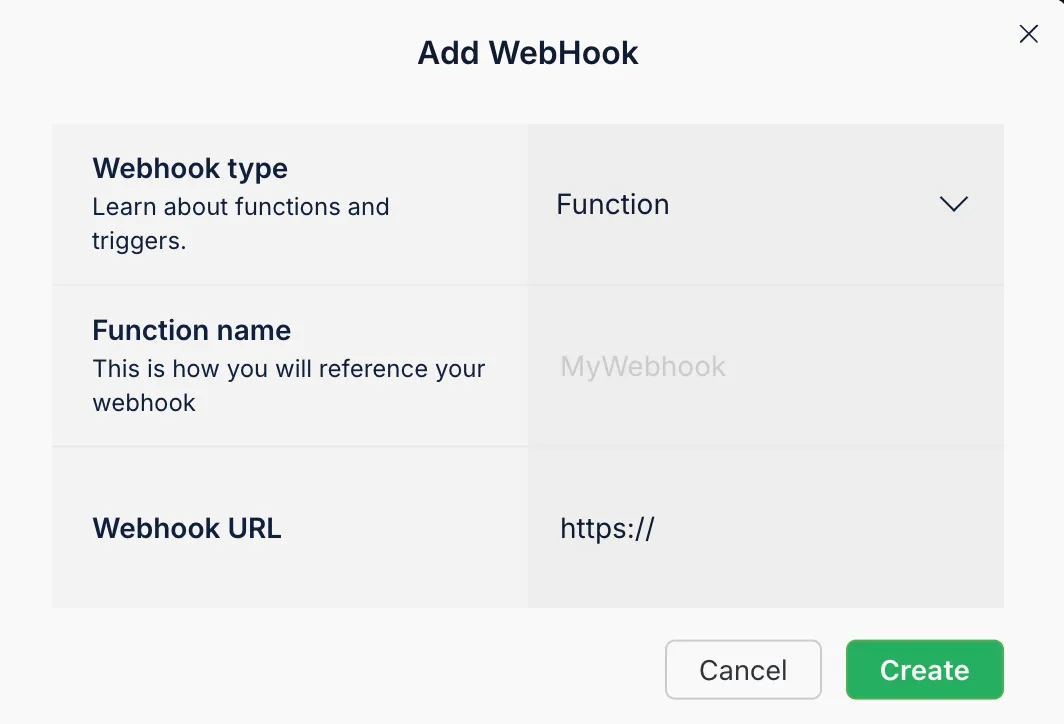
This allows external systems to receive data whenever you create or modify objects in Back4App.
Non-technical teams can use this panel to manage data visually. It simplifies CRUD operations and data reviews.
- Go to App Dashboard > More > Admin App and choose “Enable Admin App.”
- Create an Admin User to log in.
- Set a subdomain for your Admin App.
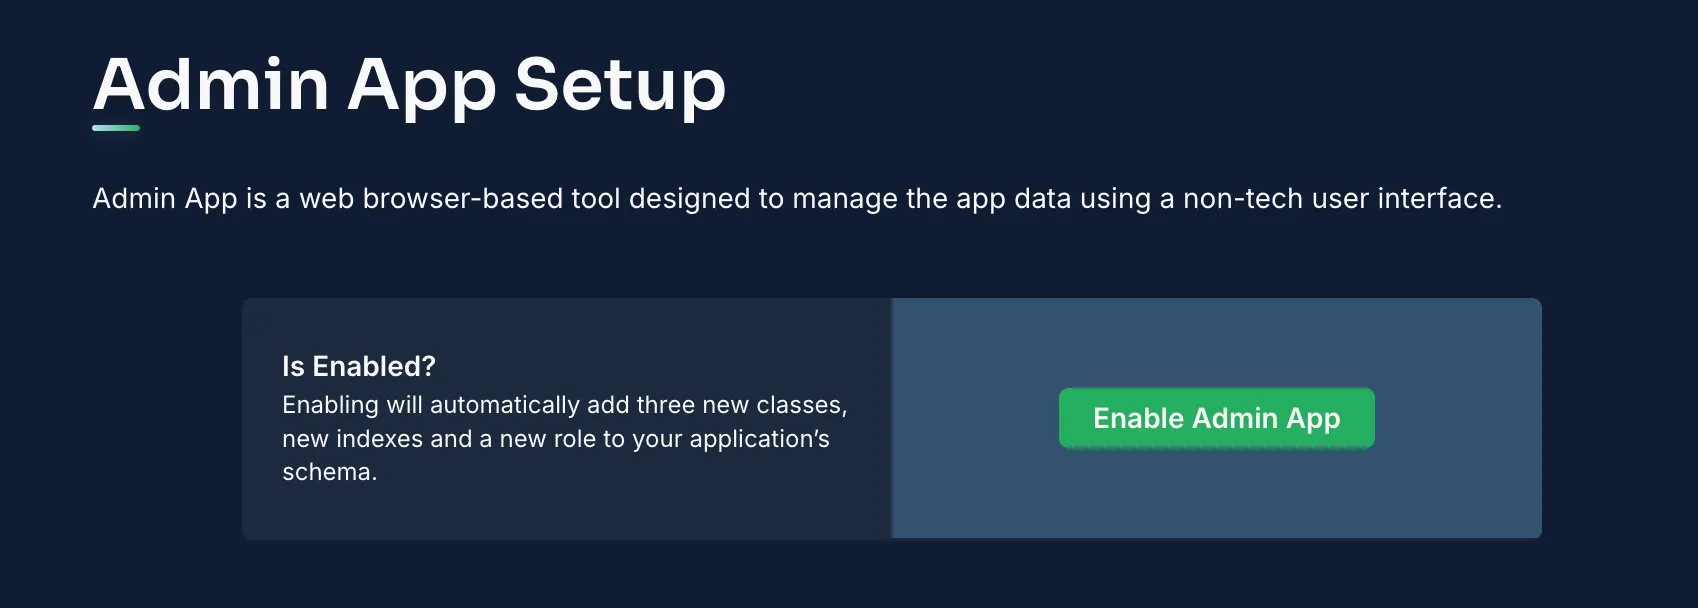
You can then log in to the Admin App to manage records securely.
In this tutorial, you discovered how to build a backend for Deno on Back4App. You created data models, handled user authentication, learned about ACLs and CLPs for security, and scheduled Cloud Jobs.
You also saw how to integrate external APIs via webhooks and how to run the server or rest apis with deno run --allow-net commands.
This setup gets you started fast without manually configuring file systems or standard library complexities for server architecture.
Next Steps:
- Expand your Deno application with additional endpoints and advanced logic using Cloud Code.
- Integrate more services (e.g., payment gateways, analytics) with your Back4App data.
- Reference Back4App’s official documentation for deeper security, performance, and logs analysis tips.
- Experiment with advanced real-time features or deno kv storage, bridging data between your Deno runtime and Back4App’s robust environment.
With your new knowledge, you can confidently deploy a secure, scalable, and feature-packed Deno backend supported by Back4App.
