How to Build a Backend for Python?
In this step by step tutorial, you’ll learn how to build a complete backend for Python applications using Back4App.
We’ll walk through integrating essential Back4App features—such as database management, Cloud Code Functions, REST and GraphQL APIs, user authentication, and real-time queries—to create a secure, scalable, and robust backend that seamlessly communicates with your Python code.
Python is a popular choice among programming languages for backend development because it offers simplicity and the ability to maintain the server side with ease.
Frameworks and libraries like Django, Flask, and more have long made Python a go-to for web development processes.
By leveraging Back4App, a Python developer can quickly set up database schema, ensure data integrity, and even incorporate machine learning tasks without having to manage complex infrastructure.
Along the way, you’ll gain hands-on experience with key functionalities, such as advanced security features, scheduling tasks with Cloud Jobs, and setting up webhooks for external integrations.
By the end of this tutorial, you’ll be well-prepared to enhance this foundational structure into a production-ready Python backend application or easily integrate with other tools like Docker and Kubernetes as your project scales.
This will jump-start your Python backend development journey by using a reliable platform and robust Python libraries.
To complete this tutorial, you will need:
- A Back4App account and a new Back4App project Getting Started with Back4App. Sign up for free if you haven’t already and create a new project.
- The Parse Python SDK Install via pip with pip install parse-rest. We’ll use this SDK for data interactions.
- Familiarity with basic Python concepts If you’re new to Python, review the Official Python Documentation. or a beginner’s tutorial.
Having these prerequisites in place will ensure you can follow along as we explore how to build a backend for Python on Back4App.
The first step in building your Python backend on Back4App is creating a new project. If you have not already created one, follow these steps:
- Log in to your Back4App account.
- Click the “New App” button in your Back4App dashboard.
- Give your app a name (e.g., “Python-Backend-Tutorial”).
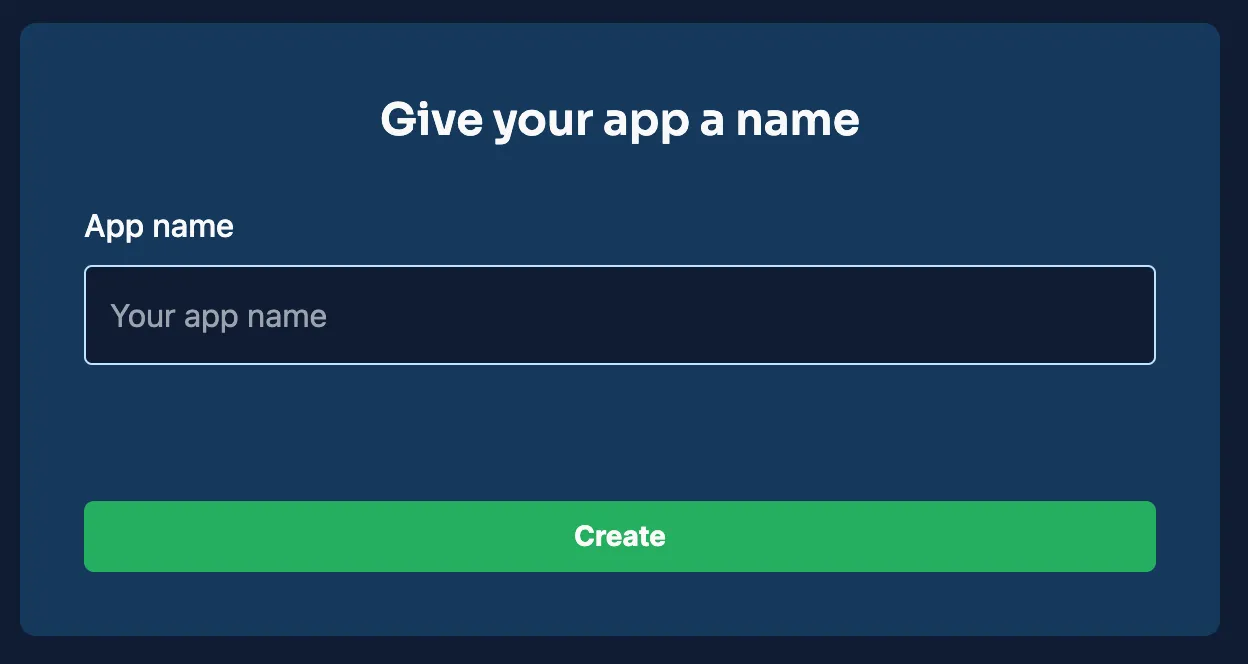
Once the project is created, you will see it listed in your Back4App dashboard. This project will be the foundation for all backend configurations discussed in this tutorial.
Back4App relies on the Parse Platform to manage your data, provide real-time features, handle user authentication, and more.
To connect your Python code to Back4App, you must install the relevant Parse SDK and initialize it with the credentials from your Back4App dashboard.
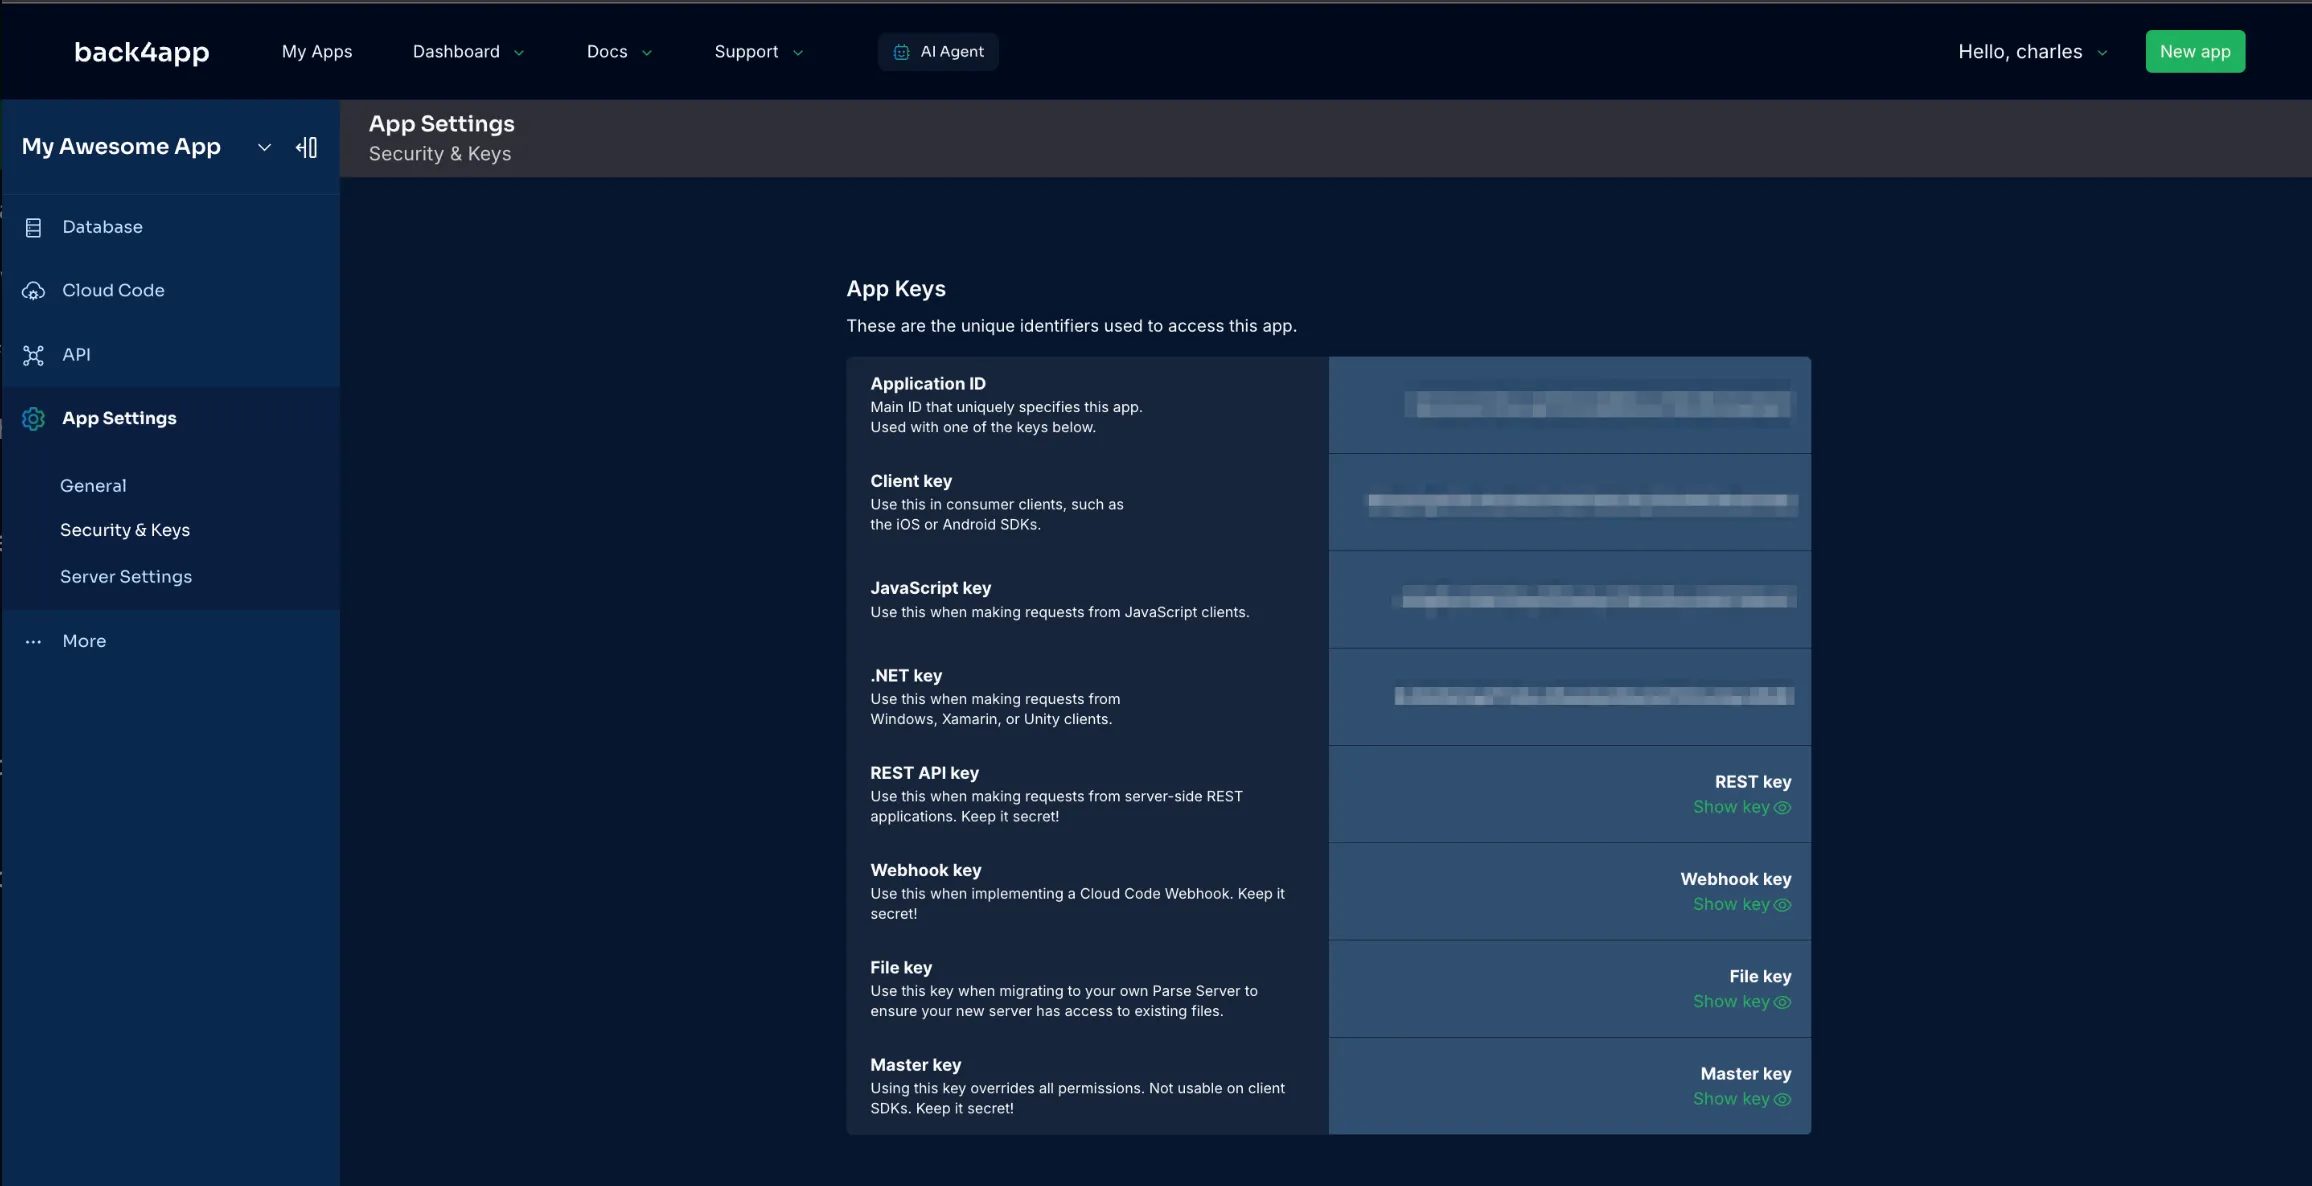
Retrieve your Parse Keys: In your Back4App dashboard, navigate to your app’s App Settings or Security & Keys section to find your Application ID and REST API Key. You will also find the Parse Server URL (often https://parseapi.back4app.com).
Install the Parse REST Python SDK:
Initialize Parse in your Python script:
Typically, you would create a file (e.g., parse_config.py) in your project:
This code ensures that whenever you import your parse_config module elsewhere in your Python application, it is pre-configured to connect to your specific Back4App instance. You have now established a secure connection between your Python code and the Back4App backend.
A robust database schema is essential for Python backend development. Back4App’s data management features let you define tables (classes), fields, and relationships, ensuring you can easily store and retrieve data in your python web framework or any other Python libraries you choose.
Back4App automatically creates class schemas when you first save an object from code, or you can define a schema in the dashboard:
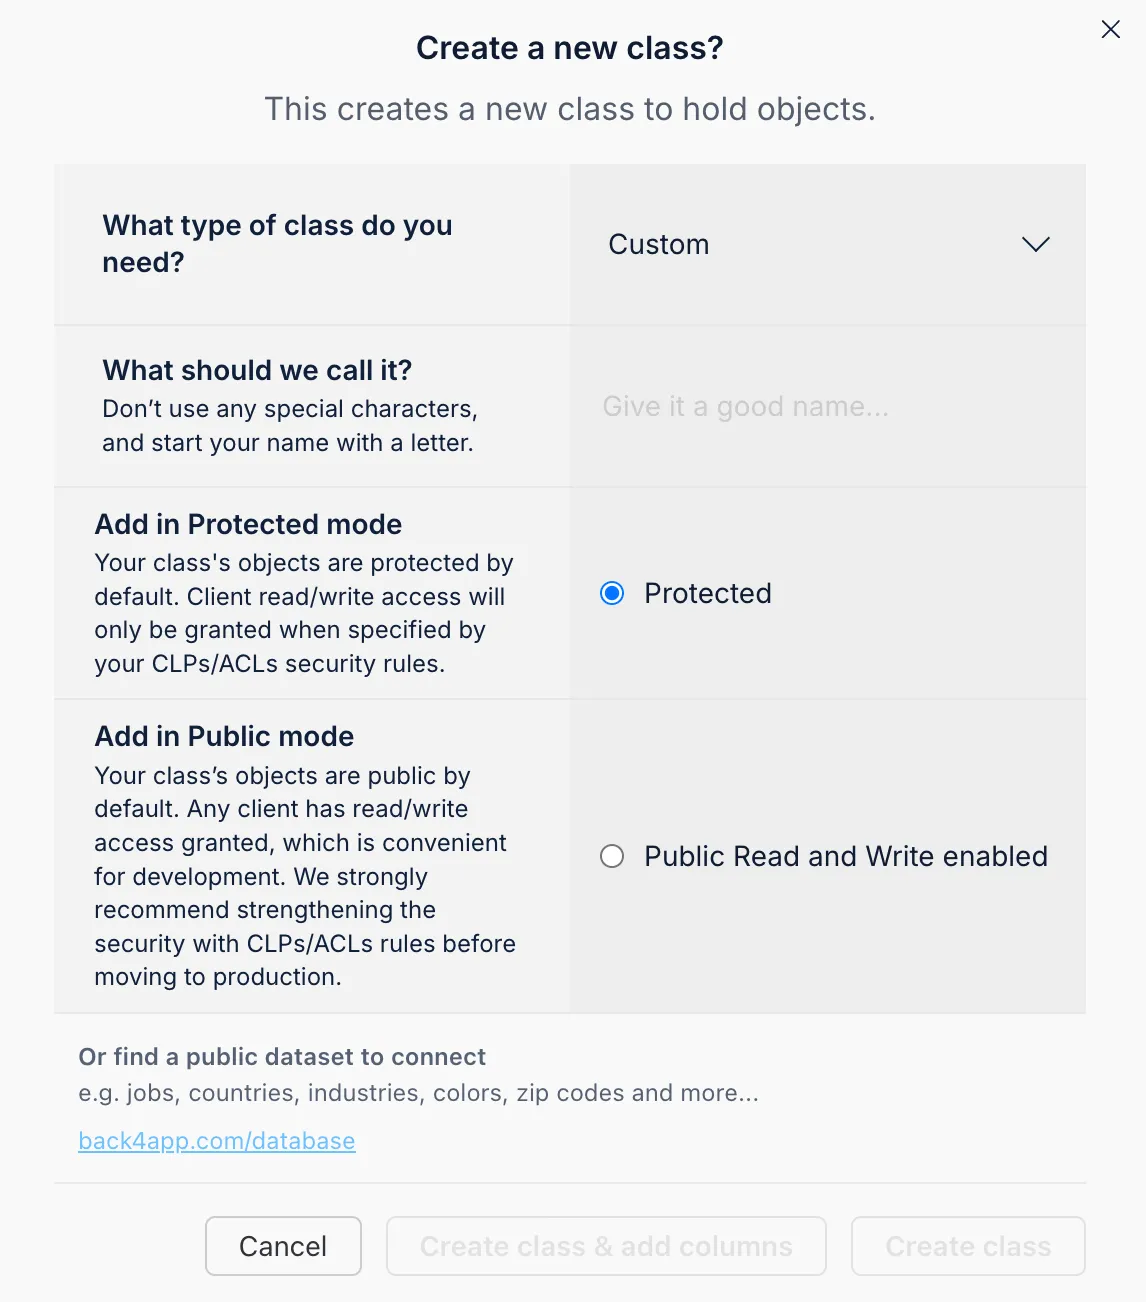
- Navigate to the “Database” section in your Back4App dashboard.
- Create a new class (e.g., “Todo”) and add relevant columns, such as title (String) and isCompleted (Boolean).
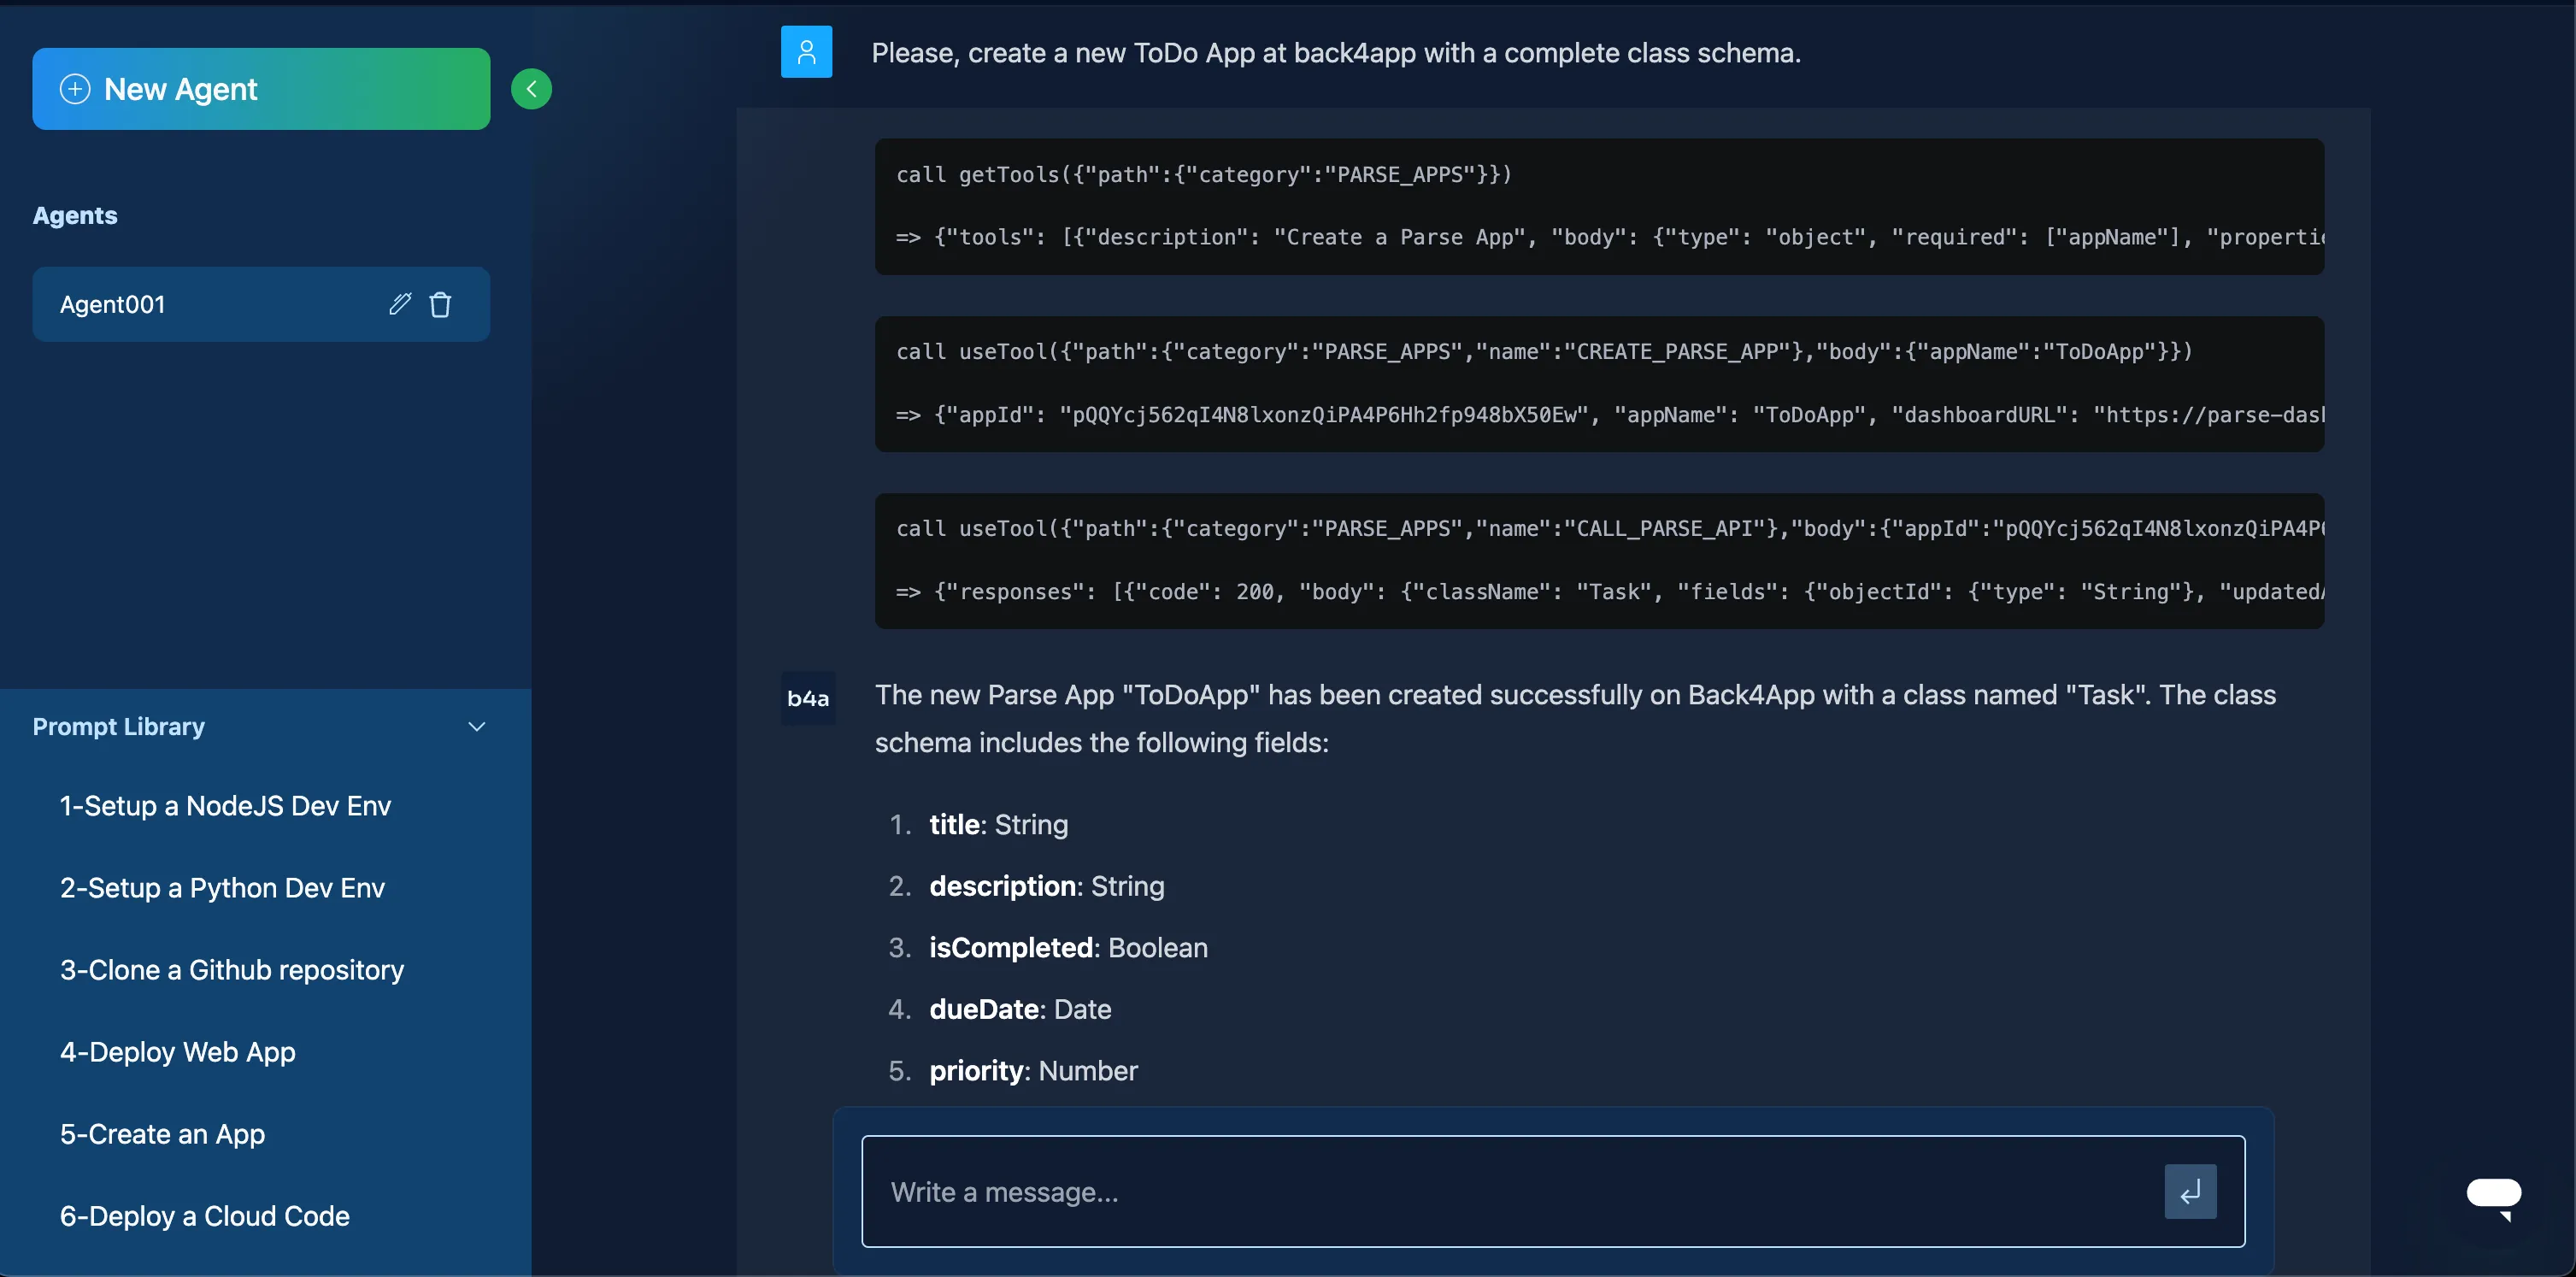
Back4App’s AI Agent can help you craft a database schema quickly:
- Open the AI Agent from your App Dashboard.
- Describe your data model in natural language (e.g., “Create a ToDo App with a complete class schema.”).
- Let the AI Agent generate your schema automatically.
Once your schema is ready, saving and querying data is straightforward. For example:
If you prefer to interact via REST, you can send requests directly:
Back4App also provides a GraphQL endpoint for querying and mutating data:
Live Queries let you receive real-time updates whenever data changes. To enable them:
- Turn on Live Queries in your Back4App Server Settings.
- Use a Python WebSocket approach to subscribe to changes. Although the Python SDK for Live Queries is community-driven, you can integrate a WebSocket library if your application demands real-time updates.
Back4App provides Access Control Lists (ACLs) and Class-Level Permissions (CLPs) to help you ensure data integrity. These features define how public users or authenticated users can access or modify data.
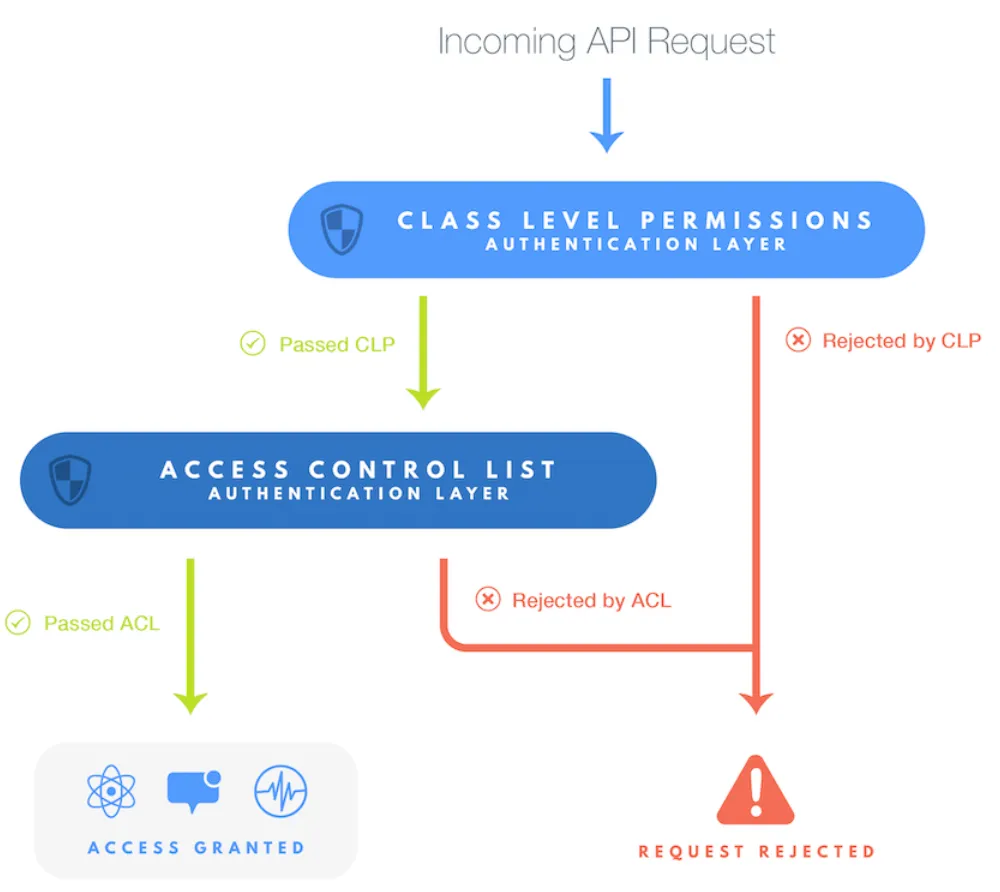
- Go to your Back4App Dashboard, select your app, and open the Database section.
- Select a class (e.g., “Todo”).
- Go to Class-Level Permissions and configure rules for public or authenticated users.
ACLs are fine-grained permissions set on individual objects. For instance:
With ACLs and CLPs, you can strike a balance between security and convenience when building your Python applications.
Cloud Code allows you to offload important business logic to the server side. This could involve validations, triggers, or sophisticated tasks like integrating machine learning tools or external APIs with your Python backend development.
You might write your functions in main.js (JavaScript-based Cloud Code) on Back4App. Note that while you develop your application in Python, the Cloud Code environment on Back4App uses Node.js/JavaScript. You can call these functions from your Python code or any other client.
You can call this function using Python’s REST or GraphQL capabilities:
Back4App’s Cloud Code is deployed using the Back4App CLI or via the dashboard. You can install NPM packages (e.g., for data manipulation, external API calls) and reference them in your main.js. This approach keeps your code efficient and secure on the server side.
Back4App leverages the Parse User class for authentication. This automatically handles password hashing, session tokens, and more. You can manage signups, logins, or password resets with minimal overhead.
Sessions are automatically handled by Parse. You can track the logged-in user and call .logout() when needed. For more details, consult the official User Class Docs.
You can integrate popular providers (like Facebook or Google) by configuring OAuth flows or using specialized adapters. Refer to Social Login Docs for more details on setting up these features with your Python project.
The Parse platform includes native file storage:
You can attach this file to a Parse Object by storing its URL. This keeps your data consistent while your media is safely hosted by Back4App.
You can control who can upload or access files by configuring your Parse Server settings to only allow authenticated users, for example. This approach ensures that your production Python applications remain secure.
Email verification and password resets are crucial for user management. They help confirm user identities and maintain account security.
- Enable Email Verification in App Settings > Email Settings.
- Configure the email templates, such as the “From” address, and the password reset instructions.
From Python, you can trigger password reset emails via the REST endpoint or parse libraries. For example:
This ensures a seamless flow for password resets directly from your Python backend or any other interface.
Cloud Jobs allow you to automate tasks, like cleaning up old records or generating periodic reports. These run on Back4App’s infrastructure at specified intervals.
In your main.js:
You can then schedule this job to run daily or weekly using the Background Jobs section of the Back4App dashboard.
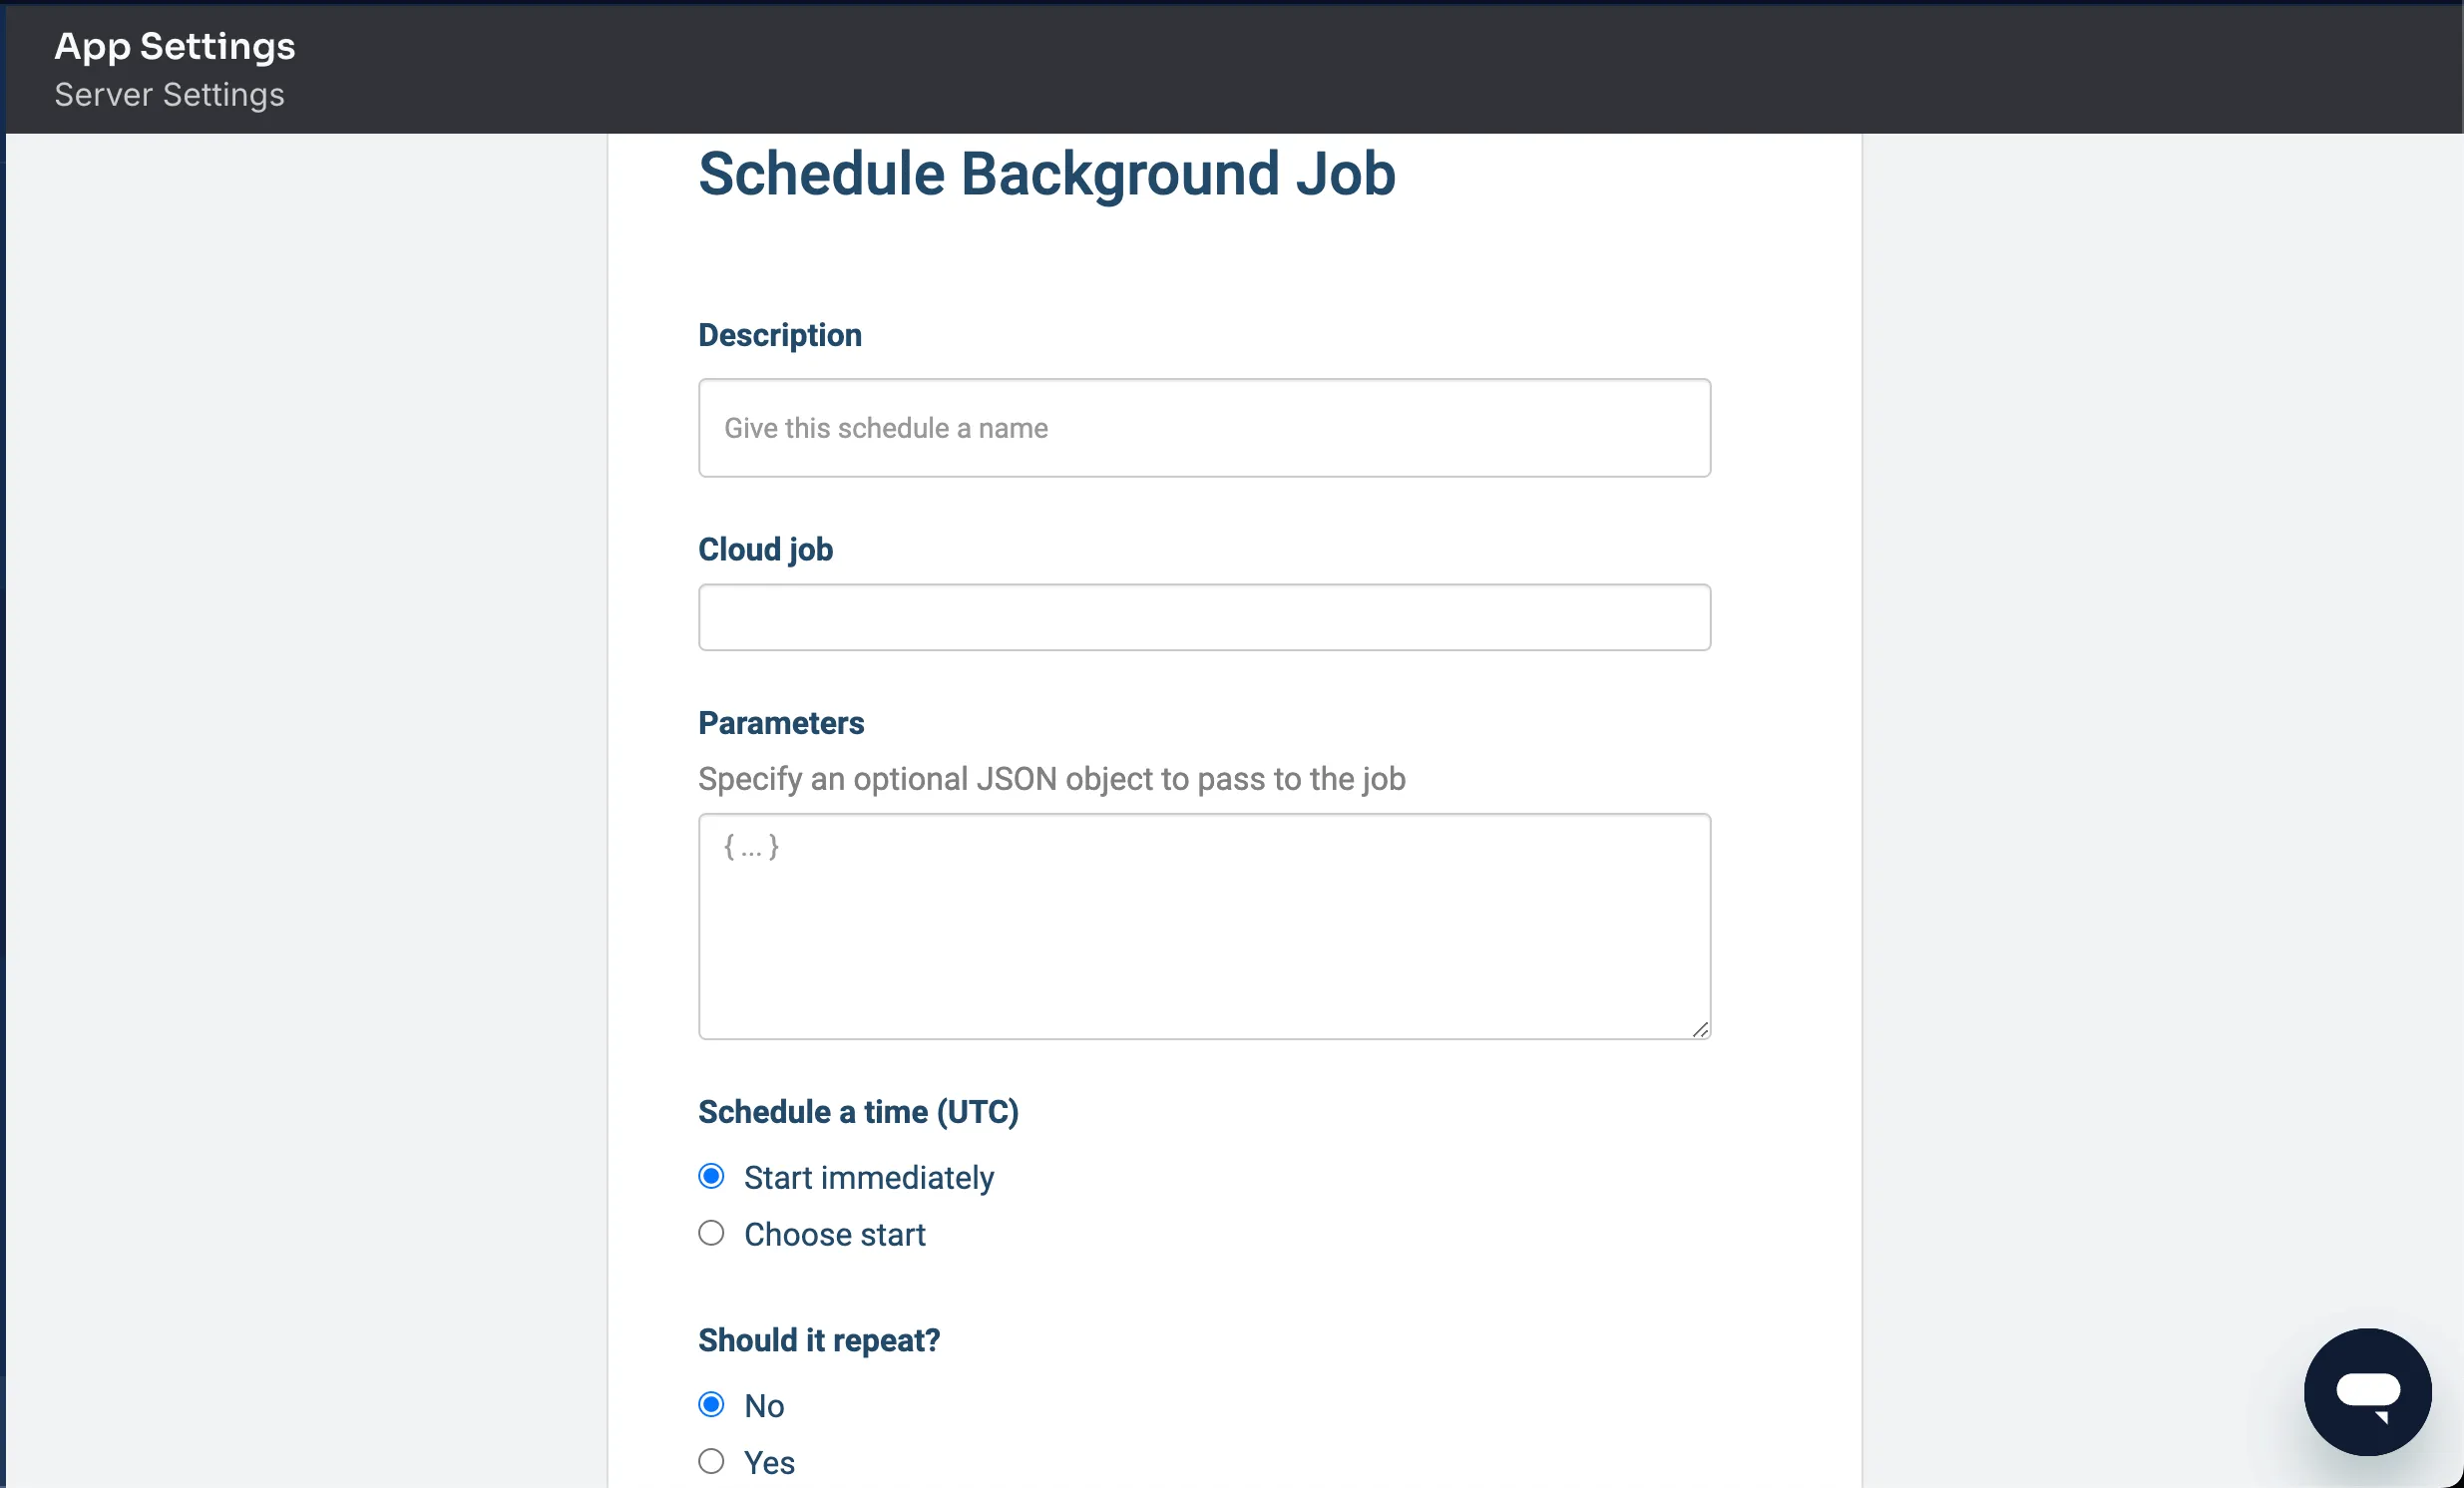
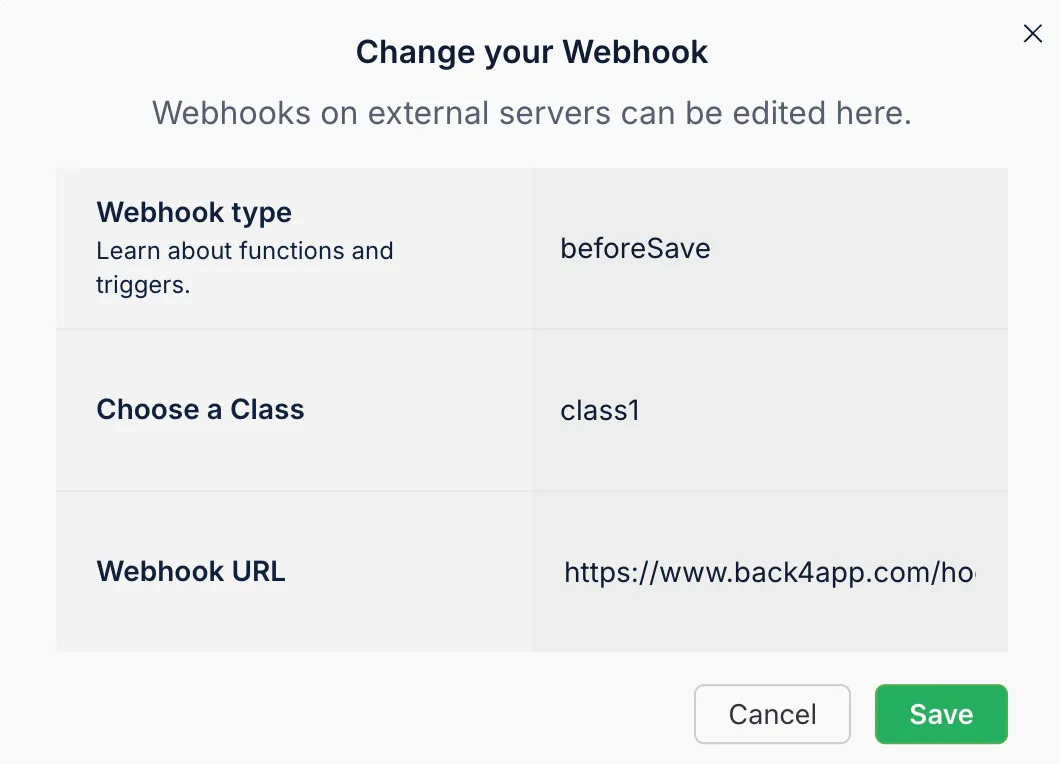
Webhooks allow your Back4App app to notify external services when certain events occur. This is useful for integrating with payment gateways or analytics platforms, expanding your development processes.
- Navigate to Webhooks in your Back4App dashboard.
- Add a new webhook endpoint (e.g., https://your-service.com/webhook-endpoint).
- Select the events that trigger the webhook (e.g., object creation or updates).
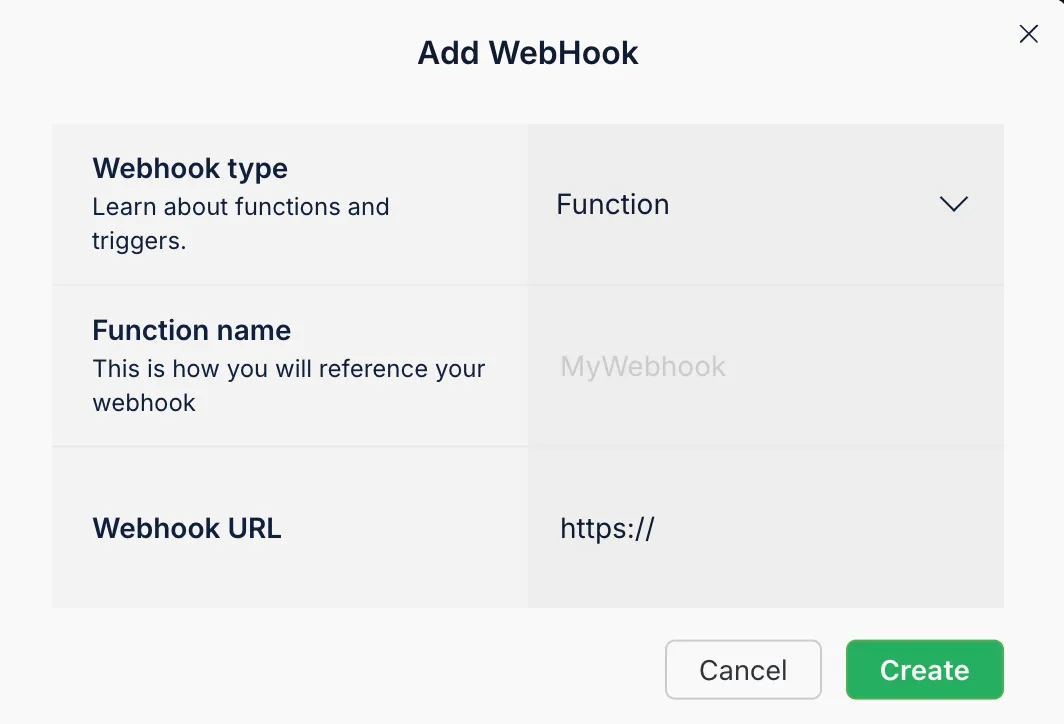
You can also define webhooks in Cloud Code triggers like beforeSave or afterSave to post data to external APIs.
The Back4App Admin App is a web-based management interface. It enables your team to perform CRUD operations, manage data, and handle day-to-day tasks without writing additional code. This can streamline your Python backend development process.
Enable the Admin App from App Dashboard > More > Admin App and follow the steps:
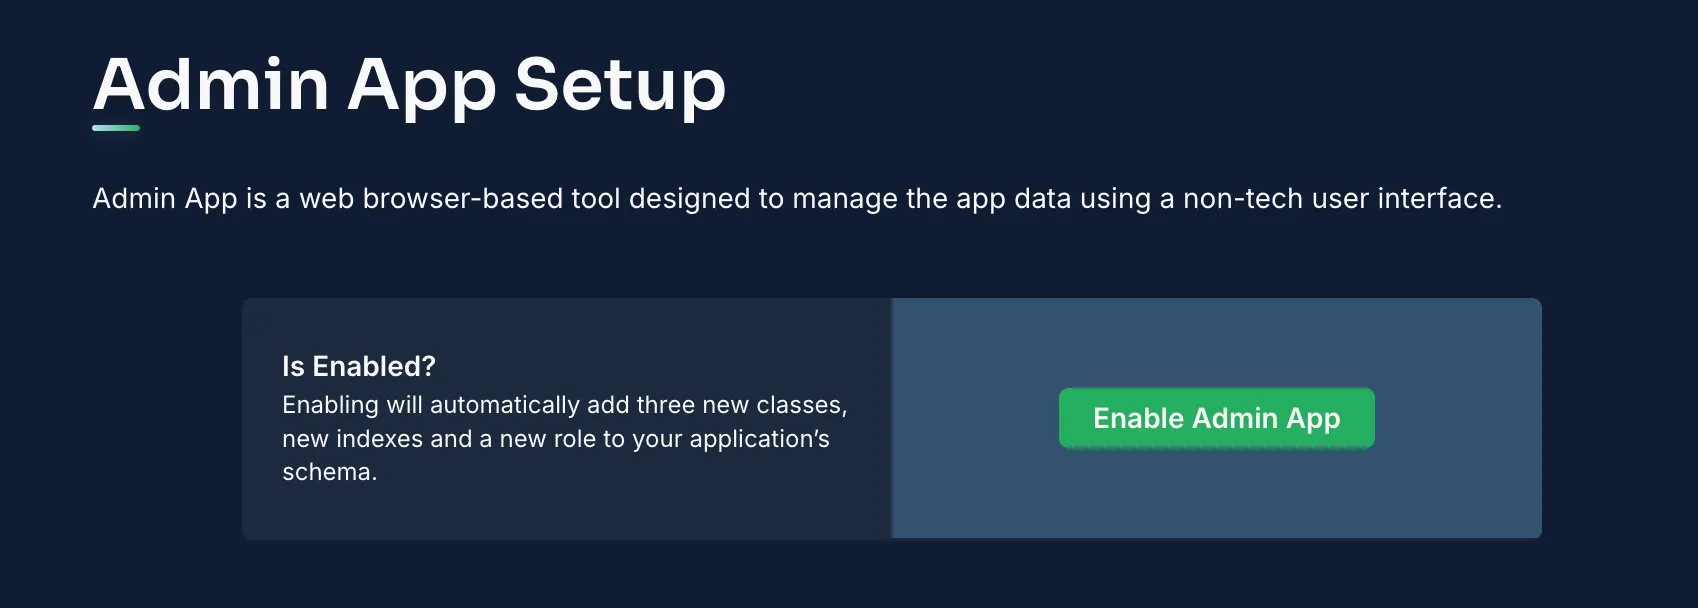
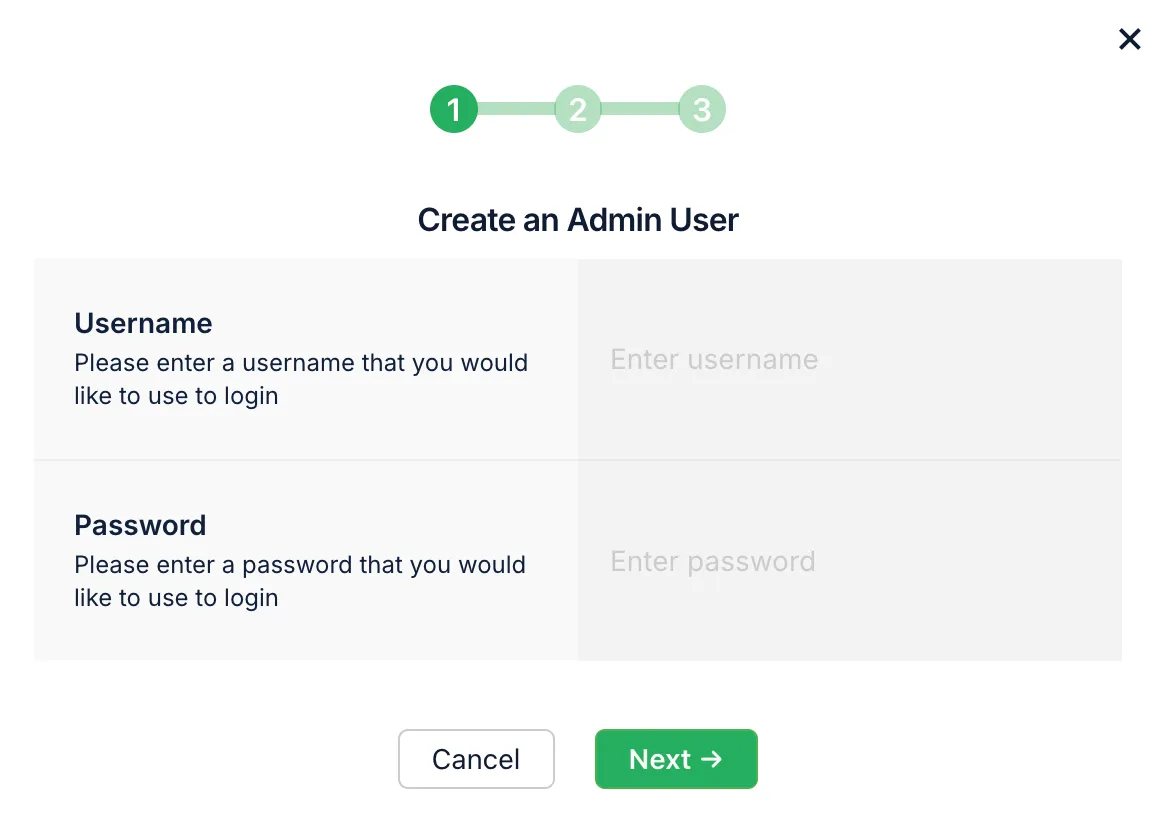
Create the first Admin User. A new role (B4aAdminUser) and classes are automatically added to your schema.
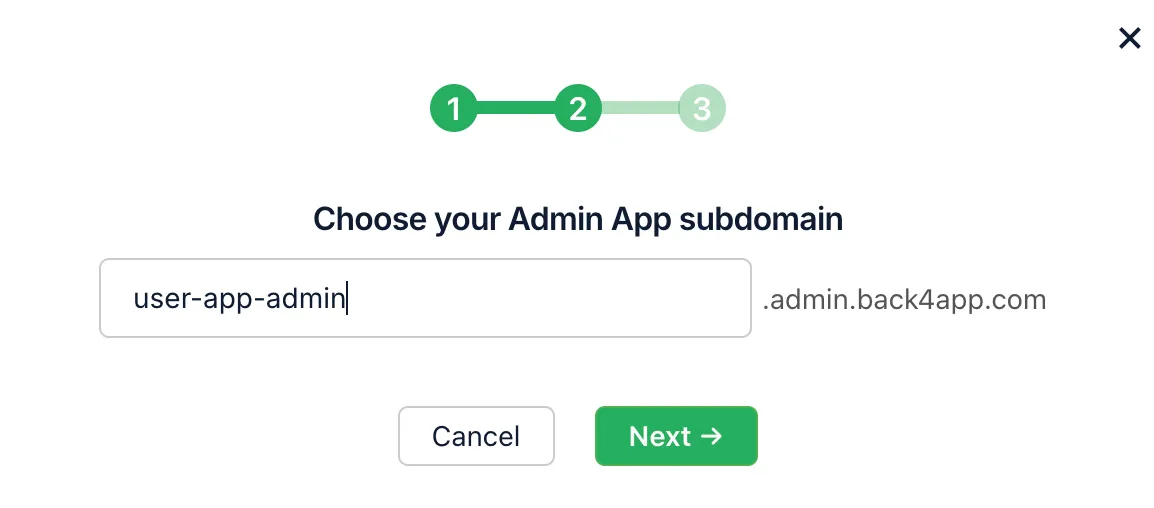
Choose a subdomain for your admin interface and finalize. Then log in to access your new Admin App.
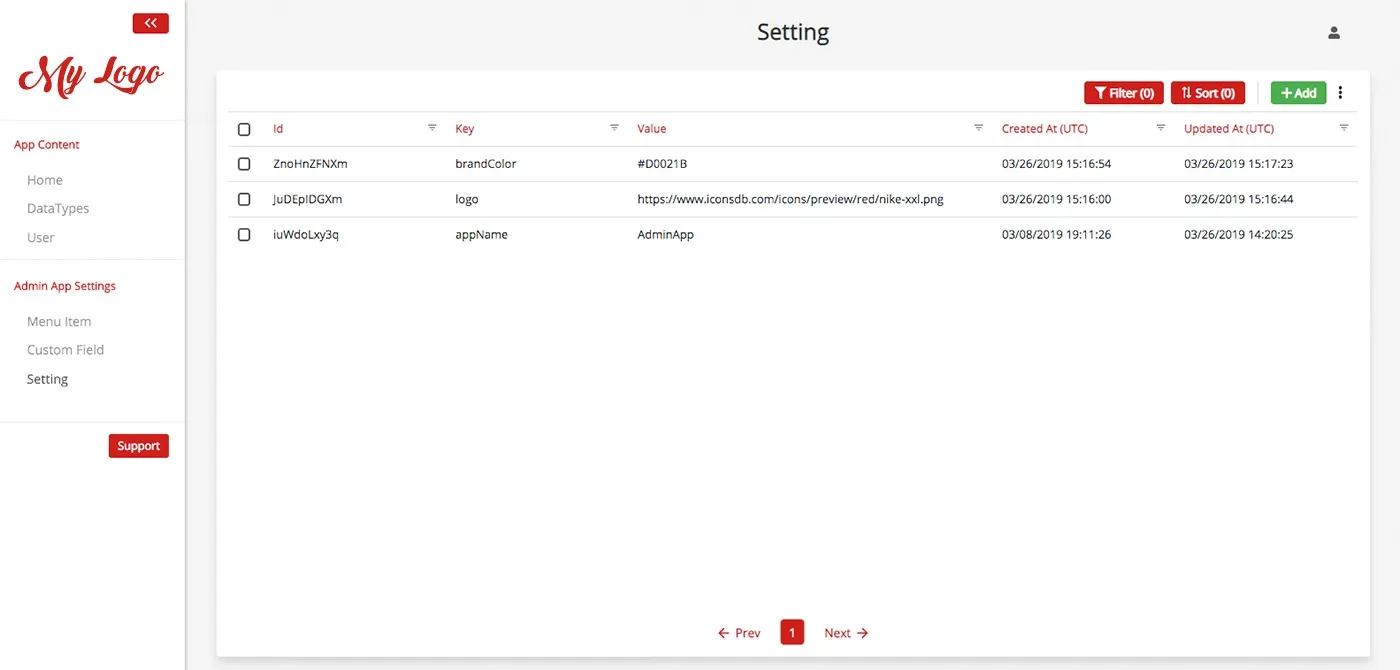
The Admin App makes it easy to update or remove records and manage your data. With proper access controls, it’s safe to share with project managers or stakeholders.
By following this guide on how to build a backend for Python, you have:
- Created a secure backend for Python applications on Back4App.
- Configured a database with flexible schemas and relationships.
- Implemented real-time queries for instant data updates (optional with Live Queries).
- Applied security measures with ACLs and CLPs to safeguard data.
- Wrote Cloud Code in JavaScript to handle server-side logic, easily callable from Python.
- Set up user authentication with email verification and password reset flows.
- Handled file uploads in your Python code with optional file security.
- Scheduled recurring jobs for automated tasks.
- Integrated external services using webhooks.
- Explored the Admin Panel for data management and collaboration.
With a solid Python codebase and a robust Back4App backend, you are now equipped to tackle advanced data structures, incorporate frameworks like Django and Flask, and even integrate machine learning.
Python offers countless possibilities, and combining it with Back4App means you can quickly iterate while focusing on core business logic rather than server maintenance.
- Build a production-ready Python app by refining your database schema, adding caching, and managing performance optimizations.
- Explore advanced features like role-based access control, advanced logging, or connecting third-party APIs for analytics.
- Review Back4App’s official documentation for deeper insights into security, performance tuning, and logs analysis.
- Experiment with tools like Docker and Kubernetes to containerize and scale your application as needed.
By leveraging Python’s powerful libraries and Back4App’s scalable infrastructure, you can accelerate your backend development journey with confidence.
