Start from template
In this guide, you will learn how to get started with an Android application written in Java or Kotlin and connect it to Back4App.
If you want a detailed Quickstart guide or connect Back4App to an existing project, go to our Install Parse SDK tutorial
Download an Android Template and connect it to Back4App
- An app created at Back4App.
There are 2 Android templates, one written in Java and the other on Kotlin:
Choose the template that suits you, and proceed to download or import your project on Android Studio. Android Studio.
Use the following commands to download and unzip your project template:
After downloading the files, unzip them. Let’s open Android Studio
In the welcoming screen of Android Studio, choose ‘Open an Existing Project’ and select the project’s folder.
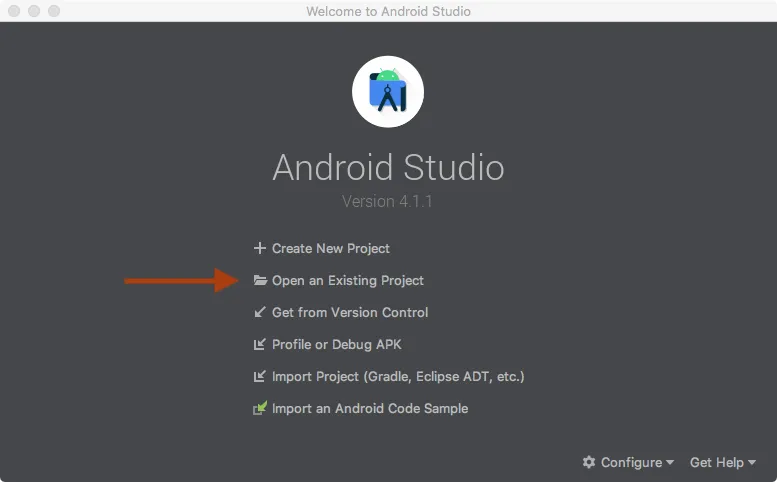
Choose your downloaded and unzipped folder’s location and open it.
Please wait until the finish of the Gradle Run process. Now you can see Gradle console bottom tabs in Android Studio.
You can import the repository link directly to Android Studio. On Android Studio welcoming screen, choose ‘Get from Version Control’
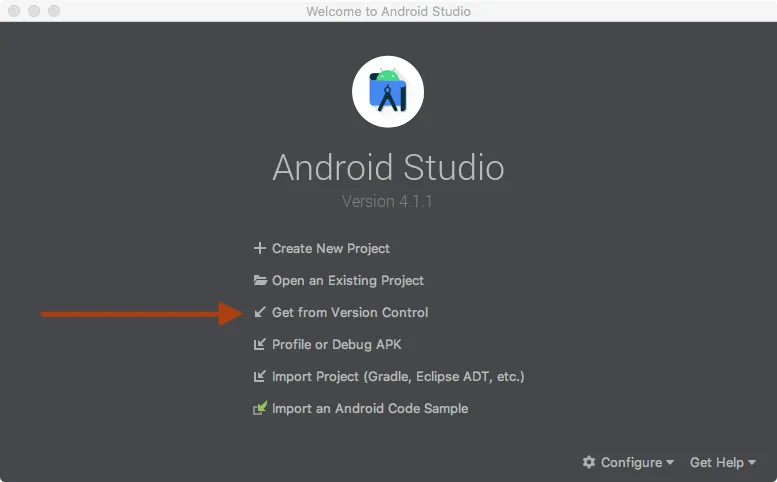
Android Studio will ask you for the Git repository link and the desired project path. You can find repository links at the start of this section.
You can find repository links in the start of this section
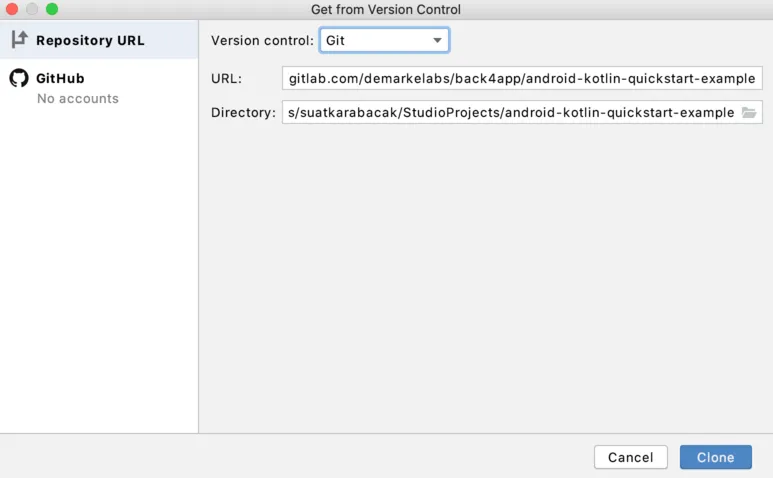
After filling the URL and Directory fields, click on the Clone button. Then Android Studio will copy and open the project for you. Please wait until the finish of the Gradle Run process. Now you can see Gradle console bottom tabs in Android Studio
Android Studio will copy and open project for you
Please wait until gradle run is finished.You can see gradle console bottom tabs in Android Studio
In this guide we will use following files in project :
AndroidManifest.xml - We will set our Back4App credentials as <meta-data> and app permissions App.java (App.kt for kotlin) - We will modify our initialization code in here MainActivity.java (MainActivity.kt for kotlin) - Will contain our very first code for creating a Parse Object strings.xml - We will store and read Back4App setup credentails from here build.gradle - We will set our Parse Android SDK version in here
In order to connect your App project to Back4App’s server, you’ll need three primary information the server URL, the Application ID, and the Client Key. In an Android project, strings.xml is a perfect place to set this information. It is where Parse Android SDK reads Application key values to make a connection with your Back4App App. The server URL is already on the project. You’‘ll need now go to Back4App, copy your App keys, and update your strings.xml with those values:
- Open your strings file: .../app/src/main/res/values/strings.xml
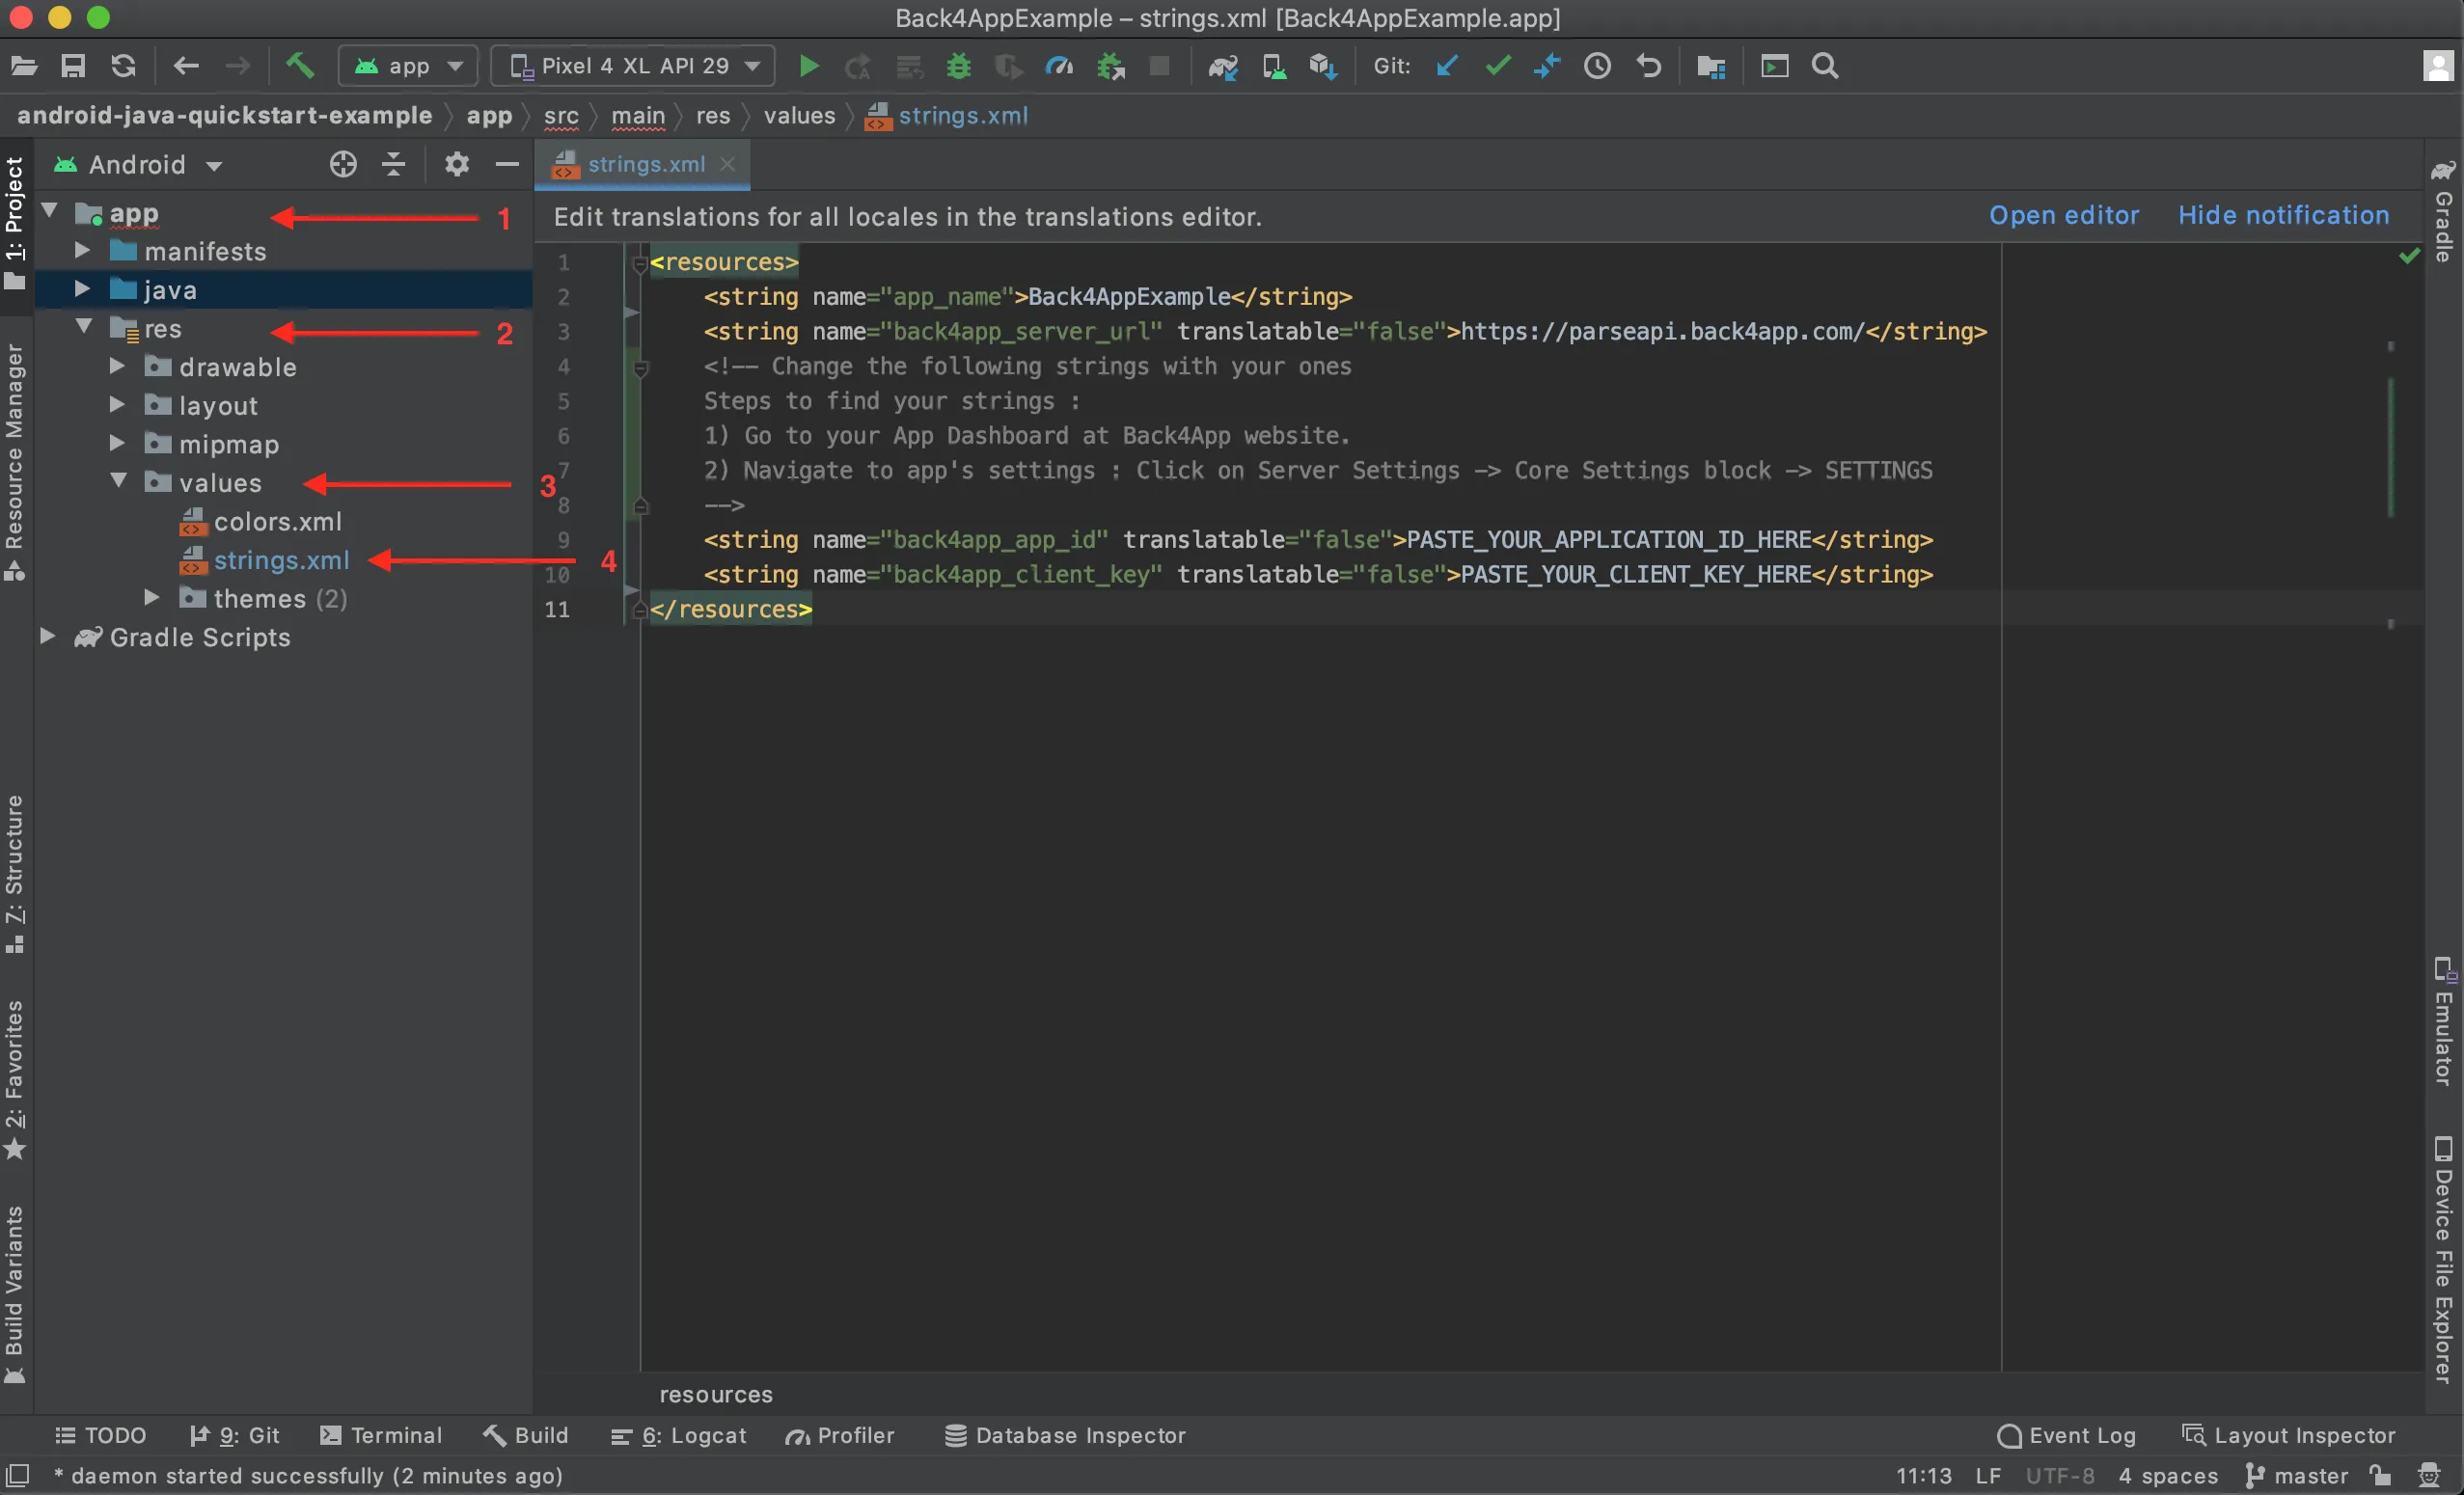
2. Go to your App Dashboard at Back4App Website.
3. Find you keys on: App Settings > Security & Keys.
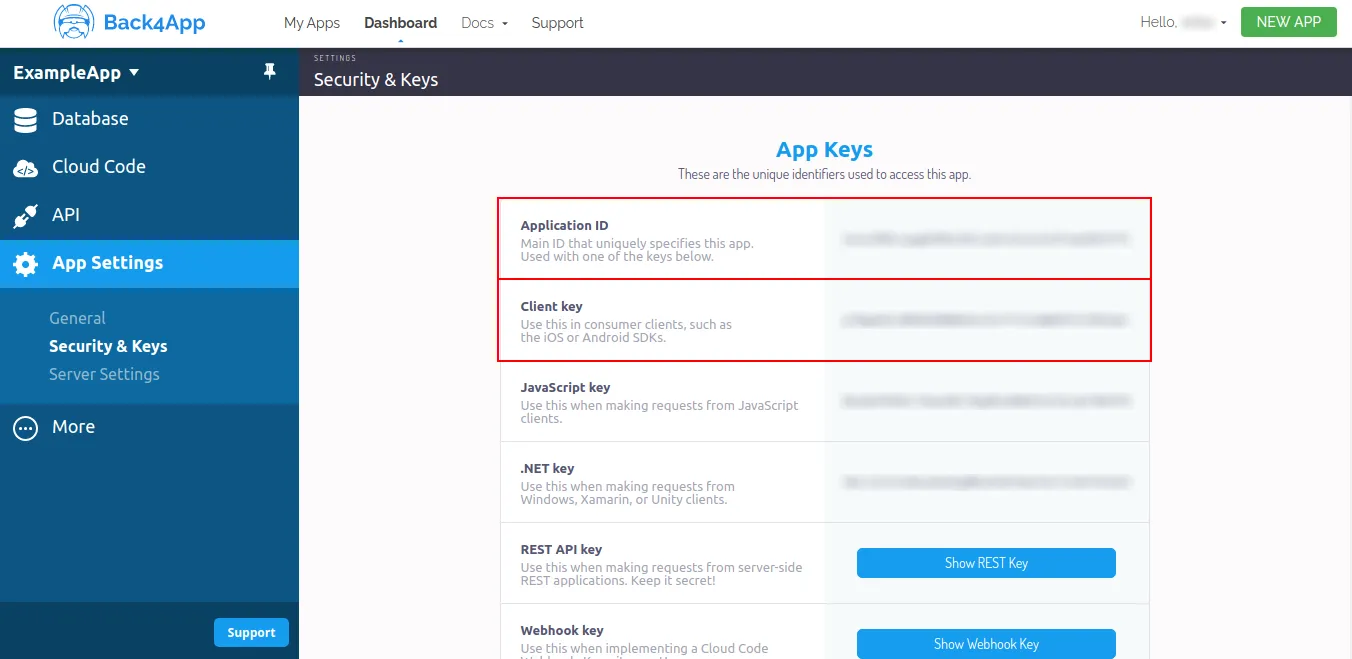
4. Return to your strings.xml file and paste your applicationId and clientKey.
5. Open your build.gradle (Module:Back4AppExample.app) file in Gradle Scripts from Project Explorer
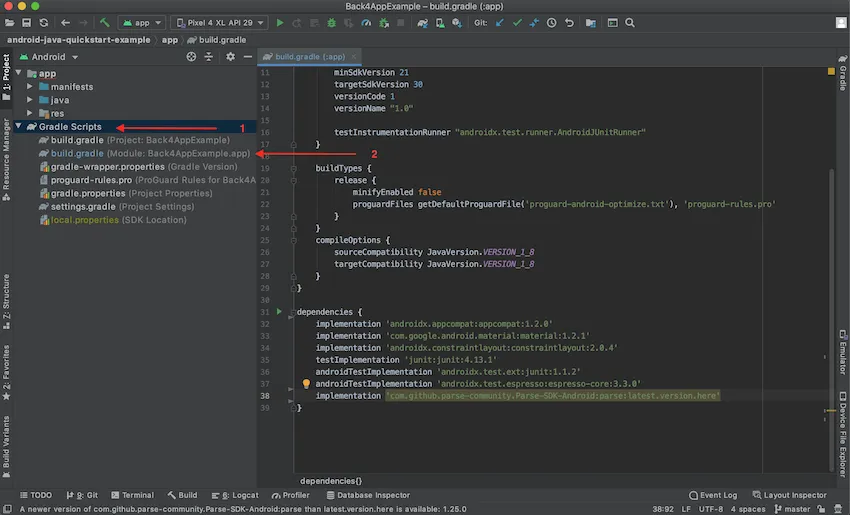
In dependencies section change the Parse-SDK-Android value with version of your choice.
After saving build.gradle run ‘Sync Now’
You can see current version of SDK in here SDK Versions.
After setting up your App credentials, you are ready to connect with your Parse Server instance on Back4App.
This is the initialization code you’re going to use:
You can reach initialization code in project in App.java (App.kt for kotlin)
We are using App.java for our initialization because we need to establish connection before app takes any other action. App.java is the first Context to be created before any other Activity and Service and last to be destroyed.
Below initilization code gets App Keys from strings.xml and try to establish a connection with our Back4App server. We put our code onCreate() method because we want to connect to our server first before taking any other action.
Now it is time to add some codes for interacting with the server. Let’s open our MainActivity file.
Activity files are great for interacting with user. They are main purpose providing a User Interface.
You can choose which activity to show in launch in AndroidManifest.xml
In our project MainActivity is set to open on launch.
In this code sample we have a Parse SDK code for saving a Parse Object to server and showing objectId of saved Parse Object to user with a TextView
- Build your app in a device or virtual device (Shift+F10).
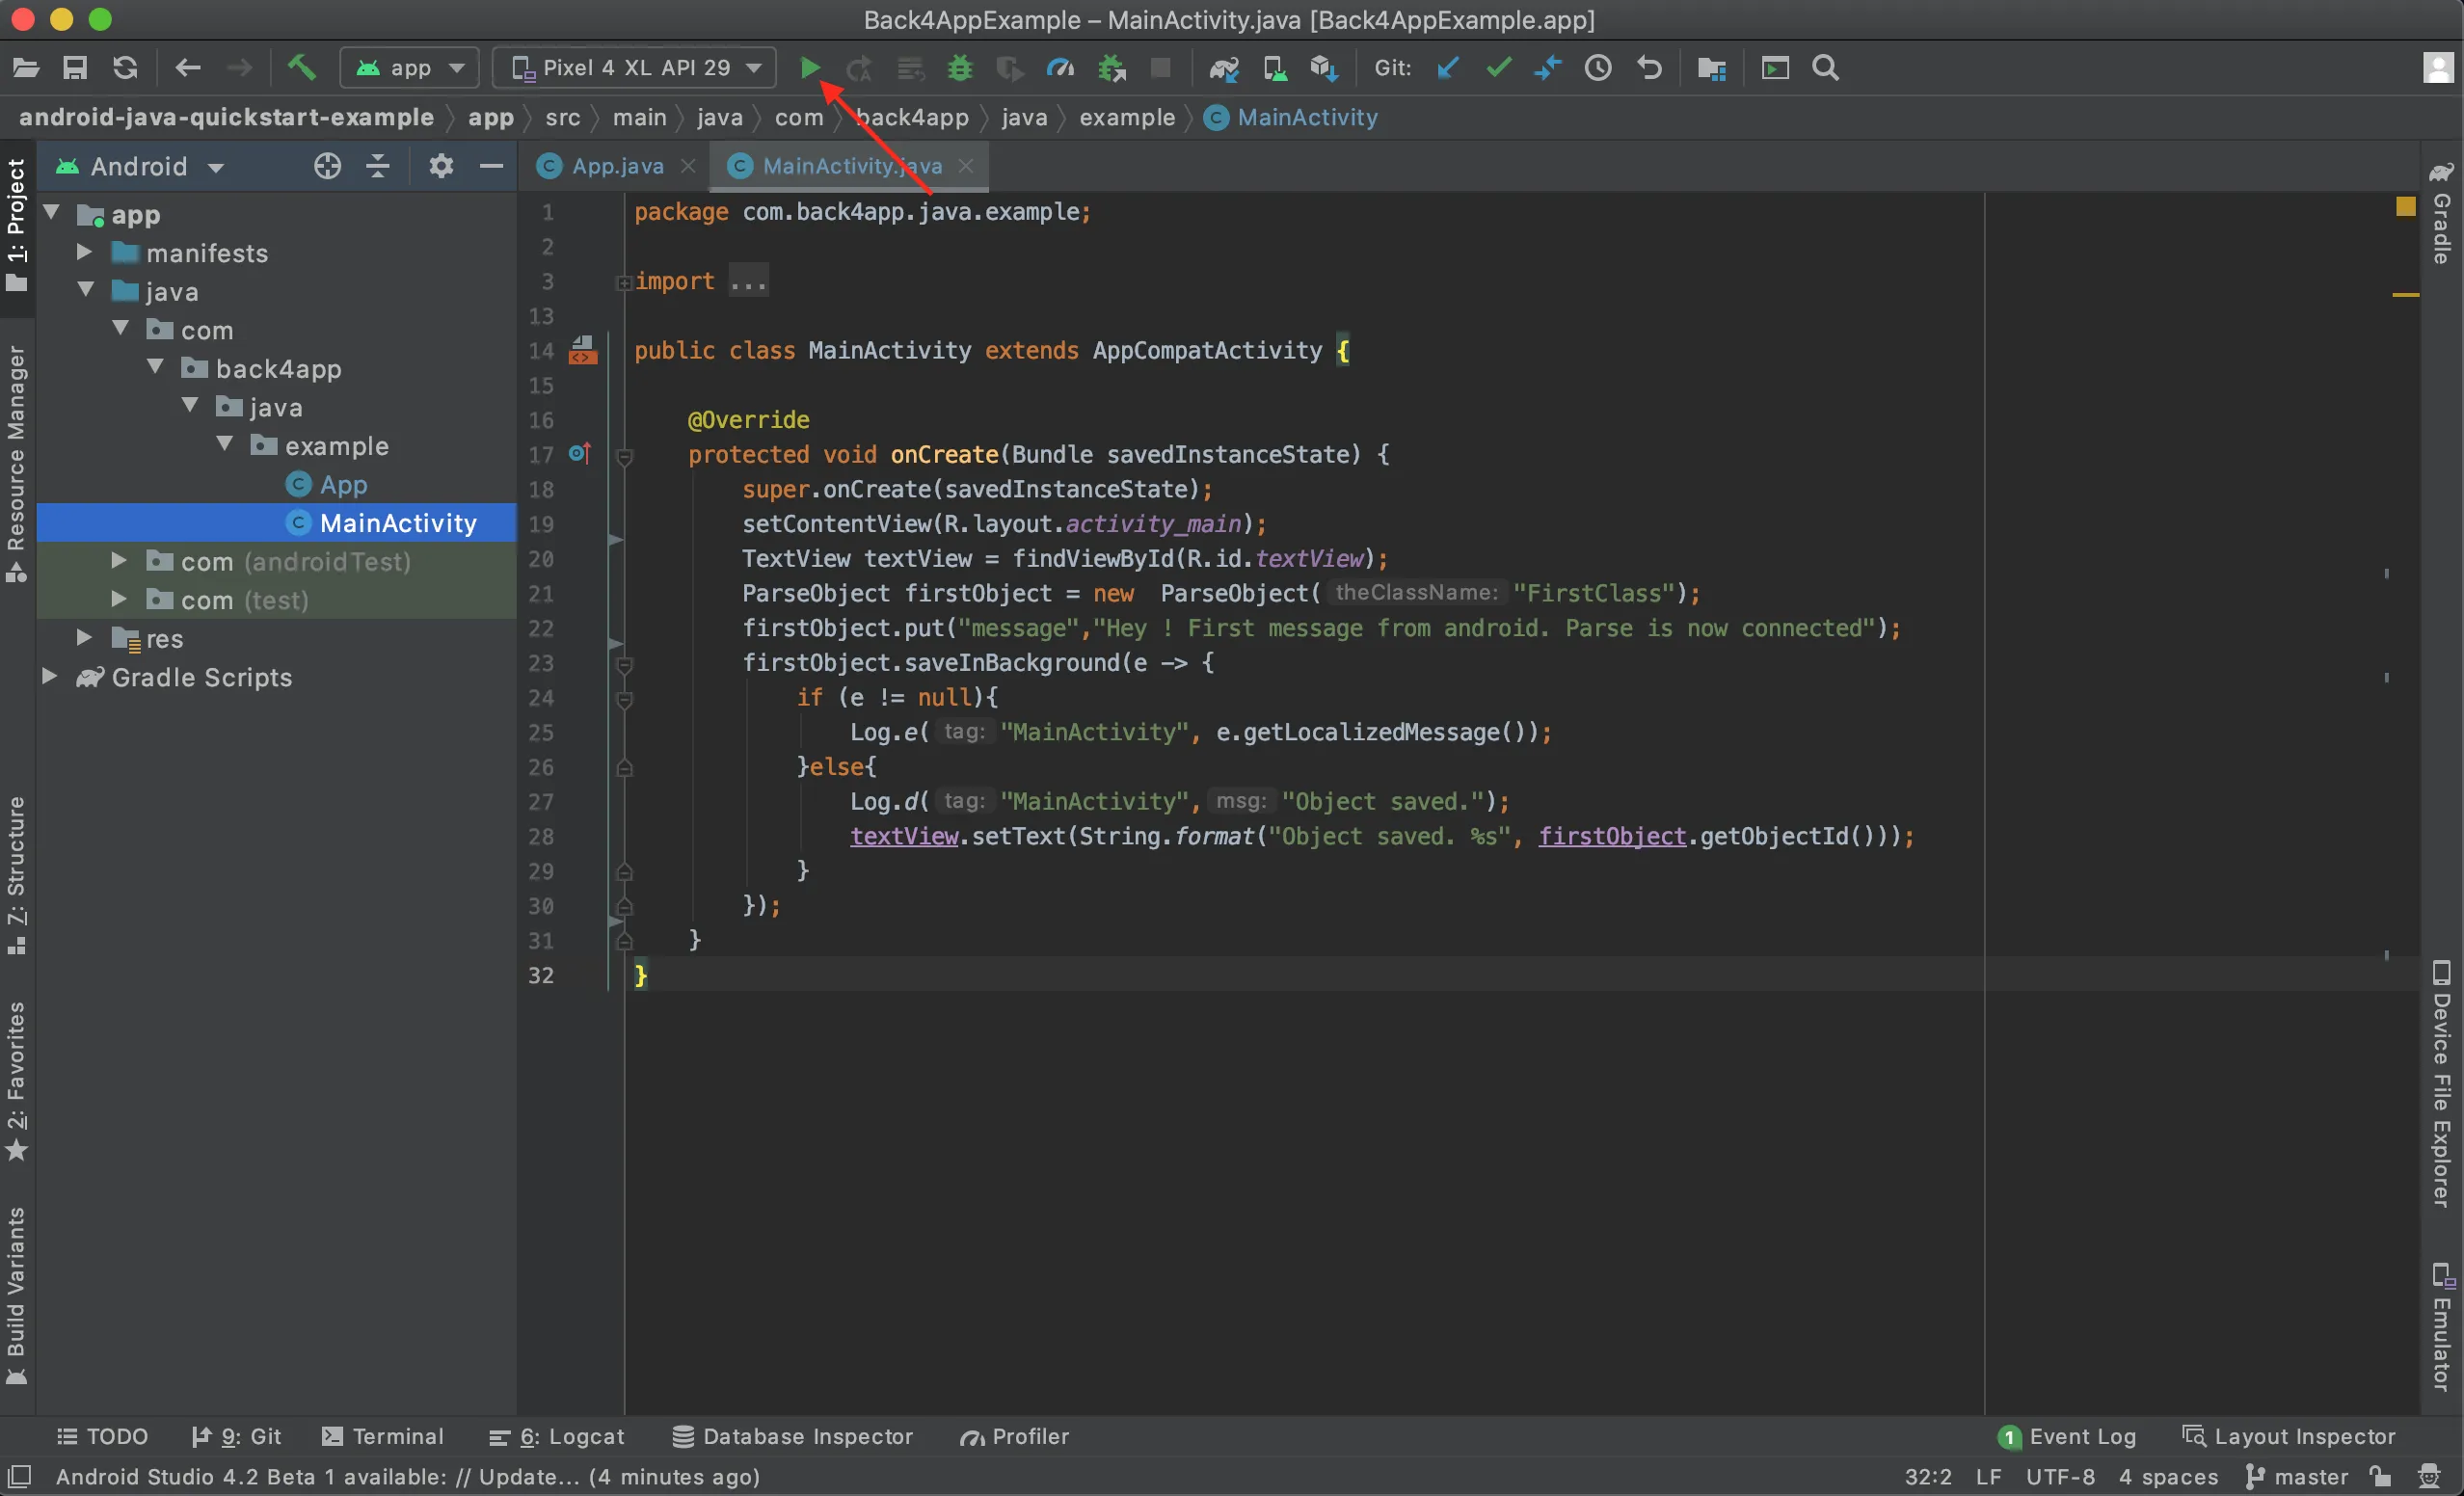
If you don’t have any virtual device to run app. You can create a new one from AVD Manager in Android Studio
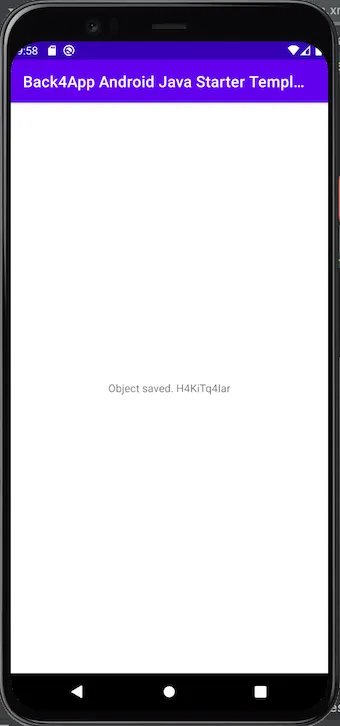
- Wait until the Hello Word! screen appears. After Hello Word! you will see Object saved. Message this message will include saved object’s id.
2. Login at Back4App Website.
3. Find your app and click on Dashboard > Database > Browser.
If everything works properly, you should find a class named FirstClass as follows:
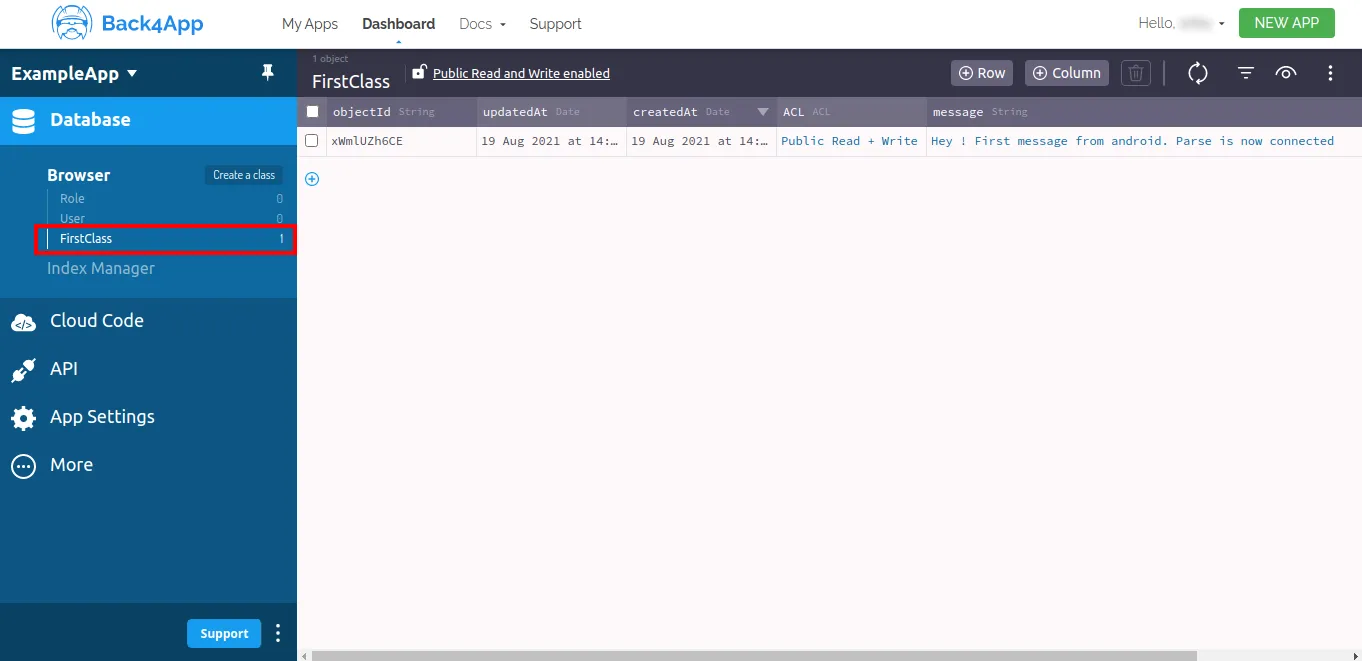
You can see objectId in dashboard and your app’s screen is matches !
At this point, you have learned how to get started with Android apps.
Learn more by walking around our Android Tutorials or check Parse open source documentation for Android SDK.
