Stripe
In this guide, we are going to show you how to integrate a hosted backend in Back4App with Stripe API. The best architecture choice to build it on Back4App is using a very powerful feature called Cloud Functions. Once you finish the cloud function integration with Stripe you will be able to use this integration for all your front-end projects (Web, iOS, Android). This guide presents a complete Stripe integration using a web example.
To complete this tutorial, you will need:
- An app created at Back4App.
Integrate Stripe on a web project using Back4App Cloud Functions.
Stripe is a tech company operating in over 25 countries, which allows both individuals and businesses to accept payments over the Internet. Stripe focuses on providing the technical, fraud prevention, and banking infrastructure required to operate online payment systems.
This tutorial will walk you through the steps of creating functions and integrating Stripe API to your Parse Server into your web app.
More specifically, in this guide, we will create an environment in which a user can log in or sign up, register credit cards, and generate example purchases with them via Stripe Payments. Also, you will be guided on how to set up the whole process as well as test if the connection to the server and the Stripe API is working properly.
Go to Stripe and click on the sign up to create an account. There, you just need to provide your personal information and to which country your account belongs.
Next, verify your Stripe account (you will receive an email containing a verification link from Stripe). Click on that link, and then follow the steps to confirm your Stripe email address.
After configuring the Stripe environment for Step 1, go to your Back4App app dashboard so you can set up your database. This step is not obligatory since Parse will automatically create the classes while the cloud functions try to create a new object, but we will go through them to explain which fields will be created and why.
There will be two classes that will hold your app Stripe related data: PaymentMethod and Payment:
Here is how the classes are laid out:
- PaymentMethod
- type(String): its value will always be “card”;
- card(Object): will hold the complete Stripe data regarding the registered card;
- stripeID(String): id referencing this PaymentMethod on the Stripe backend;
- user(Pointer to Parse.User): direct reference to which Use this PaymentMethod belongs.
- Payment
- data(Object): will hold the complete Stripe data regarding the payment;
- user(Pointer to Parse.User): direct reference to which User this Payment belongs.
We will also add two new String value columns in your app default User class called setupSecret and customerId that will contain the Stripe ids that relate the User to its Stripe counterpart.
Let’s configure the Cloud Code functions in the app, installing the Stripe module and deploying the Code.
If you want to better understand the Cloud Code enviroment, check this guide.
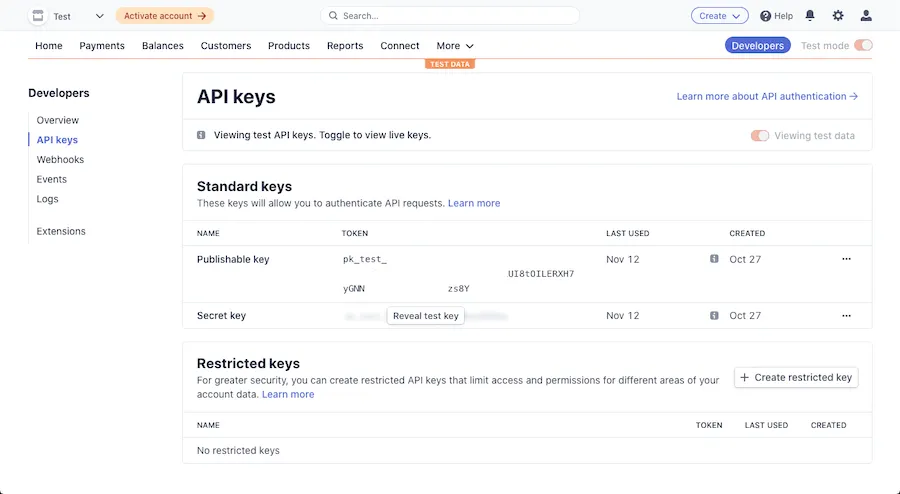
Now, open your Stripe dashboard, navigate to the Developers page at the top and then select API Keys on the left menu. In that section, you will be able to see your Publishable key and your Secret key.

Write down these keys as you will need them later.
On your computer, create the following files, that will be responsible to install the module and adding your Cloud Code functions to Back4App.
Add the code below to a new file and don’t forget to paste your Stripe secret key on the top.
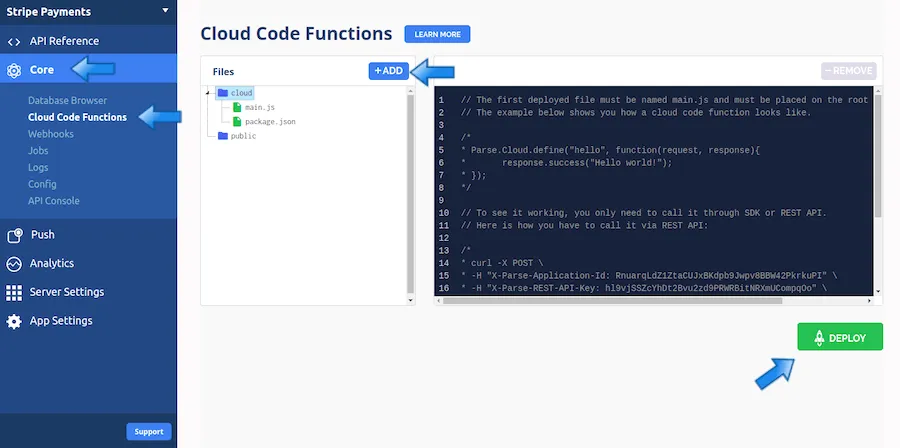
Go to the Back4App website, log in and then find your app. After that, click on Dashboard link and you will end up on the page shown below. To deploy your Cloud Code, click on the + ADD button and find the main.js and package.json files that you created in the previous step, then click on the DEPLOY button.

You have just configured Cloud Code functions that you can use on any platform! Check the Deploy & call functions guide to learn how to call them. On the next step, you will work with a JavaScript project that calls them.
Now you will see an example of a straightforward HTML page with JavaScript that has three main features: signing in or up a user on Parse, creating valid payment methods (credit cards), and creating new payments, charging these methods belonging to the user.
Go ahead and create a new directory in your computer and a new HTML file with the following code inside it:
In this file you will find two main sections, the first one being the authentication one, which will be rendered by default if the user is not logged in yet. After logging in, the payment section will be shown, containing all the forms responsible for creating data on Stripe and also communicating with the Cloud Code functions on Back4App.
We now need to create a JavaScript function containing the code that ties it all together, called index.js:
Make sure to add your Stripe publishable key and also your Parse app ID and JS key to the top of the file. These are some of the key elements to check out and understand in this script:
- Check the usage of the Parse.User.current method when loading the script for the first time to render the correct part of the page;
- The form submit action listeners that will perform actions on Parse, like signing in or up and calling the Cloud Code functions to create the Stripe related objects and save on your Back4App database;
- The “retrieve” and “return” methods that make queries on Parse to retrieve the current user’s Payment and PaymentMethod objects.
Before testing the app, add the following stylesheet in a CSS file called app.css inside the same directory:
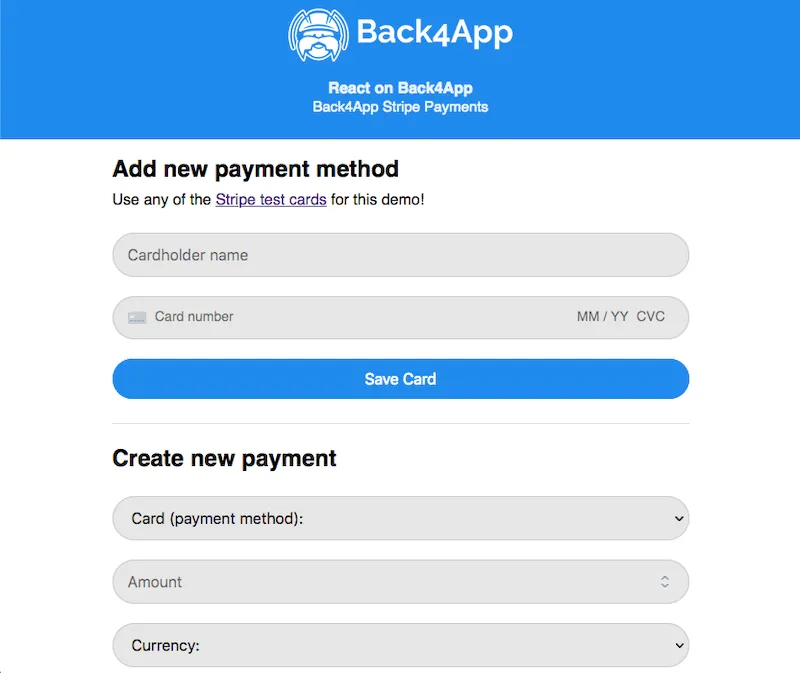
Test the app using any kind of local HTTP server, like the http-server node package. After signing up, your app should look like this:

With the guide described above, you got to use Stripe with a Cloud Code function in Back4App as well as integrate payments to a simple JavaScript app!
In case you face any trouble while integrating Stripe or a function doesn’t work, please contact our team via chat!