Sign In with Apple
In this section you learn how to get started with Sign In with Apple using our Swift template and get ready to use Back4App in a few easy steps.
To complete this quickstart, you need:
- Xcode 11
- Set up Sign In with Apple in your Apple Developer account.
- Follow the Sign In with Apple Tutorial to learn how to set up Sign In with Apple in your Apple Developer account.
Clone or download the template at Back4App’s GitHub repository, open the Swift foder.
- Open Xcode.
- Click on File>Open.
- Navigate to the project folder and double click on app.xcworkspace.
- Wait for Xcode to open the project.
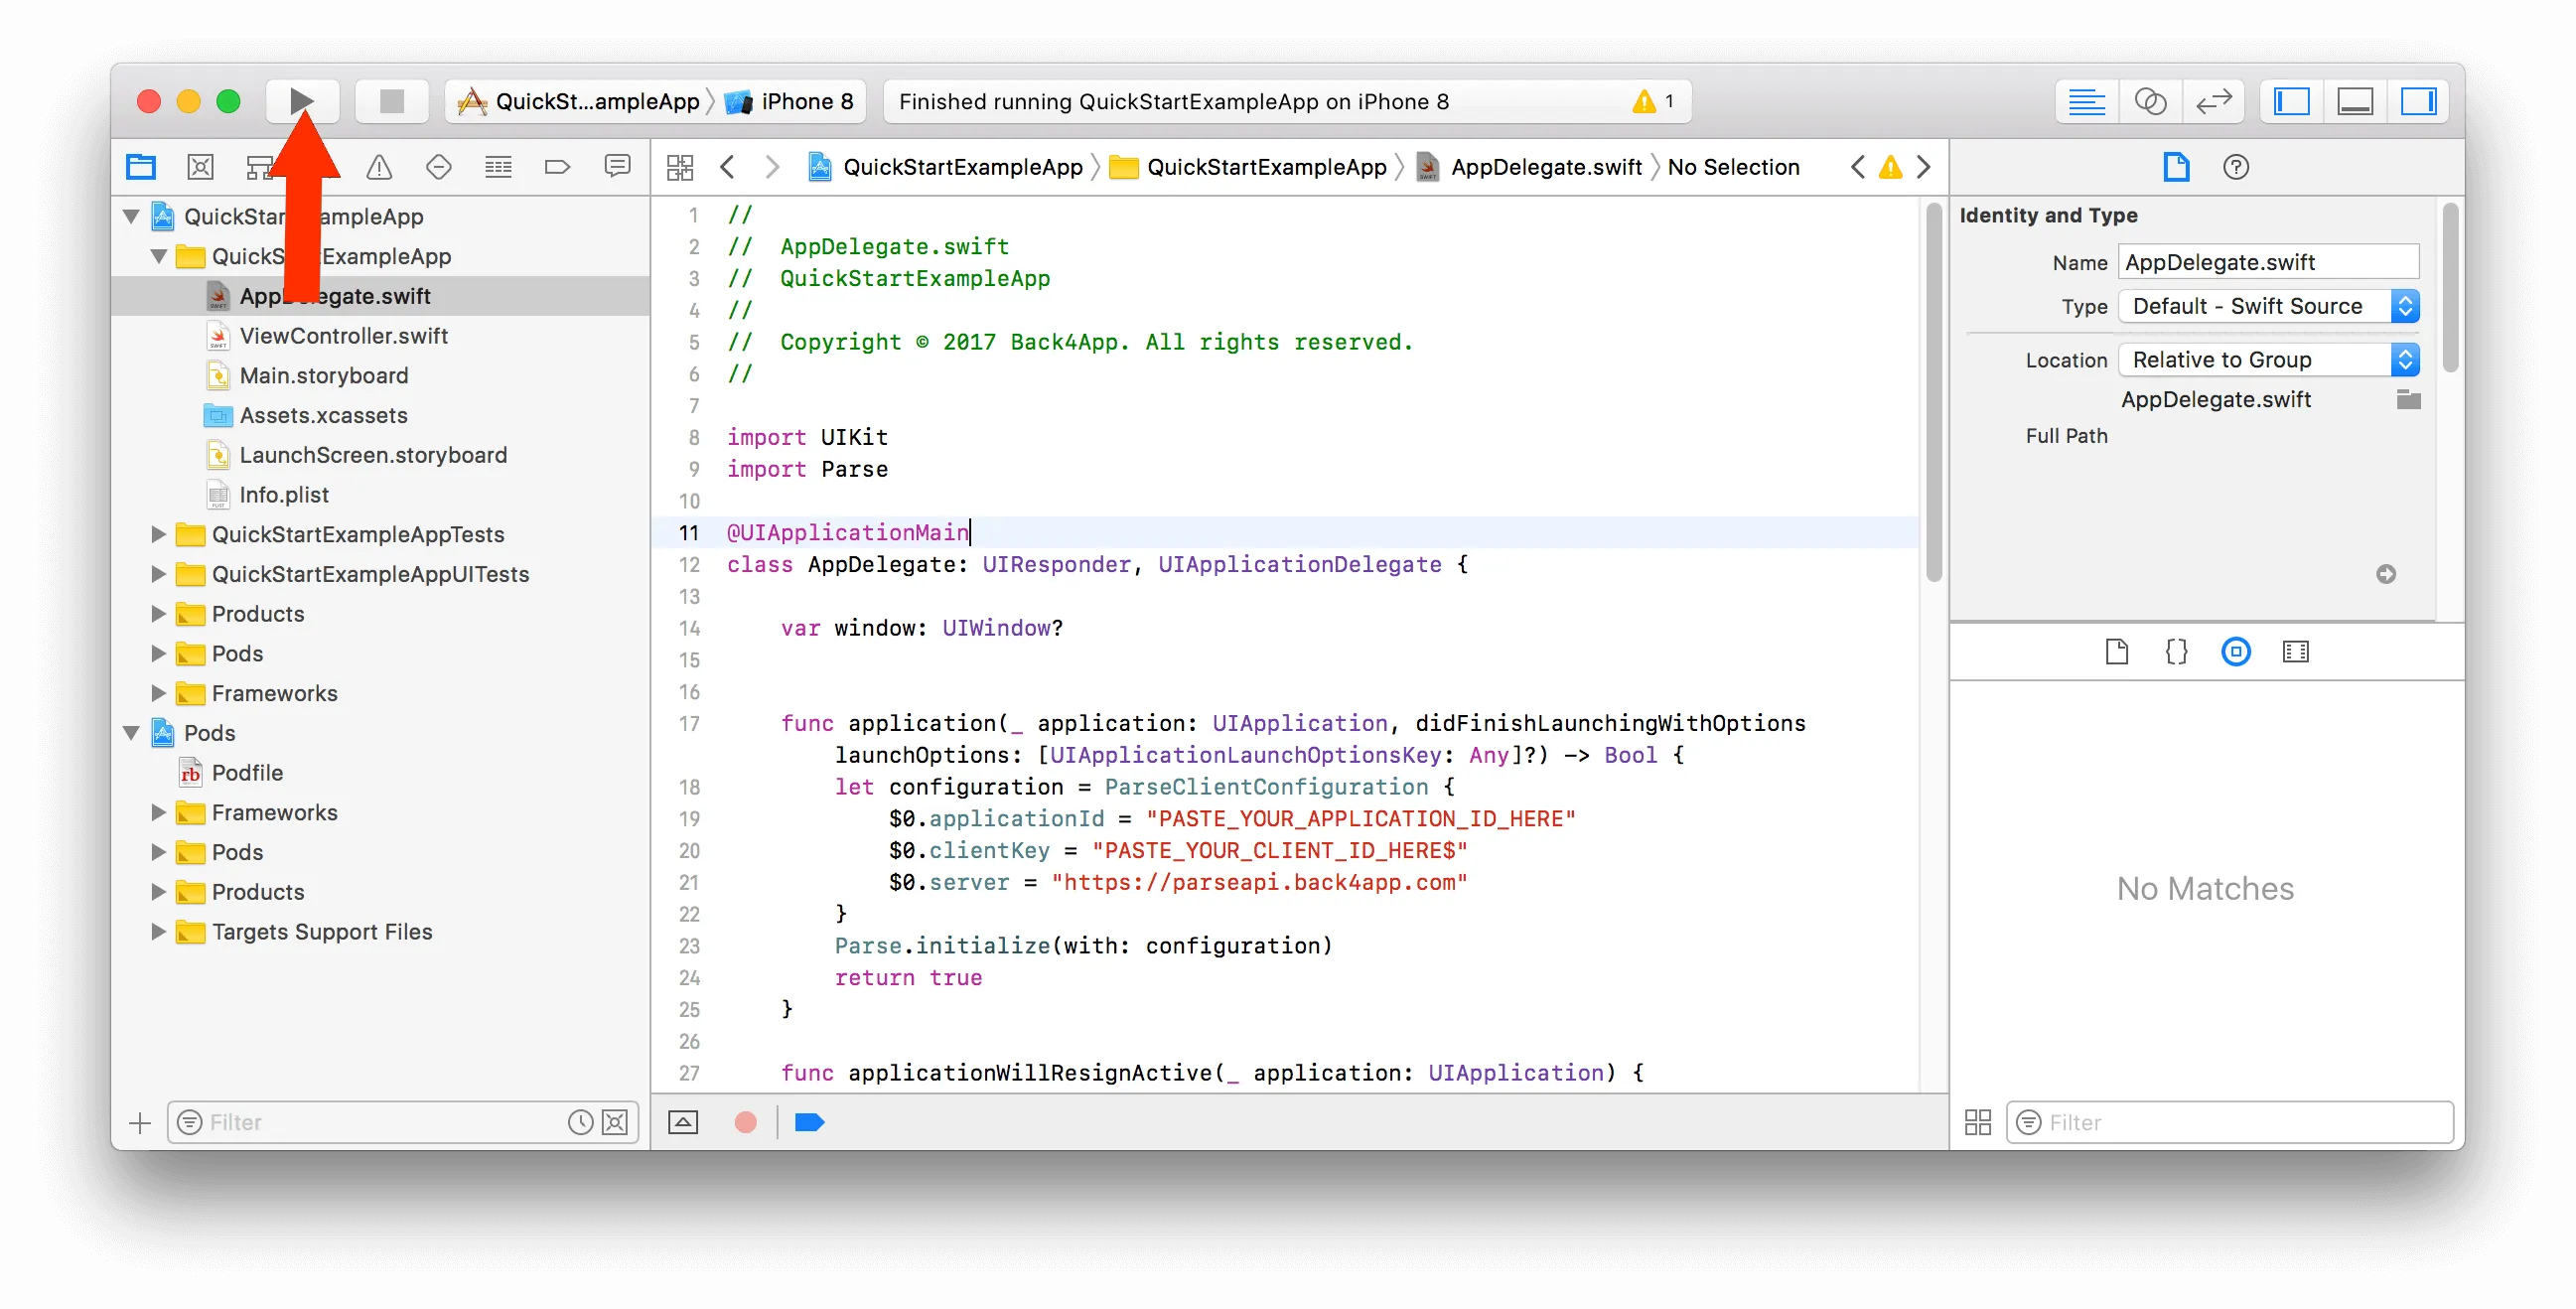
Update your App Delegate’s Parse Client Configuration values to set up the app’s credentials. Parse iOS SDK uses these settings to connect to the Back4App servers.
- Open your App Delegate file: AppDelegate.swift
- Go to your App Dashboard at Back4App website.
- Navigate to app’s settings: Click on Features>Core Settingsblock>Server
- Return to your AppDelegate.swift file and paste your applicationId and clientKey.
See more at our New Parse App guide.
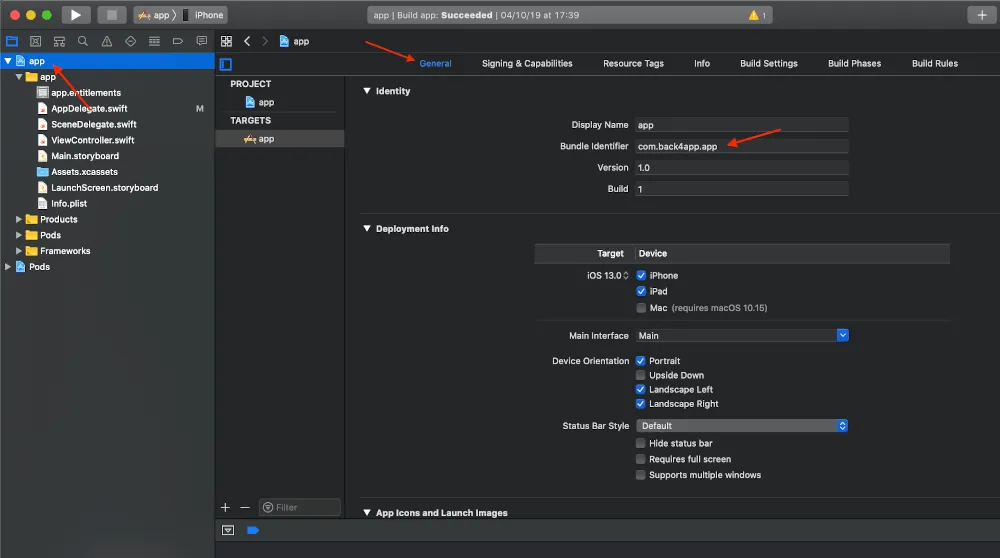
In your target, replace the Bundle Identifier by the one you created when setting up Sign In with Apple in your Apple Developer account

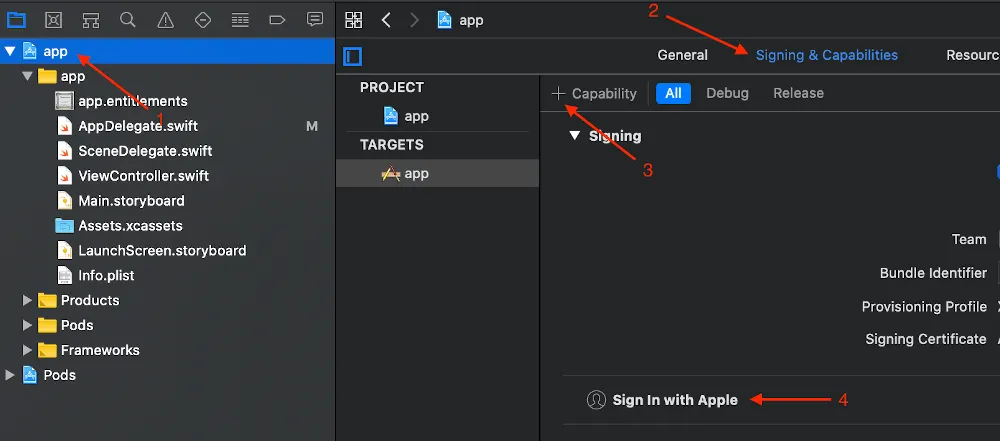
Also add the Sign In with Apple in the Capabilities of your App

- Build your app in a device or simulator (Command+R)

2. Wait until the Sign in with Apple screen appears.
3. Click the button and do the login process.
4. Find your app and click on Dashboard.
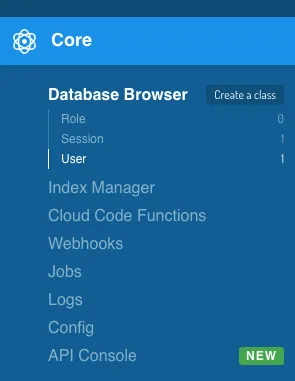
5. Click on Core.
6. Go to Browser.
If everything works properly, you should find a class named User as follows:

At this point, you have learned how to get started with iOS apps.
Learn more by walking around our iOS Tutorials or check Parse open source documentation for iOS SDK.