User Registration - login
This section explains how to do a basic user registration with email verification in a JavaScript environment through Back4app.
In this tutorial, you will use Parse.User object and will learn its most important functions.
See more about Parse SDK at Parse JavaScript SDK API Reference and Parse open source documentation for JavaScript SDK.
To complete this tutorial, you will need:
- A basic JavaScript app connected with Back4app or JSBin connected with our Parse API.
- Note: You can use the app created in our JavaScript Install Parse SDK tutorial or use the same online environment JSBin with the setup done in the JavaScript Database Operations tutorial.
The user sign-up function is similar to the create function used in the JavaScript Database Operations tutorial, but it has some additional benefits:
- Check if the username and email are unique.
- Securely hashes the password in the cloud. Not even the developer can see the user’s password.
- Requires at least a username and a password. You can use the email as a username if you want to.
You can open the Back4app JavaScript Sign Up Function to see the code that has already been implemented.
To make your own signUp function, you need to repeat the same steps of the create function explained in the Javascript CRUD tutorial but call the method user.signUp instead of the save method, as shown below:
- Be aware that Error 202 or Error 203 is likely to occur if you don’t change the username or the email.
- The Error 209 invalid season token is also likely to occur when your browser cookies conflict with your Parse’s Current Session. To bypass that, clear your browser cookies or open the incognito mode of your browser. To confirm that the new user has been added to the database, you can access your Parse Dashboard or code the login function which will be provided ahead.
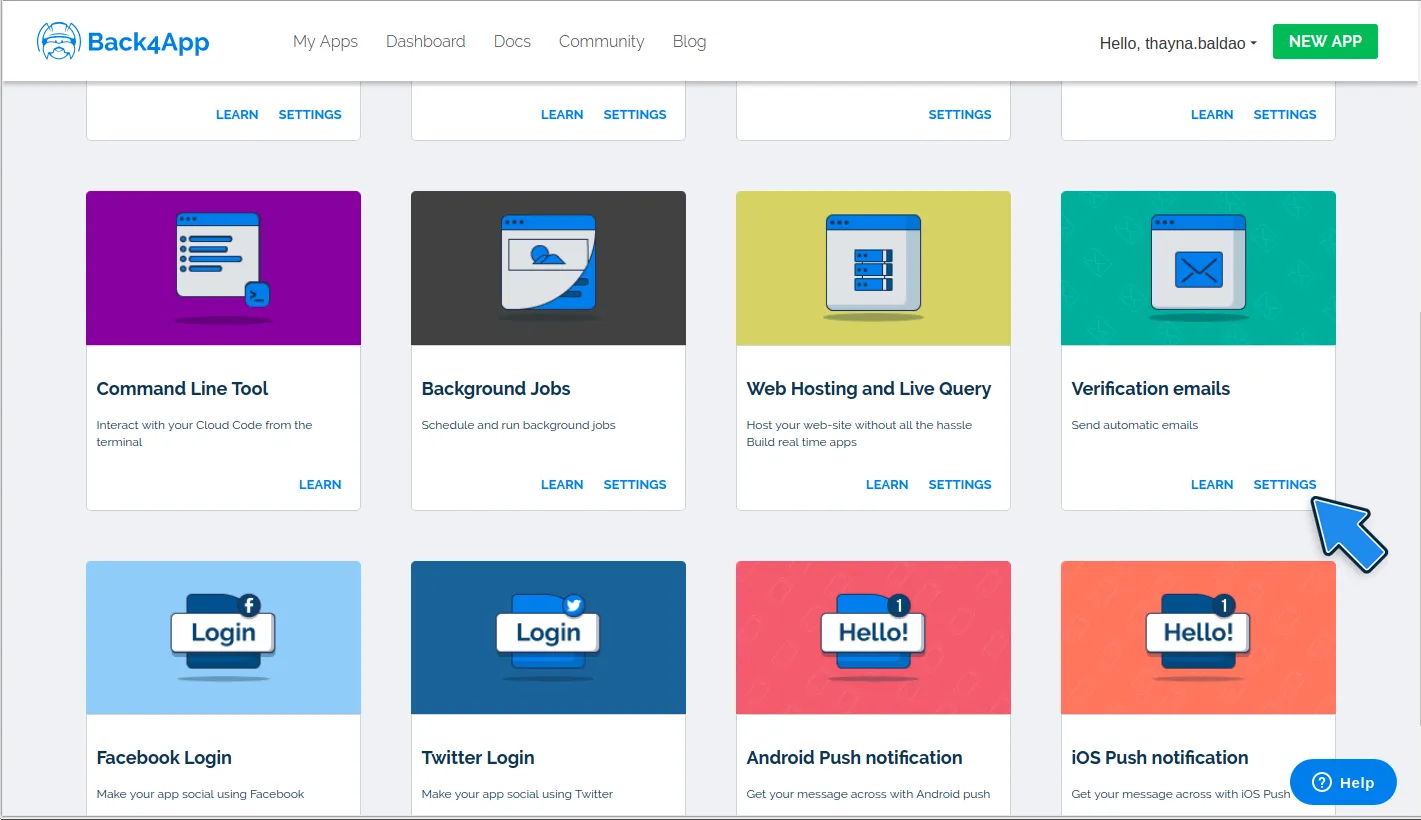
An important feature of a sign-up method is email verification. Fortunately, it is easy to configure it using Back4App. To enable email verification, login to your account, find your app, and click on Server Settings. Find the “Verification Emails” box and click on SETTINGS. Here’s how the “Verification Emails” box looks like this:

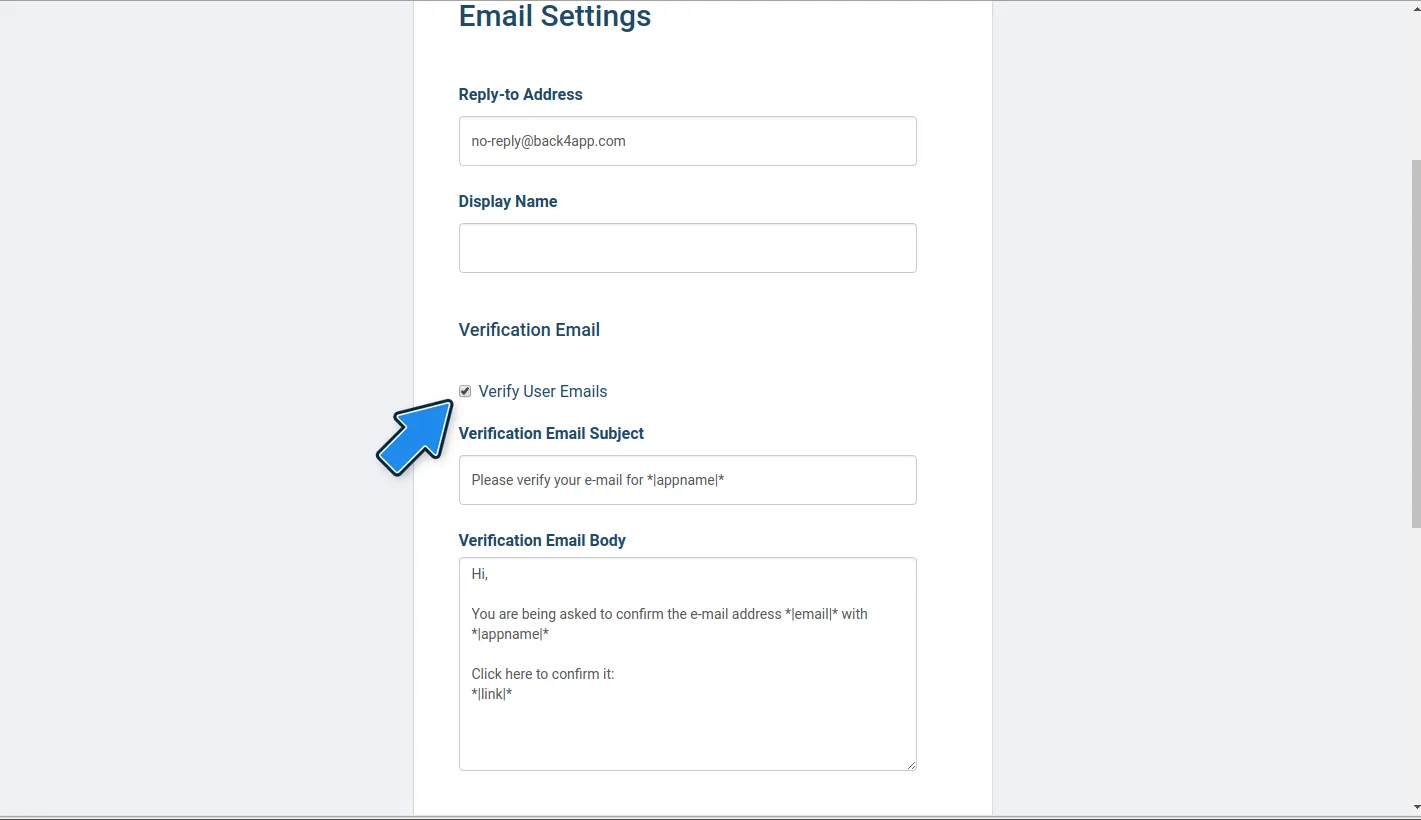
Then enable the verification by checking the box below.
If you are using the cloud environment of JSBin, then there is no need to complete this step.

By enabling this, the user’s class in your database receives one additional field: verifiedEmail. This field is set to true when the email is verified, false if the email isn’t verified, and undefined if the user was created before this setting was checked.
On that page, you can also customize the email, change the subject, the body, and the sender’s email and name.
To see how the email looks like, just create a user, using the signUp function, with an email that you can access. You should receive an email for verification.
The login function is very simple and just needs a password and a username to run.
You can open the Back4app JavaScript Login Function to see the code that has already been implemented.
You need to call the Parse.User.logIn method is as follows:
It’s very important to add the Reset Password option as users are likely to forget their password in the future. The configuration for the email that will be sent in the reset password function is on the same page as in the Email Verification step. There you can change the body and the subject of the email.
You can open the Back4app JavaScript Reset Password Function to see the code that has already been implemented.
To send the Reset Password email, just run the following code:
At this point, you have learned not only how to do User Registration with JavaScript apps, but also how to send email verification and password reset emails.