Importing CSV File
Importing CSV files allow users to import data easily into Parse tables.
To begin with this tutorial, you will need:
- An app created at Back4App.
First of all, it’s necessary to make sure that you have an existing app created at Back4App. However, if you are a new user, you can check this tutorial to learn how to create one.
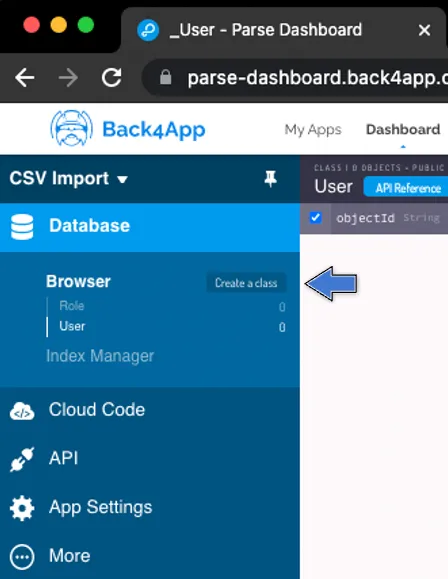
In your newly created App, go to the Database Browser and click the Create a class button

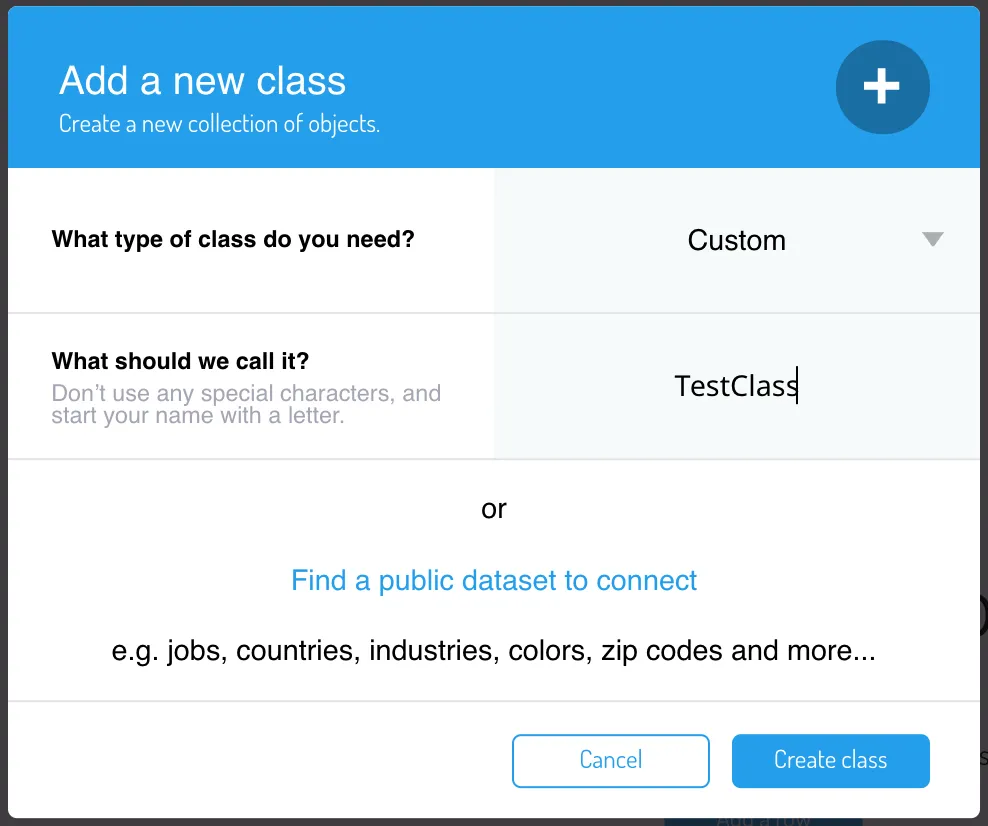
Choose to create a Custom class and give it a name. I called mine TestClass but you can call yours anything you like. Remember that by convention classes start with an Uppercase letter, are CamelCase and does not contain special characters such as spaces and symbols. Click Create class when you’re done.

The CSV file must be in the correct format in order to be imported.
Correct format parameters:
Separation character must be a comma , and NOT a semicolon ;.
Adjust your Spreadsheet software to output commas as separation characters
First line will be the Column Names
Parse will automatically convert Strings, Numbers and Booleans
Dates must have two columns: date.__typespecifies the Date type, date.isospecifies the Date Format
GeoPoints must have three columns: columnName.__typespecifies the Geopoint type, columnName.latitudespecifies the Latitude, columnName.longitudespecifies the Longitude.
Arrays are passed in double quotes
Pointers require three columns: columnName.__typespecifies the Pointer type, columnName.classNamespecifies the target class, columnName.objectIdspecifies the objectId of the target class
So, for your reference, a few examples:
Three columns: columnStringA will hold strings, columnStringB will also hold strings, columnNumberC will hold numbers
columnStringA,columnStringB,columnNumberC stringA,StringB,12 stringA2,StringB2,13
Two columns: columnStringA will hold strings, columnBooleanB will hold Booleans
columnStringA,columnBooleanB stringA,TRUE stringA2,FALSE
Two columns: columnStringA and columnStringB will hold strings, columnArrayC will hold arrays
columnStringA,colmnStringB,columnArrayC "stringA, with, commas",stringB,"[1,2,3]" stringA2,"stringB, with, commas","["A", "B", "C"]"
Two columns: columnStringA will hold strings, second column will hold a date in the ISO format
columnStringA,date.__type,date.iso stringA,Date,2020-01-16 stringA2,Date,2020-01-17
Two columns: columnStringA will hold strings, second column will hold a GeoPoint
columnStringA,geo.__type,geo.latitude,geo.longitude stringA,GeoPoint,1,2 stringA2,GeoPoint,-5,-6
You can find a sample CSV file for download here:
For Pointers, please check the example below:
One column: holding a Pointer
team.__type,team.className,team.objectId Pointer,Team,XWDSM4xxQ8 Pointer,Team,CD9nAlDaEG Pointer,Team,kRGJPuZyXD

In this example, please consider that objectId correspond to the existing ones at the Team class.
Check the sample CSV file for download:
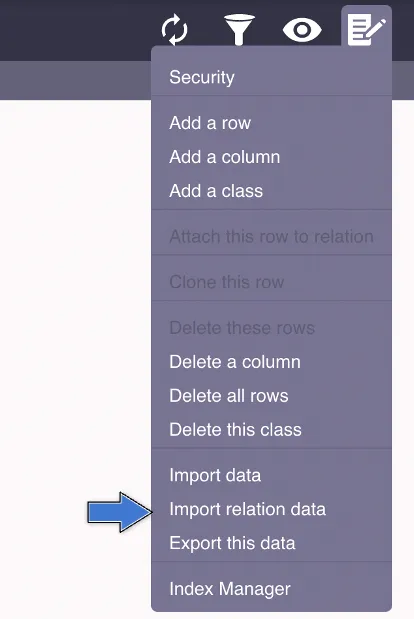
With your newly created class selected in the Database Browser, on the top right corner of the screen, click the Notes button and select Import data

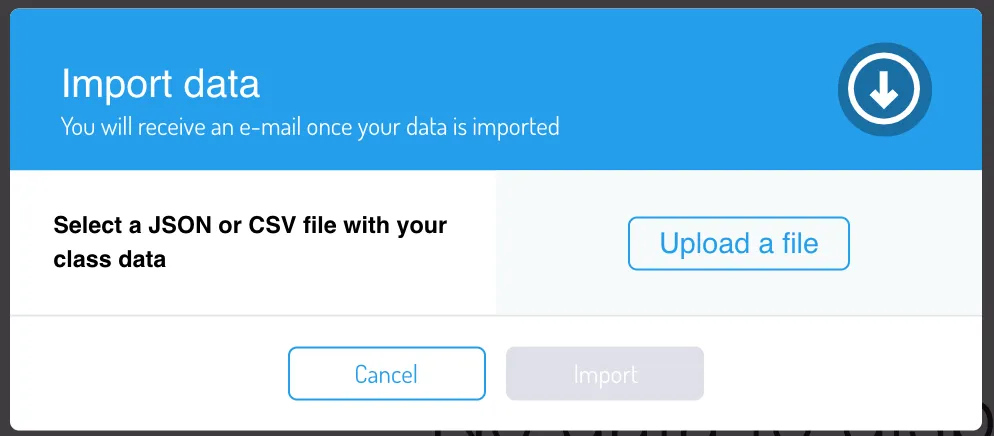
Click the Upload a file button, choose your CSV file and click the Import button

As CSV files can get quite big, an asynchronous operation is fired to import your data in background, which means you will not see any progress of importing nor success message. At the end of the operation you will receive an email message either telling the operation was successful and your data was imported, or telling the operation wasn’t successful and explaining which columns/lines failed.
If you try to refresh your dashboard before receiving this email, you might see missing data or even no data at all, as the operation is still ongoing.
Once you get the email and if your import was successful, we recommend hard refreshing your browser (CMD + Shift + R on a Mac, CTRL + Shift + R in Windows, both for Chrome) to ensure the new schemas are retrieved and your data displays properly.