How to Build a Backend for Ruby?
In this tutorial, you’ll discover how to build a backend for Ruby using Back4App.
We will walk through essential Back4App features like database management, Cloud Code Functions, REST and GraphQL APIs, user authentication, and real-time queries (Live Queries).
By leveraging the Ruby programming language and Back4App, you gain a secure, scalable, and robust backend that easily integrates with your software development ecosystem.
This approach saves time and effort by using an open source web platform built on Parse. You will see how to accelerate development projects with rapid development principles.
Along the way, you’ll learn to use advanced security features, schedule tasks with Cloud Jobs, and set up webhooks for external integrations.
By the end, you’ll be ready to craft a web application framework structure and expand it for production applications.
You’ll be able to:
- Integrate Ruby with Back4App for data models, object oriented logic, and real-time data.
- Take advantage of the development process best practices for application development in a model view controller (MVC) style or any other architecture you prefer.
- Enhance your role as a backend developer by handling secure user authentication, Cloud Code triggers, and more.
- Further refine your web applications to meet real-world needs using the flexible features of Back4App.
- A Back4app account and a new Back4app project Getting Started with Back4app. Sign up for free if you do not have an account.
- A local Ruby environment You should have Ruby installed. Typically, Ruby 2.6 or above is recommended.
- Familiarity with the Ruby programming language Basic knowledge of Ruby syntax, object oriented concepts, and common programming languages usage.
- Bundler (optional but recommended) Bundler helps manage gems for your web application framework or development projects. Bundler Official Docs.
Make sure you have all these prerequisites in place before starting. Having your Back4App project created and your Ruby environment ready will provide a smooth tutorial experience.
- Why This Step Matters A new Back4App project is the foundation for your application development. It hosts your database, manages user authentication, and provides the environment for running Cloud Code.
- Create a New Project
- Log in to Back4App.
- Click New App in your Back4App dashboard.
- Give your app a name (e.g., “Ruby-Backend-Tutorial”).
- Install Parse SDK and Connect to Back4App The Parse SDK for Ruby helps you interact with Back4App’s backend. You can install it via gem:
In Back4App, a class is like a database table. For instance, you can make a “Todo” class for storing tasks. You can create classes on-the-fly from Ruby or define them in the dashboard for fine-grained control.
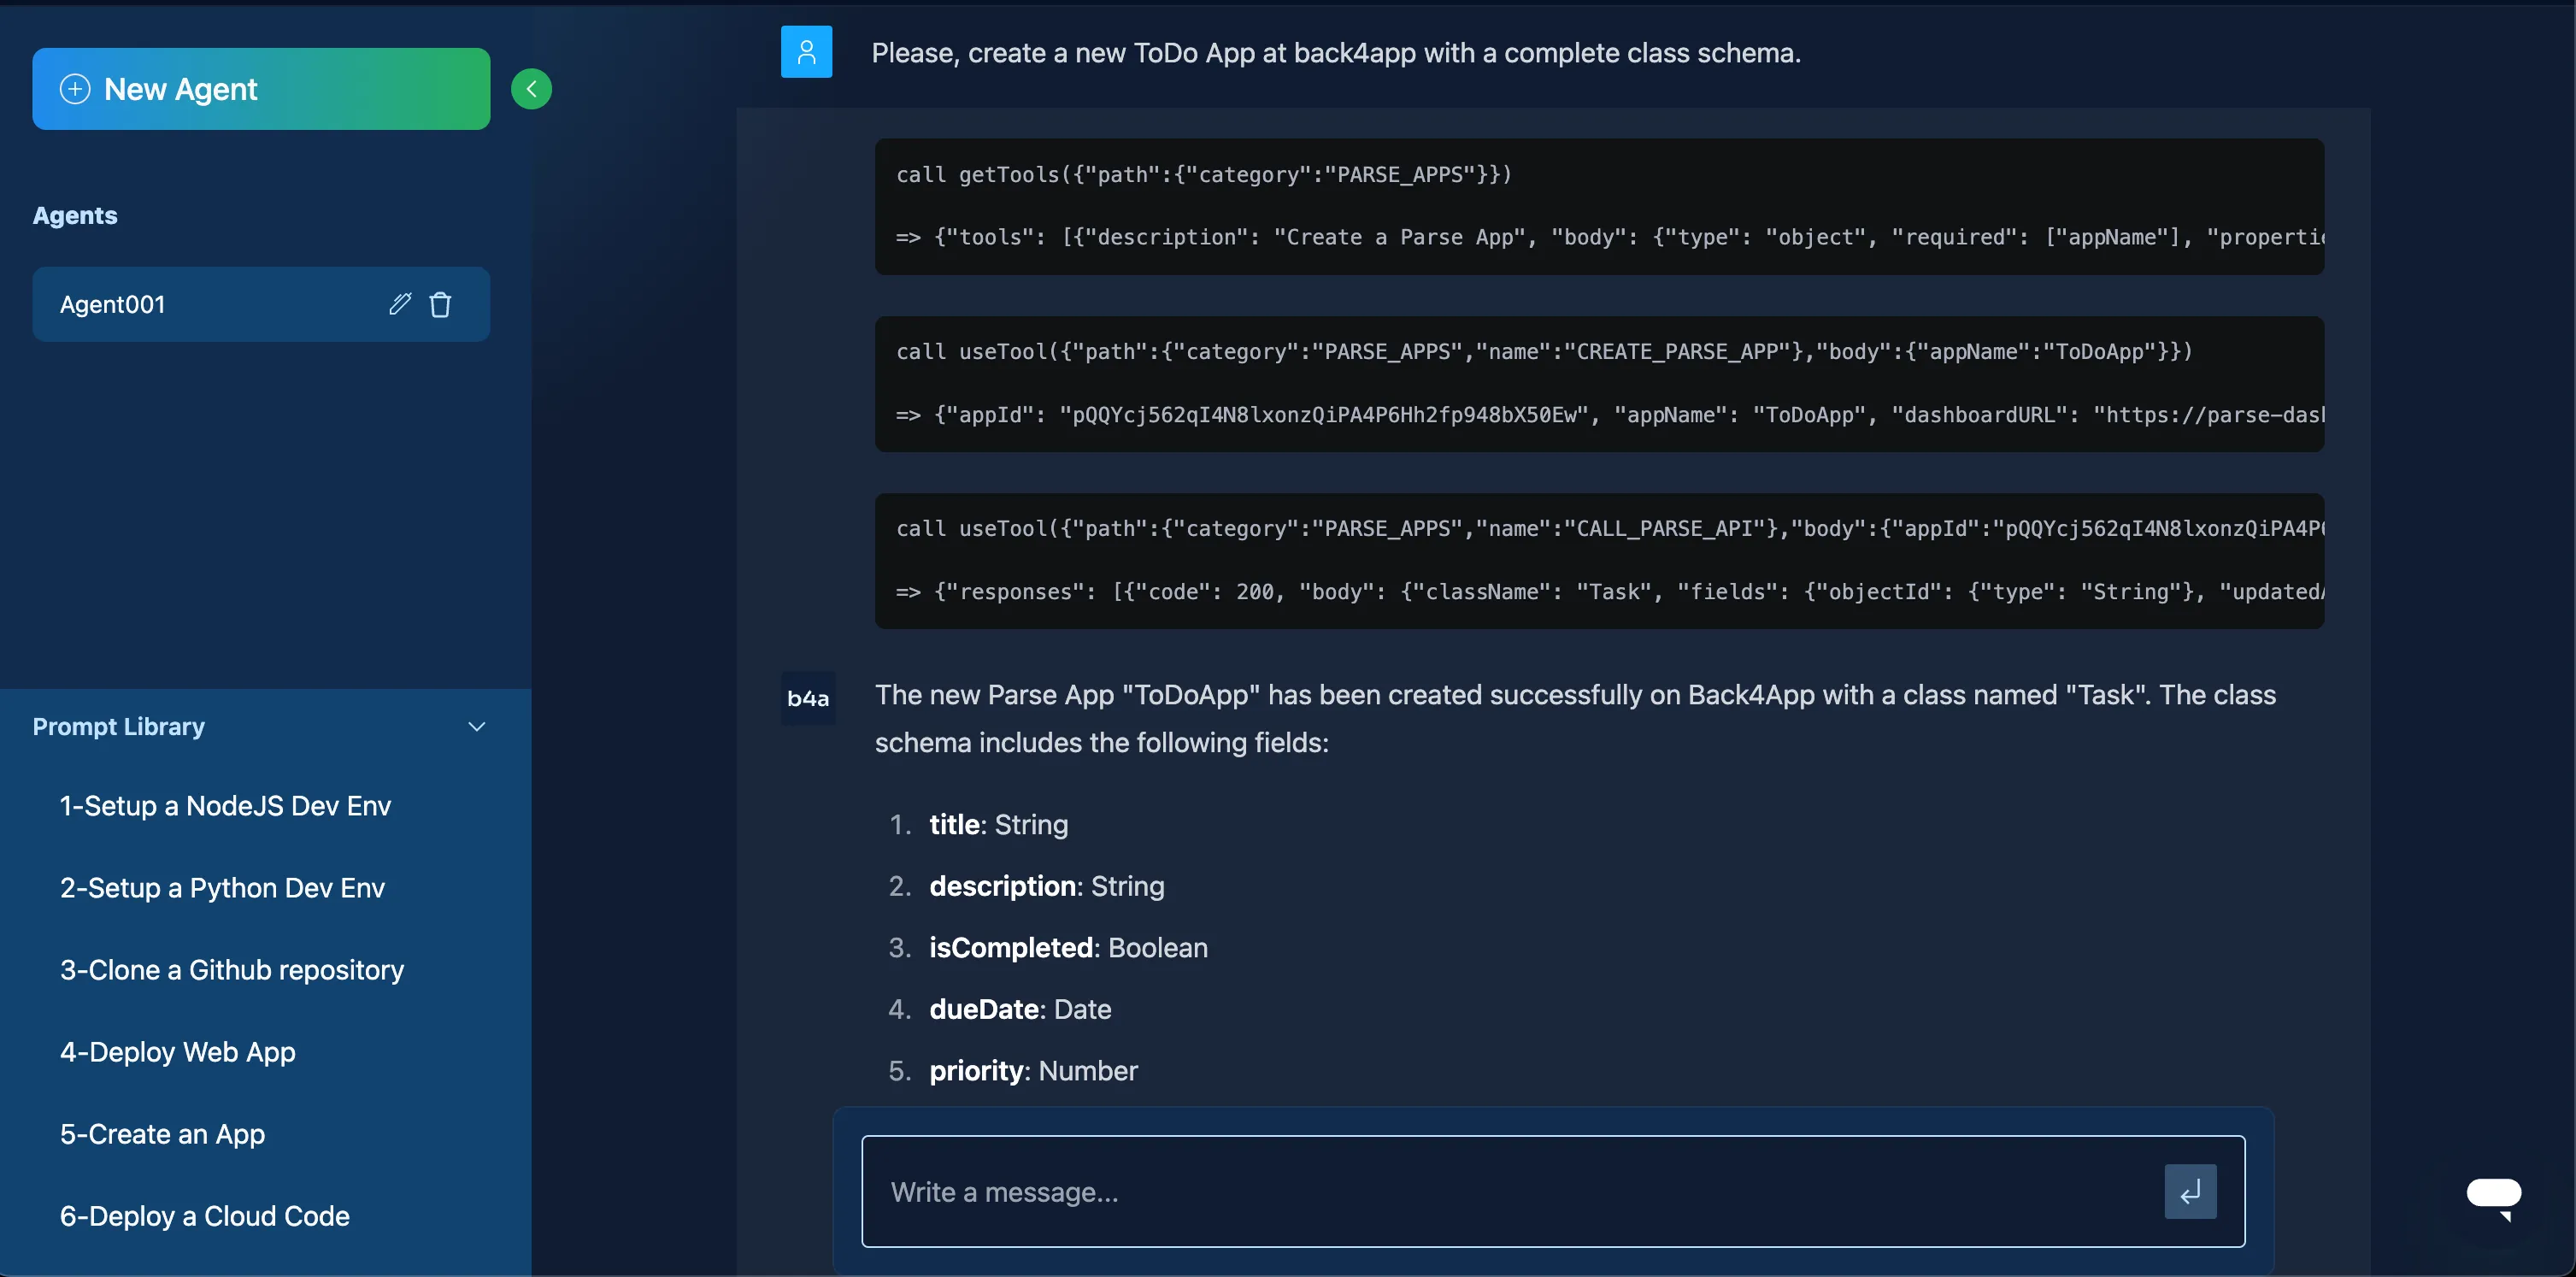
- Open the AI Agent in your App Dashboard.
- Describe your data model in plain language (e.g., “A Todo app with title, isCompleted fields”).
- Let the AI Agent create your schema automatically.

Below is a simple example of creating a new record in a “Todo” class using the Ruby SDK:
You can also create and retrieve records using the REST interface:
Back4App offers a GraphQL endpoint for advanced web applications:
Enable Live Queries in the Back4App dashboard (Server Settings) and subscribe from your Ruby script if your environment supports WebSocket connections. You can also use them for real-time updates in a web application framework that supports concurrency.
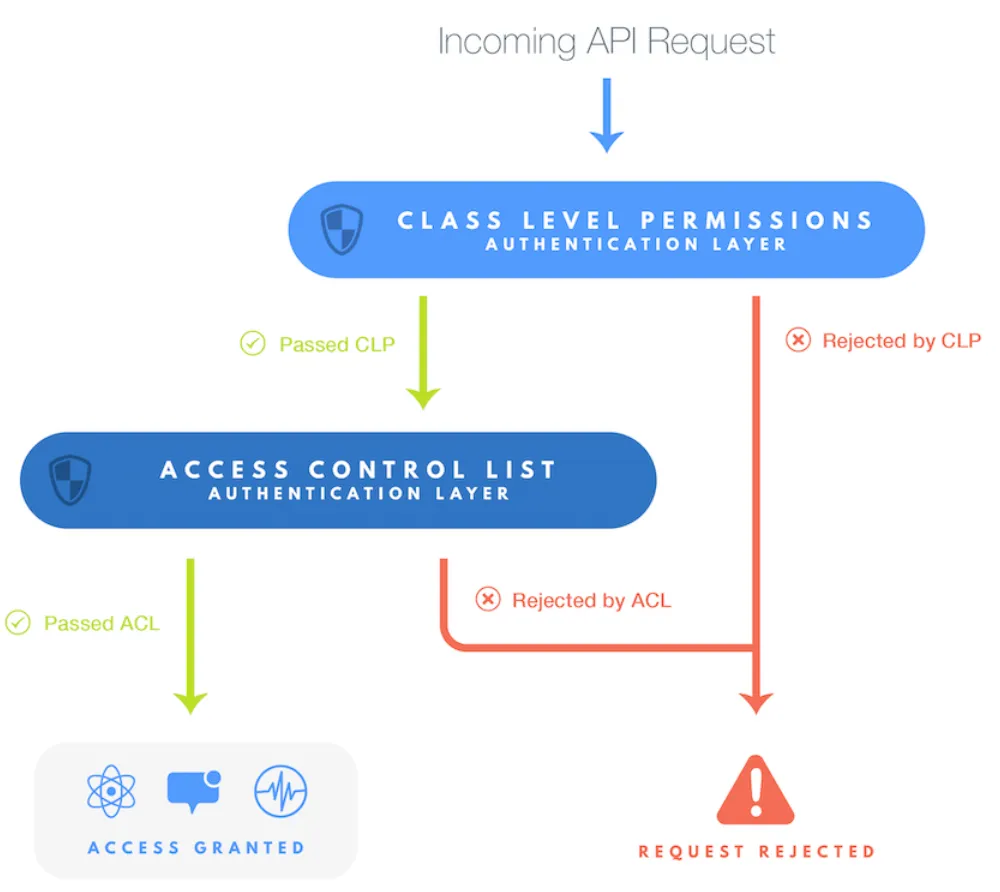
ACLs (Access Control Lists) and CLPs (Class-Level Permissions) protect your data in object oriented ways. ACLs let you decide who can read or write each record. CLPs let you manage permissions for an entire class.

Go to the Database section of your app and select your class, like “Todo.” Configure your class’s CLPs under “Security” or “Class-Level Permissions.” To set ACLs on a record:
This ensures only the owner can read/write that particular Todo.
Cloud Code helps embed business logic and validations right into the server. It’s ideal for ensuring data integrity and performing tasks not exposed to clients.
In your project’s main.js (or similar) on Back4App, you can define a Cloud Function:
Note: Although our main application uses Ruby, Cloud Code in Parse is JavaScript-based. This is how you embed server-side logic on Back4App.
- Back4App CLI:
- Back4App Dashboard: Copy/paste your function into Cloud Code > Functions and click Deploy.
You can install npm modules (e.g., axios) for your Cloud Code environment. For example:
In your main.js, require it and make external API calls as needed.
Enable user authentication in your app’s App Settings. Back4App uses Parse.User for user management.
To integrate social logins (Facebook, Google, Apple), consult the Social Login Docs. Implementation details vary for each provider.
Back4App manages file uploads via the Parse::File object. In Ruby:
Users can upload images, documents, or other files. Retrieve the URL to display it in your frontend or other services.
Configure your app to restrict file uploads to authenticated users if necessary.
Email verification ensures valid email addresses for new accounts. Password reset allows your users to recover their accounts securely.
- Enable Email Verification.
- Set up custom templates for verification and password reset.
From Ruby, you can request a password reset:
This sends a password reset link to the user’s email.
Cloud Jobs run periodic tasks like cleaning up old data or sending summary emails.
Schedule it under App Settings > Server Settings > Background Jobs in your Back4App dashboard.
Webhooks let you send HTTP requests to external services whenever certain events occur in Back4App. This is great for linking to third-party services or triggering tasks in other programming languages.
Go to your app’s Back4App dashboard > More > WebHooks, and add a new Webhook with the URL of your external service.
Send data to Stripe or Slack whenever a new “Todo” is created. Alternatively, you can define triggers in Cloud Code and make HTTP requests within those triggers.
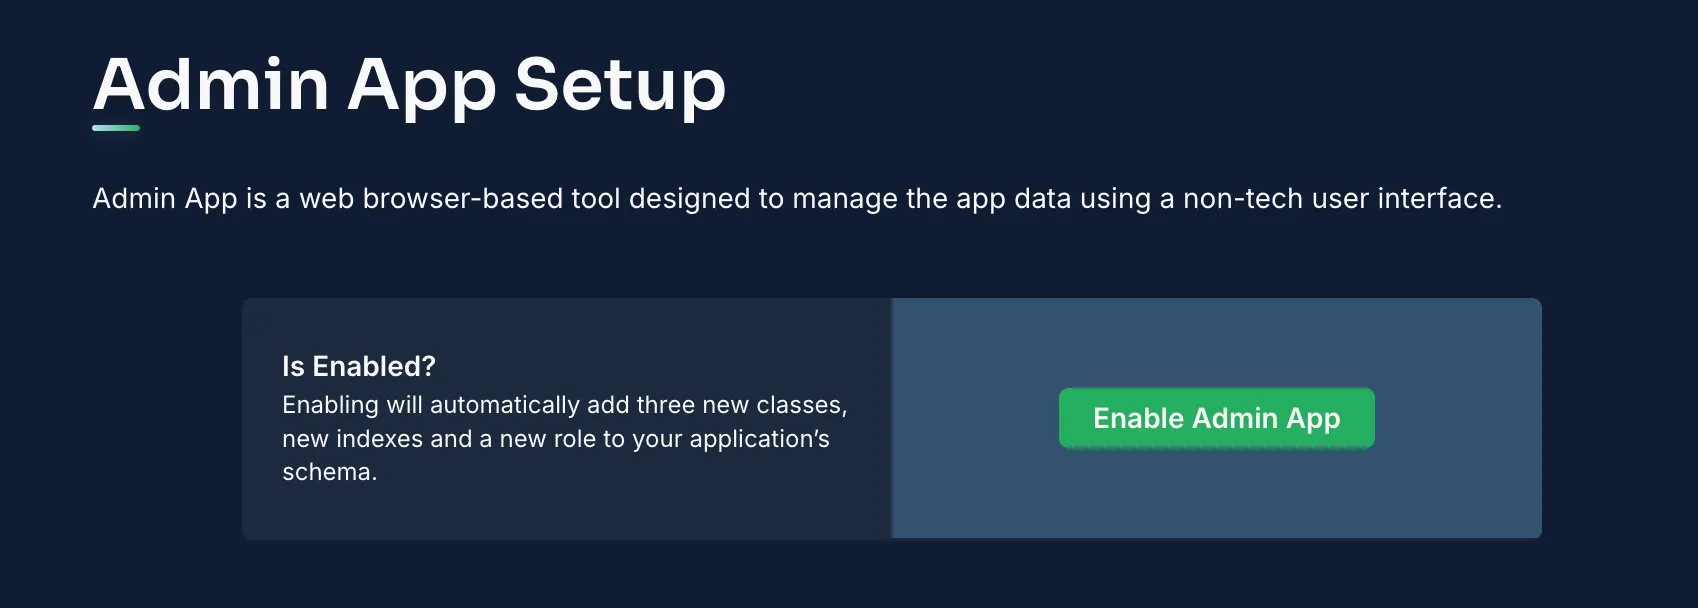
In your app dashboard, click More > Admin App, then enable it.
- Graphical interface for data management without code.
- Tools for analyzing logs, scheduling background jobs, and more.
- Role-based access control, allowing you to provide non-technical users with a safe way to manage content.

You have built a secure and scalable backend for your Ruby app on Back4App, using the ruby programming language to connect with the Parse API. Your development process now includes:
- A database with advanced security features (ACLs, CLPs).
- Real-time data updates via Live Queries.
- Cloud Code triggers for custom business logic.
- User authentication and file handling.
- Scheduled tasks with Cloud Jobs and Webhooks for external services.
- A user-friendly Admin Panel for data management.
With this foundation, you can extend your web applications or other programming languages projects to meet real-world requirements.
Whether you’re an experienced backend developer or just starting with Ruby, Back4App provides an object oriented and easy-to-use platform for rapid development.
Feel free to integrate additional APIs or features, and explore further customizations to align with model view controller (MVC) patterns or other architectural styles.
- Refine your production environment by adding advanced caching, roles-based access, or performance optimizations.
- Add more complex relationships among data classes to power real-world use cases.
- Explore official Back4App Documentation for security, performance insights, and analytics.
- Experiment with other open source web frameworks to expand your application’s features.
Enjoy building more robust and feature-rich web applications with Ruby and Back4App!
